
Integrate Cloud Voice with Zoho CRM via PhoneBridge
Zoho’s PhoneBridge platform lets you connect Cloud Voice to Zoho’s CRM (Customer Relationship Management) product straight from the CRM’s Telephony marketplace, without registering your own API (Application Programming Interface) credentials. This page covers the full setup: installing the connector app in Zoho, authorizing it from your Cloud Voice system, and mapping CRM users to extensions so calls flow between the two products.
Requirements
Section titled “Requirements”Before you start, confirm that both sides meet the following.
Cloud Voice
- Plan: Enterprise Plan (EP) or Ultimate Plan (UP).
- Firmware: version 84.18.0.102 or later.
Zoho CRM
- A Standard, Professional, Enterprise, or Ultimate CRM edition, or CRM Plus.
Before you begin
Section titled “Before you begin”-
Sign in with a Zoho account that has administrator privileges.
-
Verify that your Zoho account is hosted in one of the supported data centers:
- US:
https://accounts.zoho.com/ - Europe:
https://accounts.zoho.eu/ - India:
https://accounts.zoho.in/ - Australia:
https://accounts.zoho.com.au/ - China:
https://accounts.zoho.com.cn
- US:
Step 1. Install the Cloud Voice app from the Zoho Telephony marketplace
Section titled “Step 1. Install the Cloud Voice app from the Zoho Telephony marketplace”-
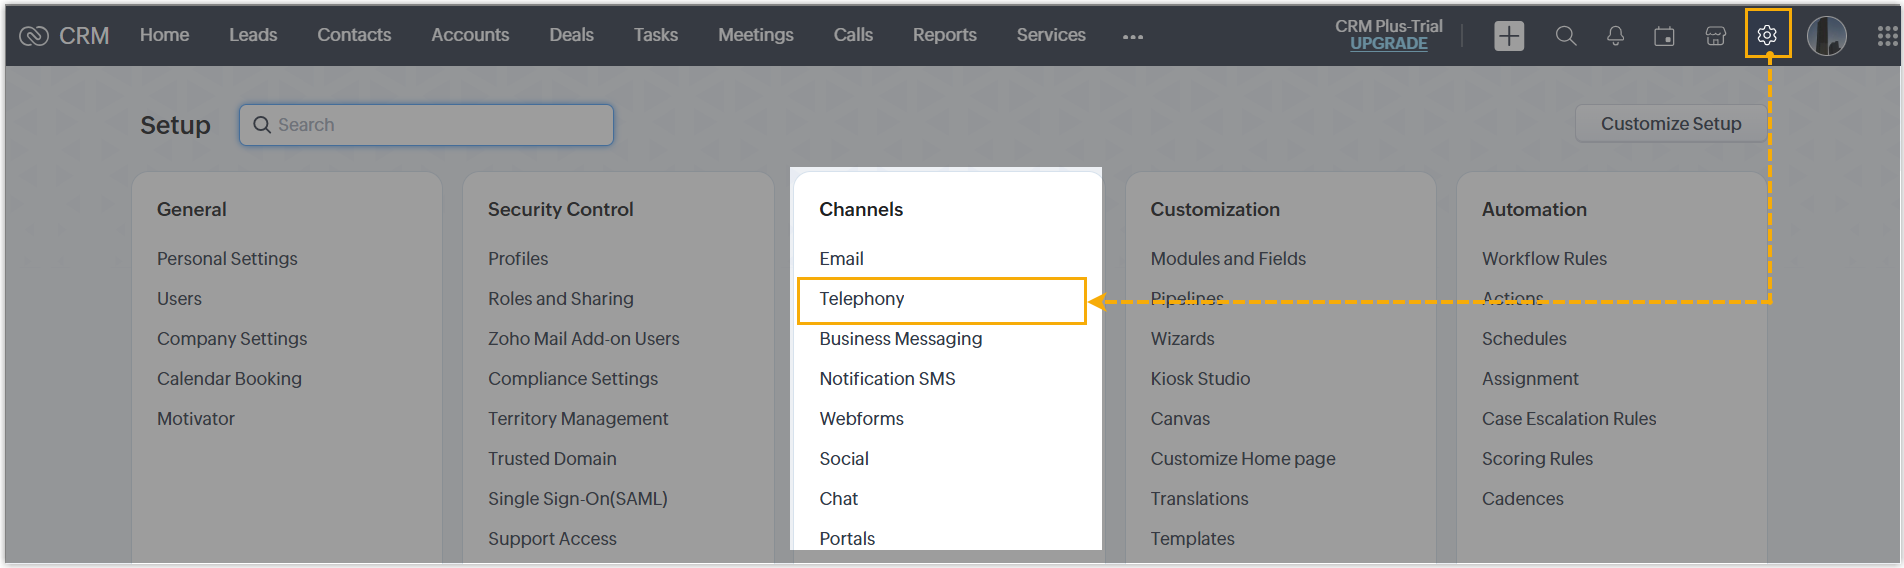
Sign in to Zoho as an administrator and go to Setup > Channels > Telephony.
-
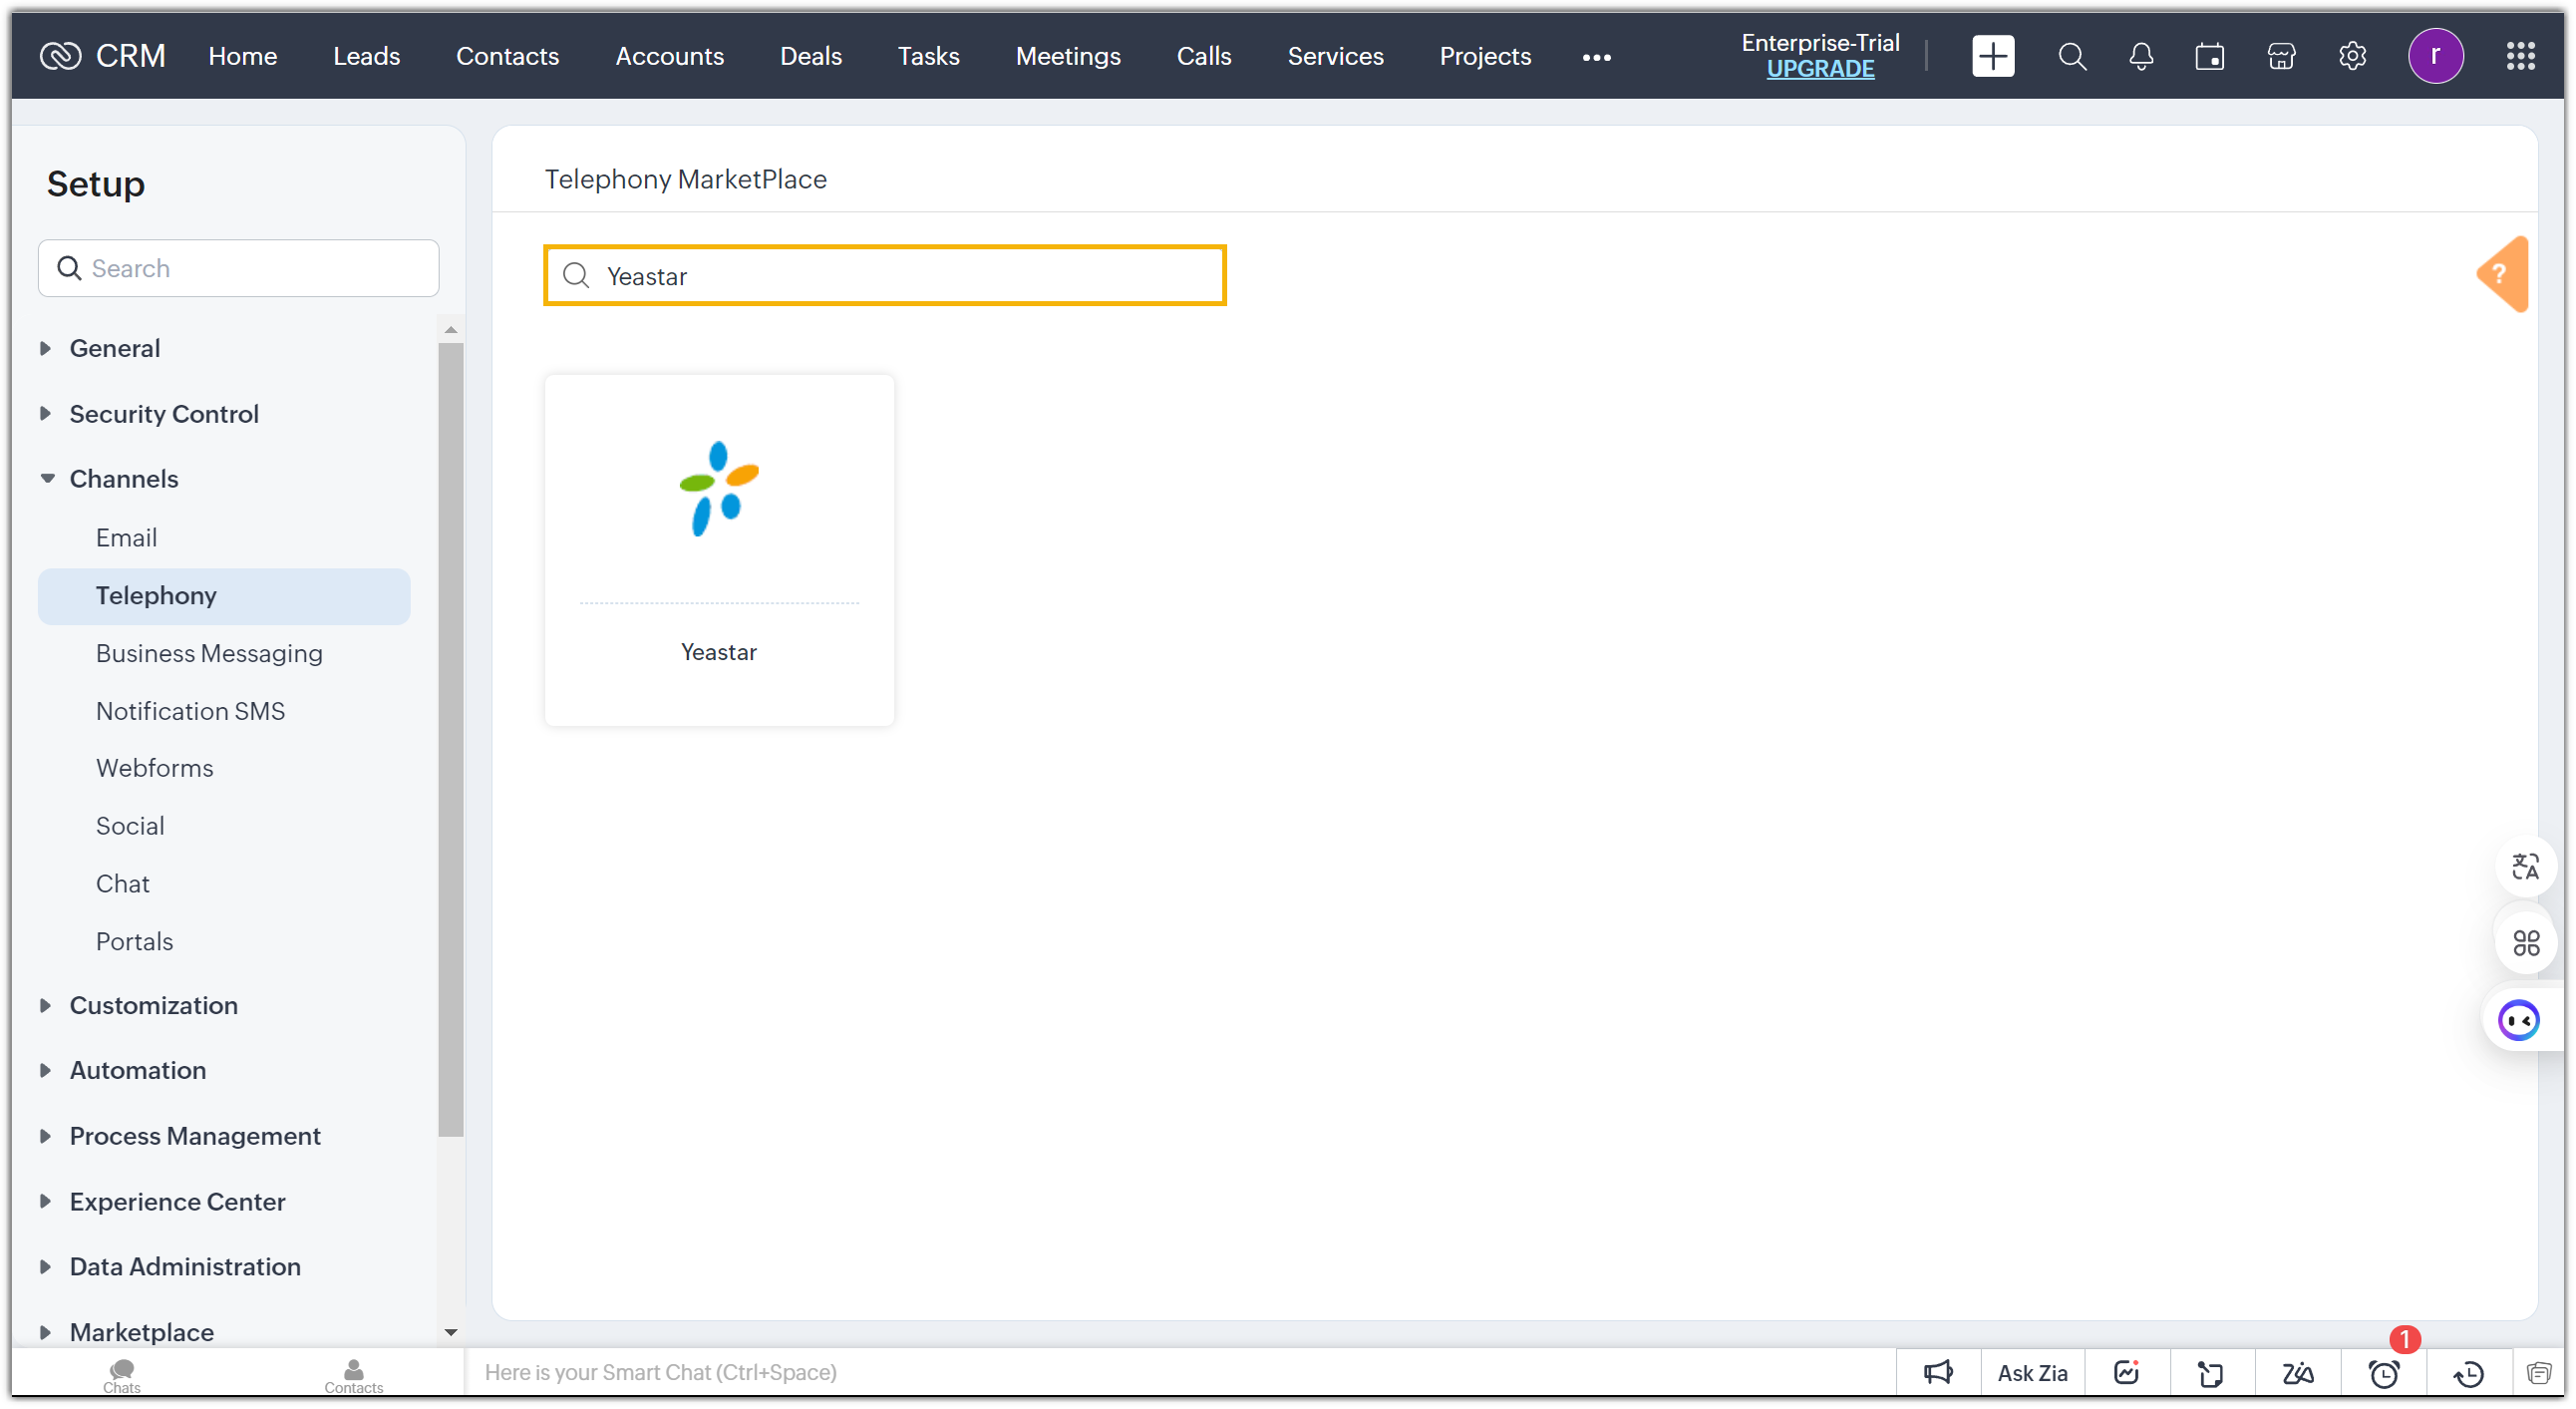
On the Telephony Marketplace page, search for Cloud Voice.
-
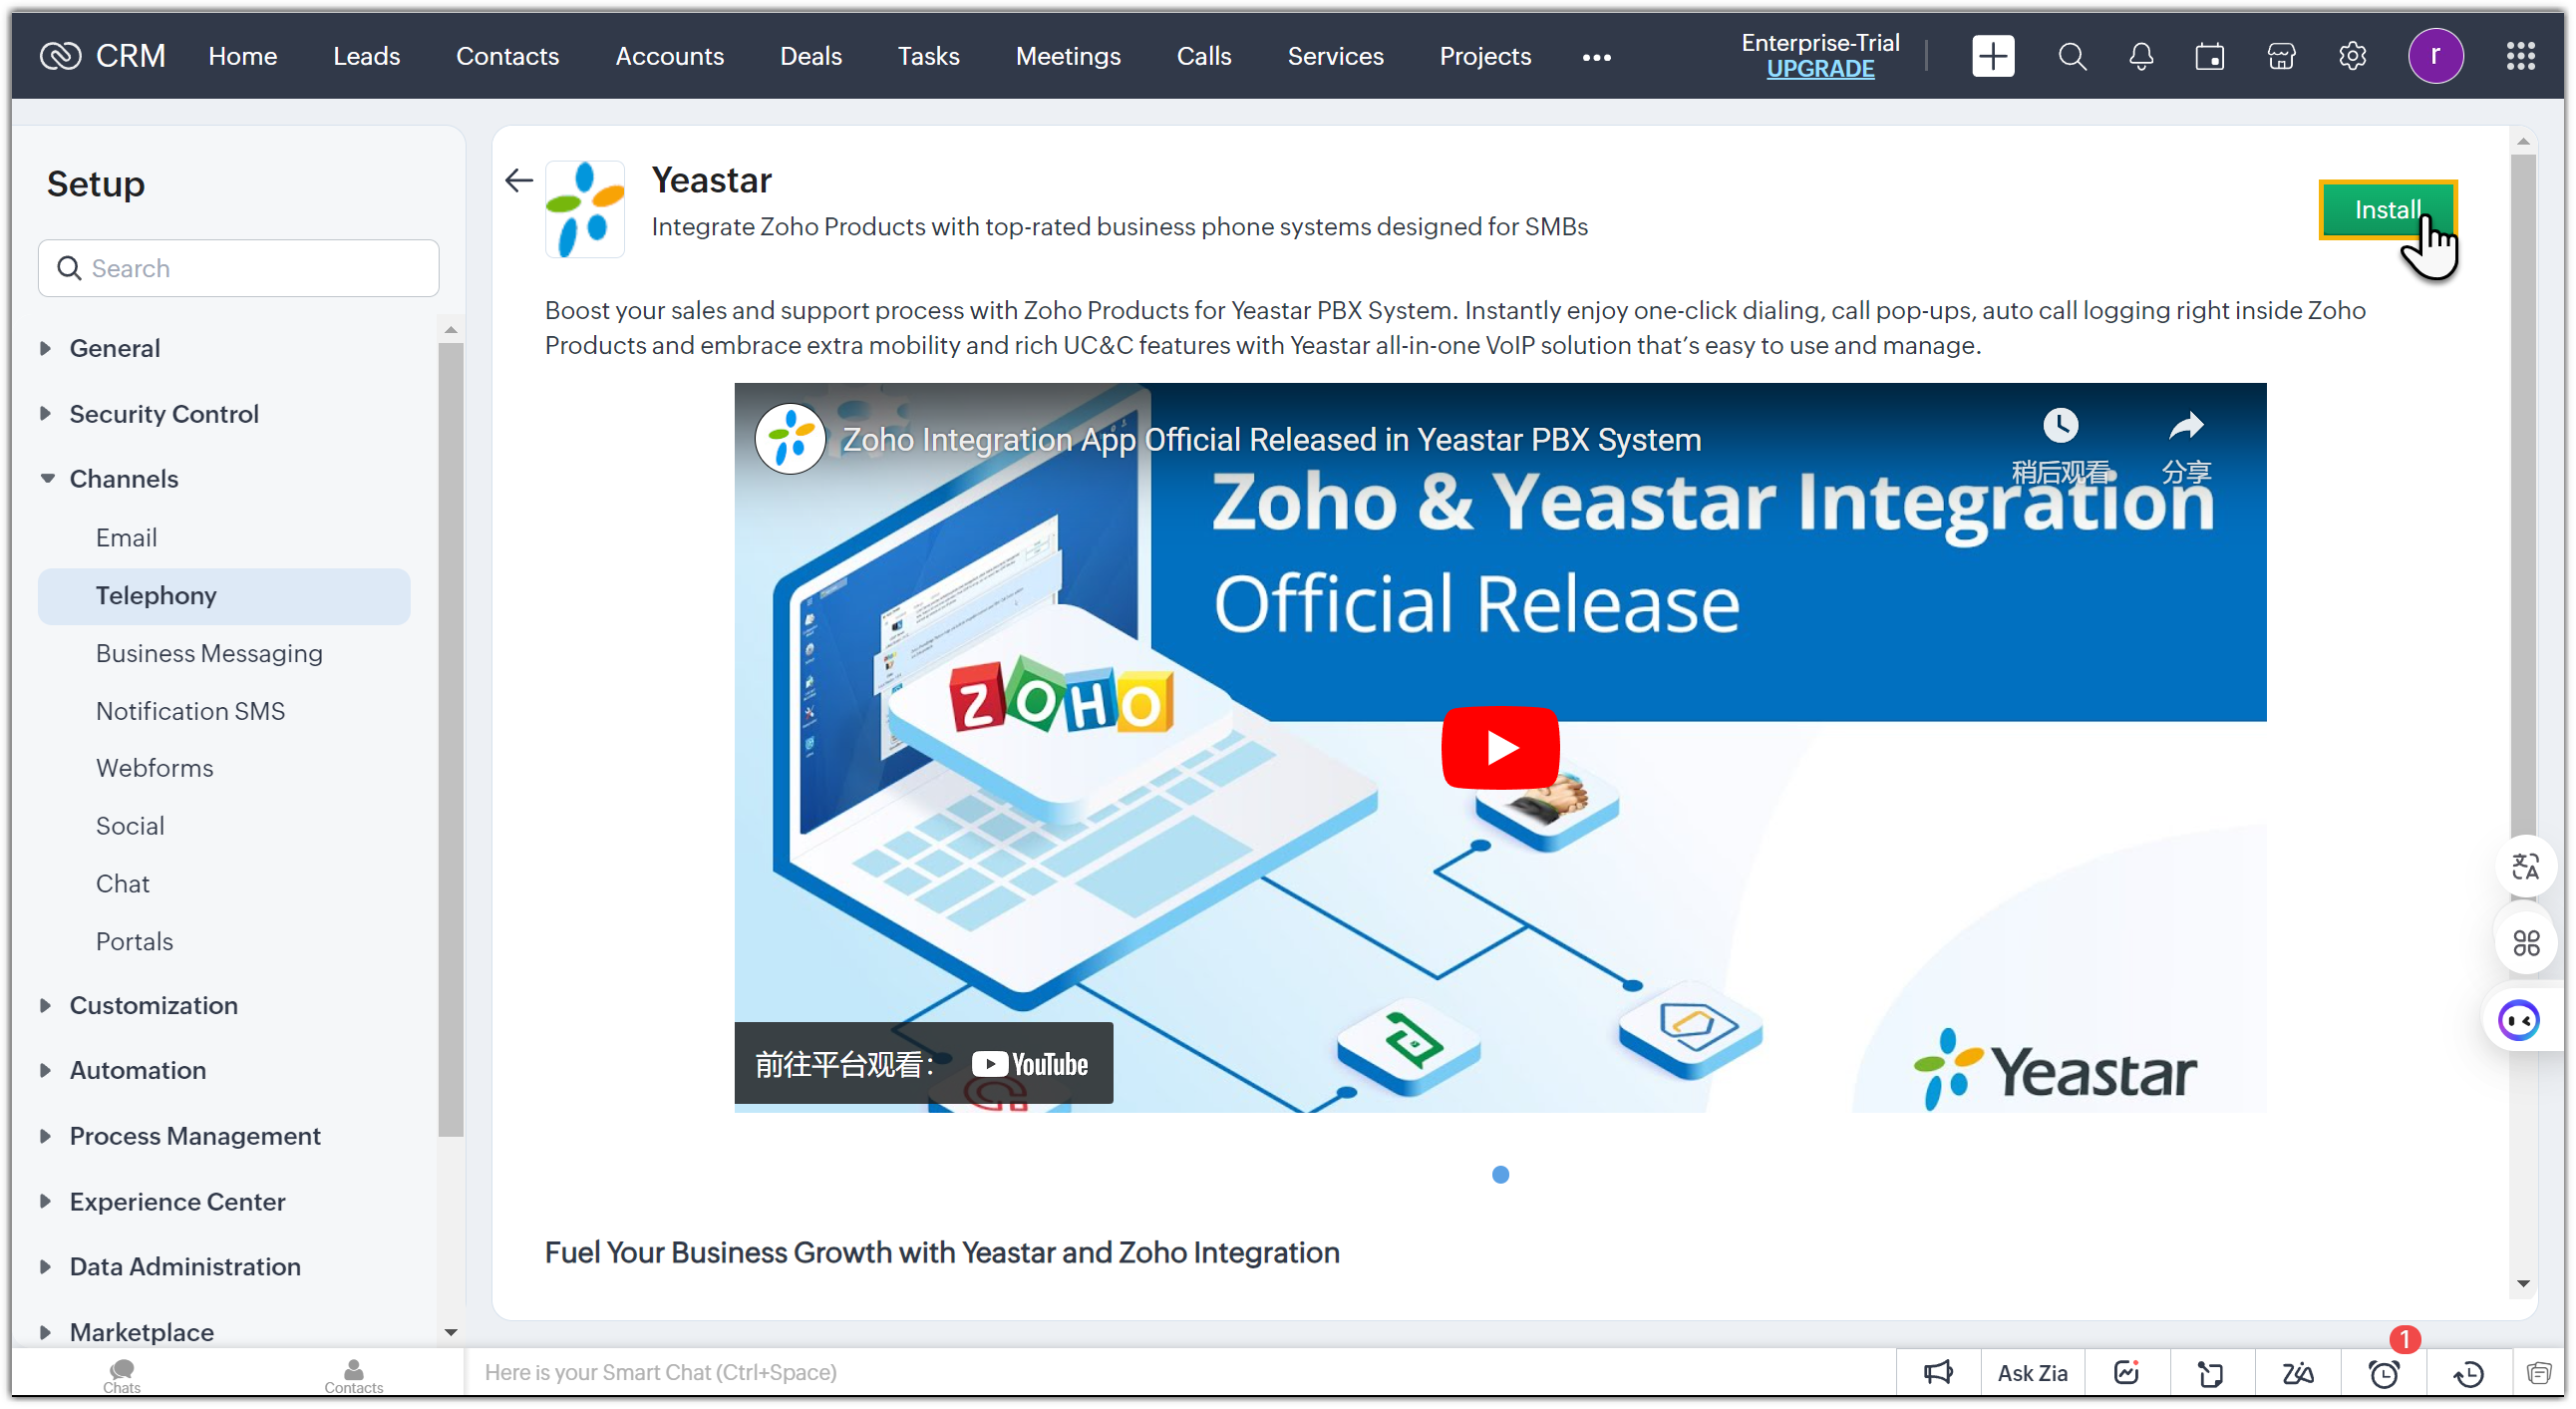
Open the listing and click Install.
-
In the dialog that appears, choose which Zoho users may use the integration, then click Install.
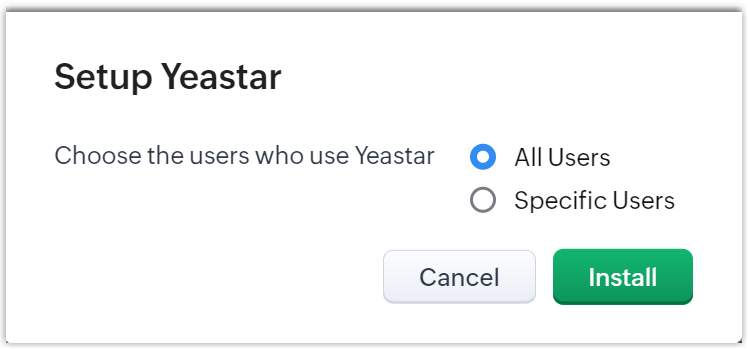
- All Users: gives every Zoho user access to the integration features.
- Specific Users: lets you pick exactly which Zoho users can use the integration features.
The app is now installed.
Step 2. Authorize the integration from Cloud Voice
Section titled “Step 2. Authorize the integration from Cloud Voice”-
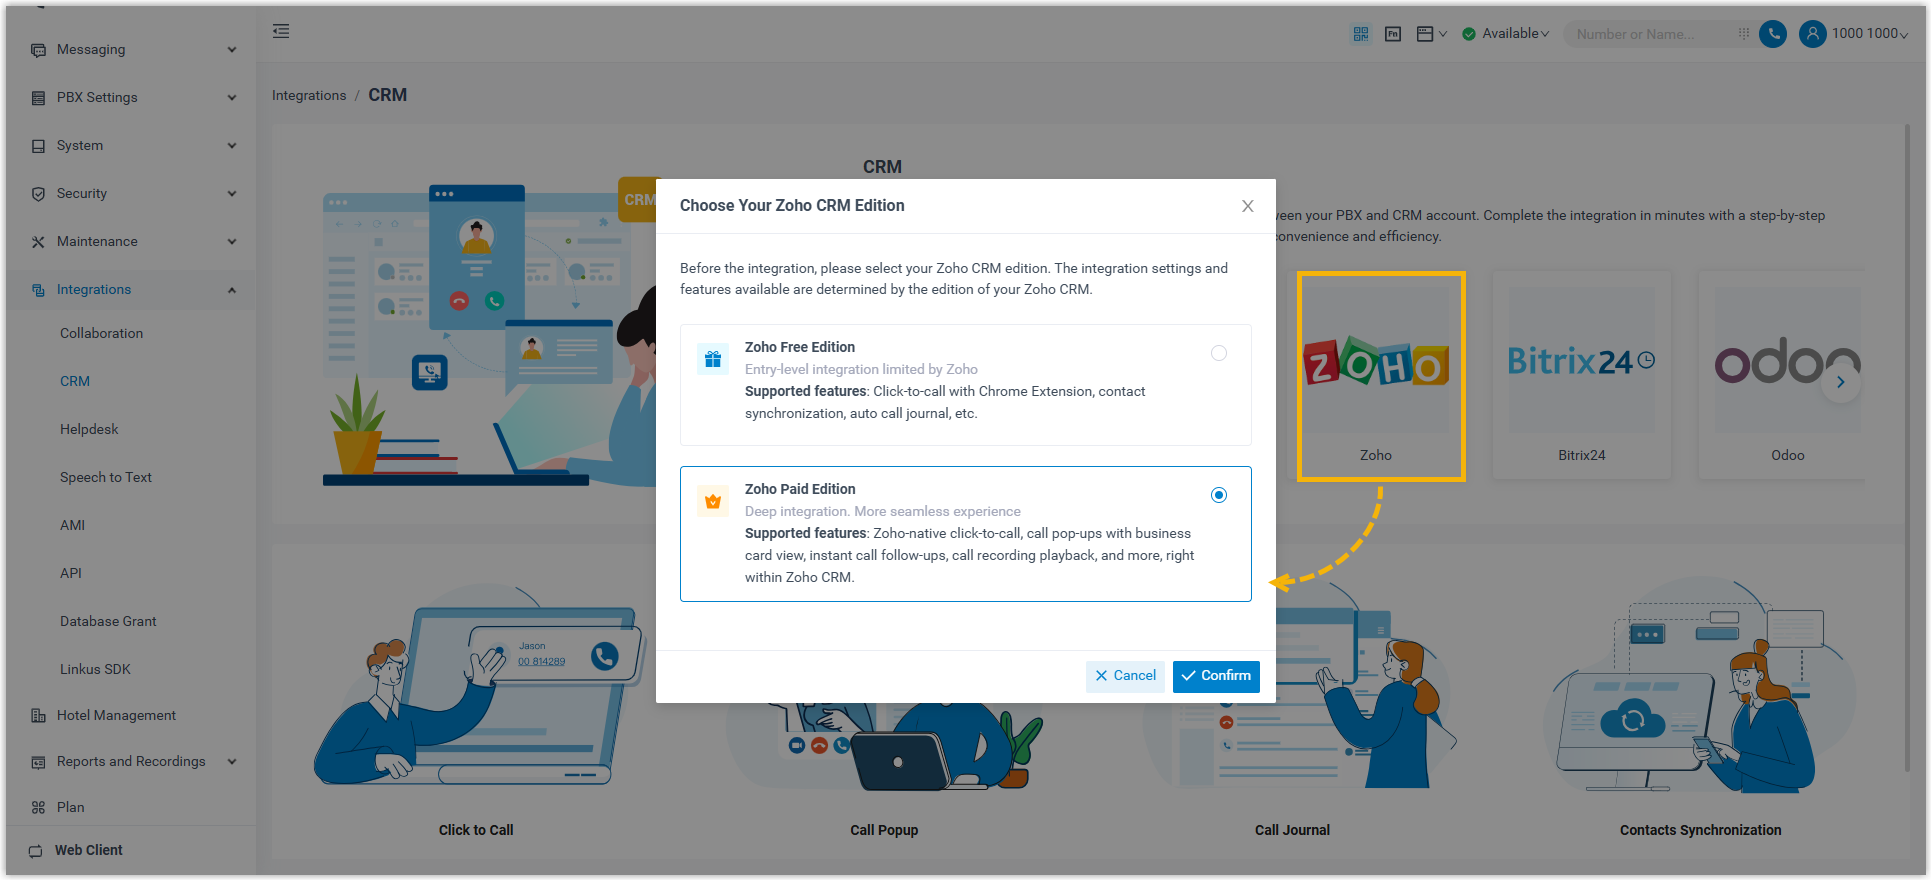
Sign in to the Cloud Voice management portal and go to Integrations > CRM > Zoho, then select Zoho Paid Edition.
-
Fill in the Settings section, then click Save.
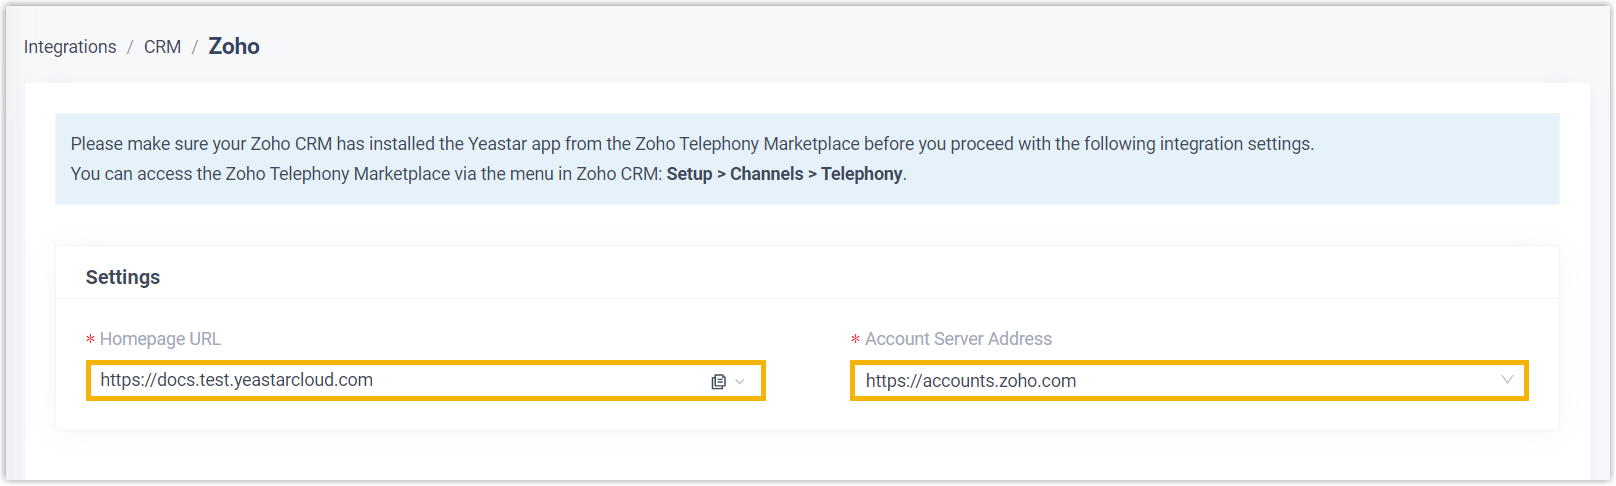
- Homepage URL: confirm your Cloud Voice system’s domain name.
- Account Server Address: choose the Zoho data center URL that matches the region where your account is registered.
-
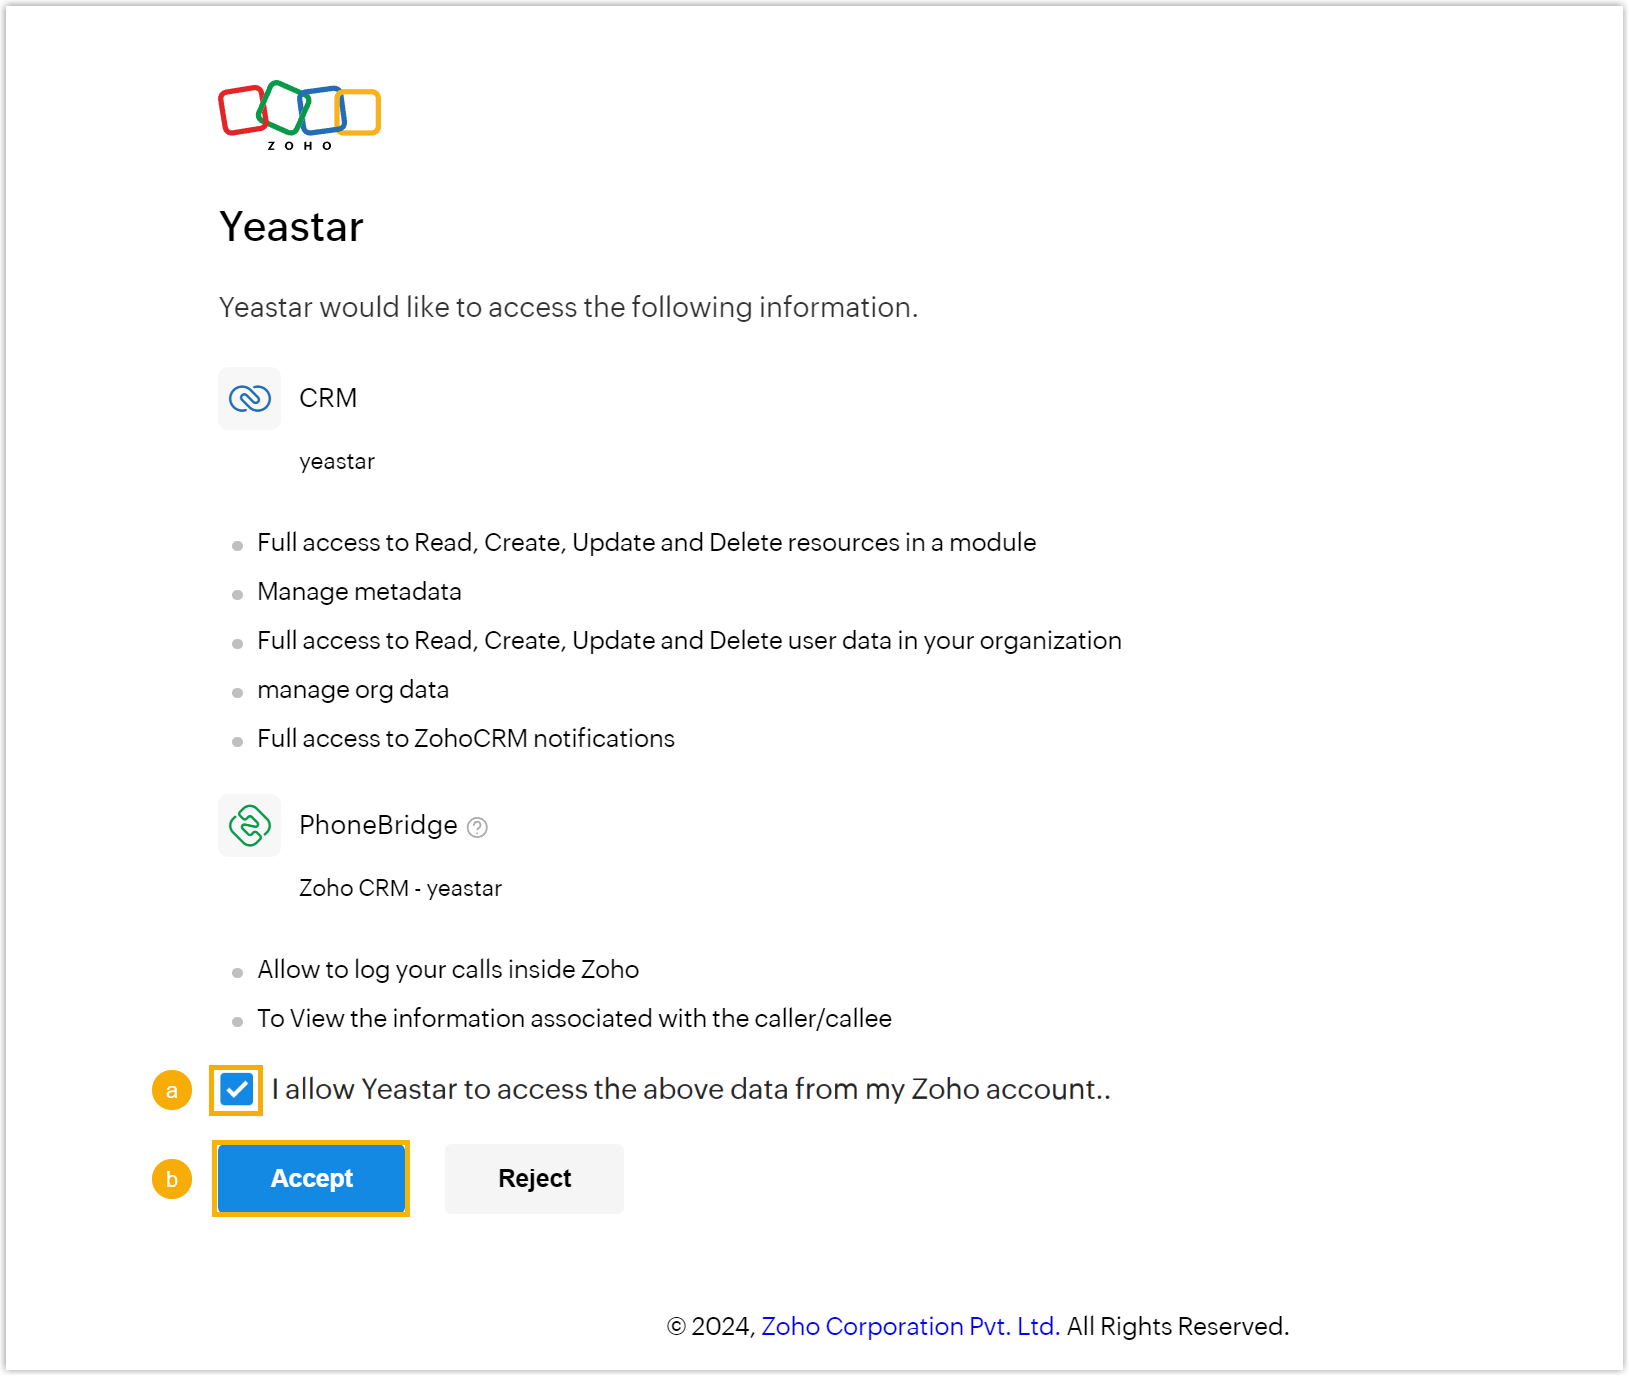
On the authorization page, review the access the app is requesting, tick the disclaimer checkbox, and click Accept.
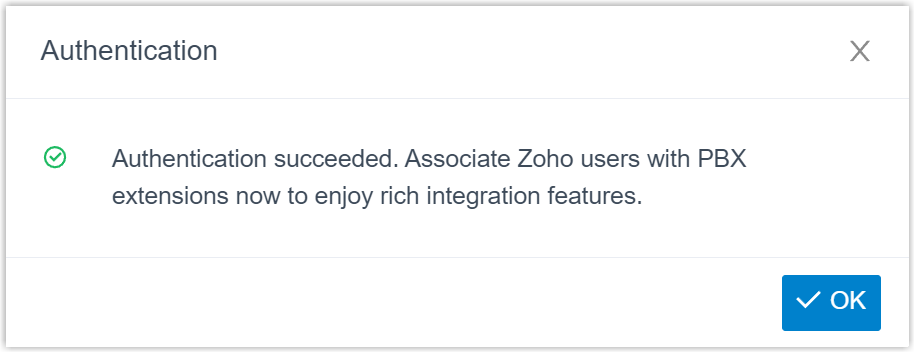
Cloud Voice finishes authenticating on its own. A window then reports the result.
Step 3. Link extensions to Zoho users
Section titled “Step 3. Link extensions to Zoho users”-
On the CRM integration page, click the refresh icon
 next to Zoho User to pull in the current list of Zoho CRM users.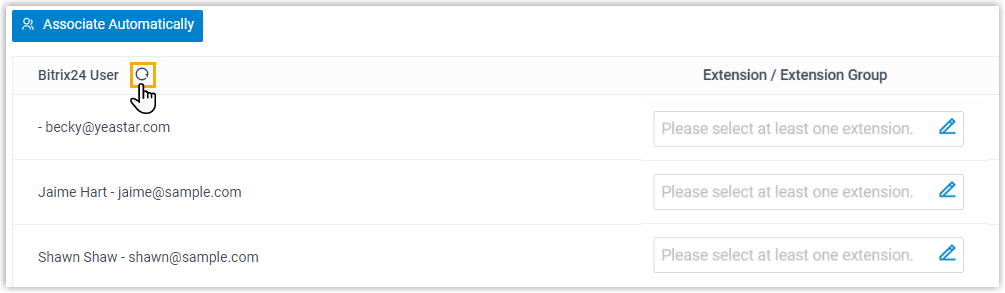
-
Pair each Zoho user with a Cloud Voice extension using whichever method fits your setup.
Match automatically
If a user’s Zoho account and their Cloud Voice extension share the same email address, Cloud Voice can pair them for you.
- Click Associate Automatically.
- In the confirmation window, click OK.
- Click Save.
Match manually
If a user’s Zoho account and extension use different email addresses, link them by hand.
- In the Extension drop-down next to the Zoho user, pick that user’s Cloud Voice extension.
- Click Save.
Result
Section titled “Result”- Cloud Voice and Zoho CRM are now connected.
- Linked Zoho users can place and answer calls on their Cloud Voice extensions.
What to do next
Section titled “What to do next”Question about this page?
Ask the AI assistant. It starts from this page, then searches the rest of the docs.
Ask Cloud Voice AI
Answers are AI-generated from the docs and may contain mistakes. Verify with the linked pages.