
Set up Contact Synchronization from HubSpot CRM
Once HubSpot CRM (Customer Relationship Management, the system where your sales and support teams keep contact records) is connected to your phone system, you can have Cloud Voice pull selected HubSpot contacts into a phonebook of its own. The sync runs one way, from HubSpot into Cloud Voice, so extension users see who is calling without leaving their phone or app.
Prerequisites
Section titled “Prerequisites”You have already integrated Cloud Voice with HubSpot CRM.
Turn on contact synchronization
Section titled “Turn on contact synchronization”-
Sign in to the Cloud Voice management portal and go to Integrations > CRM.
-
On the CRM integration page, switch on Synchronize Contacts Automatically.
-
Open the Synchronize Contacts From drop-down list and choose which type or types of HubSpot contact you want to bring across.
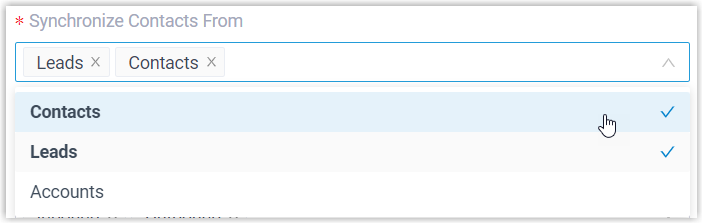
-
In the Synchronize to Phonebook drop-down list, pick the phonebook that will hold the synced contacts. You can select an existing phonebook or create a new one.

-
Decide how Cloud Voice should look up contacts by setting the Always Query CRM option.

- Enabled: Cloud Voice queries HubSpot in real time for contact details, and extension users can search CRM contacts directly from the dial pad in the Cloud Voice App.
- Disabled: Cloud Voice only queries HubSpot when no match is found in your company contacts.
-
Click Save.
What happens after syncing
Section titled “What happens after syncing”The phonebook you chose is marked with a CRM label so you can tell it apart from your other phonebooks.


From then on, whenever an extension user receives a call from one of the selected HubSpot contact types, or dials out to one, Cloud Voice looks up the number and copies the matching contact’s details from HubSpot into the linked phonebook.
Question about this page?
Ask the AI assistant. It starts from this page, then searches the rest of the docs.
Ask Cloud Voice AI
Answers are AI-generated from the docs and may contain mistakes. Verify with the linked pages.