
Make Outbound Calls through the Extended FXO Trunks
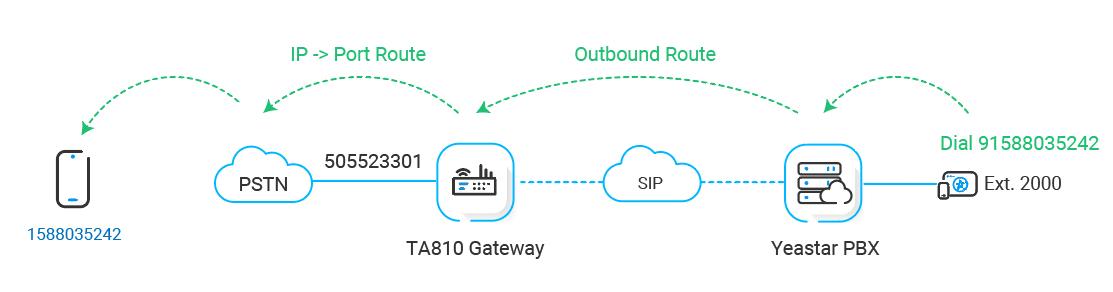
Once Cloud Voice is paired with a TA810 gateway, the gateway’s FXO (Foreign Exchange Office) lines become available as trunks, but nothing sends calls to them yet. An FXO port is the gateway side that plugs into an analog phone line from the local carrier, so calls placed over these trunks leave through the PSTN (Public Switched Telephone Network). To place outbound calls over those lines, you build a matching pair of routes: an outbound route on the PBX (Private Branch Exchange, your phone system) that hands calls to the gateway, and an IP->Port route on the gateway that forwards those calls out an FXO trunk.
Step 1: Create an outbound route in Cloud Voice
Section titled “Step 1: Create an outbound route in Cloud Voice”Add an outbound route so extensions can reach the TA810 gateway.
-
Sign in to the PBX management portal and go to Call Control > Outbound Route, then click Add.
-
Configure the following, and leave the remaining fields at their defaults:
-
Name: A label that makes the route easy to identify.
-
Dial Pattern: Define how users dial out. In this example, set Pattern to
9.and Strip to1, so callers dial a9prefix ahead of the number. To reach123456, a user dials9123456, and the9is stripped before the call leaves the PBX. The.in the pattern is a wildcard that matches any digits typed after the prefix.
-
Trunk: Choose the SIP account trunk that connects to the TA810 gateway, for example
Connect-to-TA810-Gateway.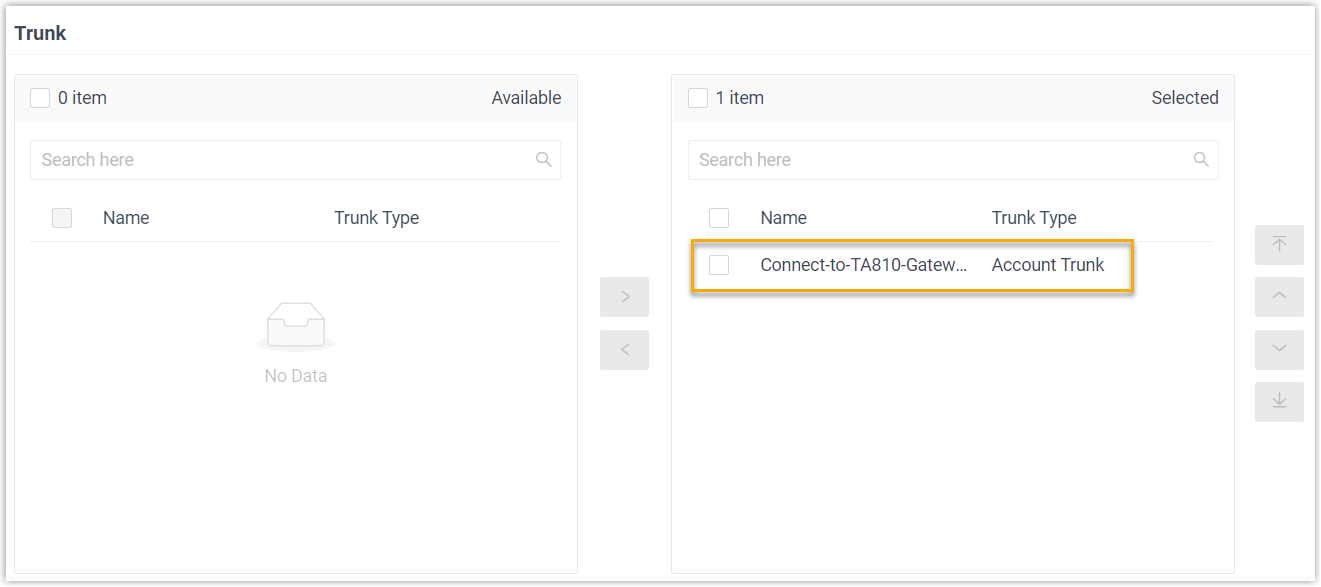
-
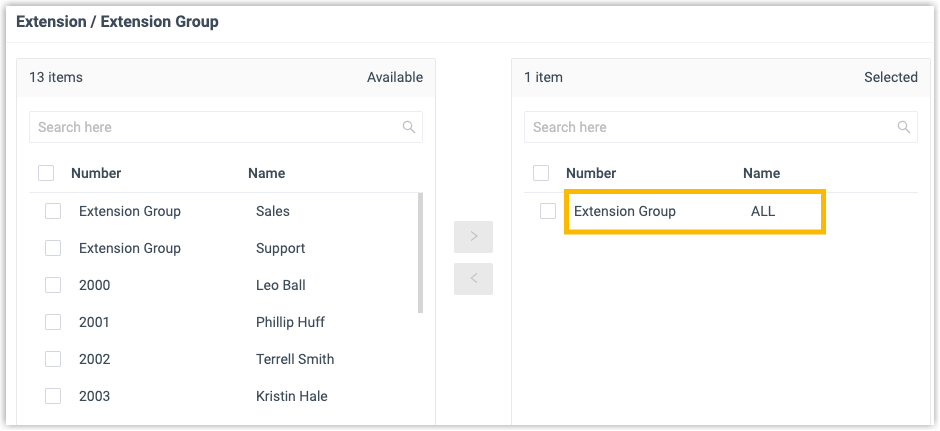
Extension/Extension Group: Choose which extensions may dial out on this route. In this example, all extensions are allowed.
-
-
Click Save, then Apply.
Step 2: Create an IP->Port route on the TA810 gateway
Section titled “Step 2: Create an IP->Port route on the TA810 gateway”Add an IP->Port route so calls arriving from the PBX are sent out an FXO trunk.
-
Sign in to the gateway’s web interface and go to Gateway > Route Settings > IP->Port, then click Add IP->Port Route.
-
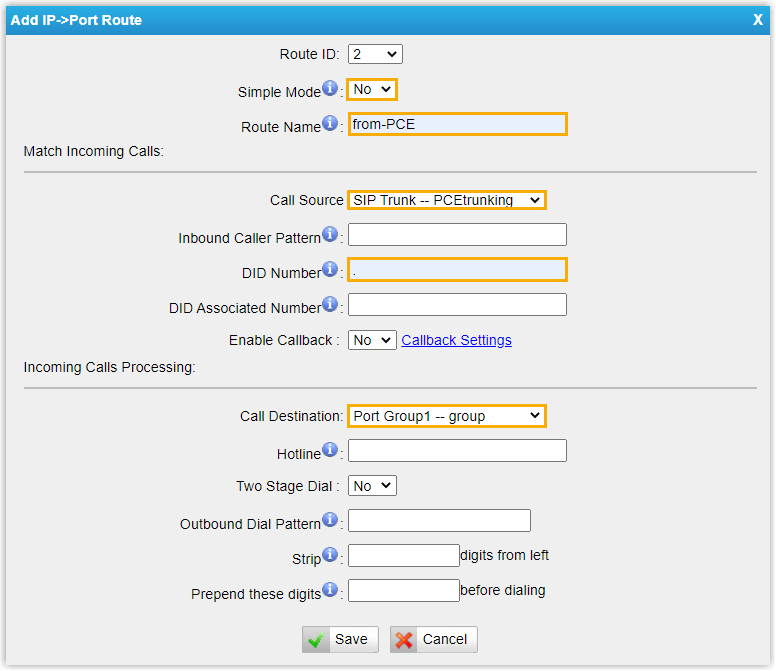
In the dialog that opens, configure the route:
-
Simple Mode: Select No.
-
Route Name: Enter a label to identify the route.
-
Call Source: Choose the SIP trunk that connects to Cloud Voice, for example
SIP Trunk - PCEtrunking. This is the same trunk the PBX outbound route sends to in Step 1. -
DID Number: Set to
.so users can dial any number. DID (Direct Inward Dialing) matching lets you restrict which dialed numbers this route accepts, and a single.matches all of them. -
Call Destination: Choose the FXO trunks used to place the call. In this example, all FXO trunks are selected.
-
-
Click Save, then Apply Changes.
Step 3: Place a test call
Section titled “Step 3: Place a test call”Dial out from an extension to confirm the routes work end to end. Say the extended FXO trunk presents an outbound caller ID of 505523301. When extension 2000 dials 91588035242, number 1588035242 rings and shows the caller ID 505523301.
Question about this page?
Ask the AI assistant. It starts from this page, then searches the rest of the docs.
Ask Cloud Voice AI
Answers are AI-generated from the docs and may contain mistakes. Verify with the linked pages.