
Set up Contact Synchronization from Salesforce CRM
With Salesforce CRM (Customer Relationship Management) connected to Cloud Voice, you can turn on a one-way contact sync that pulls your Salesforce contacts into a single Cloud Voice phonebook. This page walks through enabling the sync, choosing which contacts to bring across, and deciding how aggressively Cloud Voice looks up CRM records.
Before you start
Section titled “Before you start”Confirm that the Salesforce CRM integration is already in place. The sync depends on that connection to reach your Salesforce org.
Enable contact synchronization
Section titled “Enable contact synchronization”-
Sign in to the Cloud Voice management portal and open Integrations > CRM.
-
On the CRM integration page, switch on Synchronize Contacts Automatically.
-
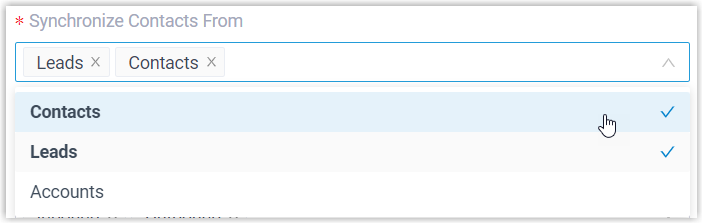
Open the Synchronize Contacts From drop-down and select the Salesforce contact type or types you want to bring into Cloud Voice.
-
In the Synchronize to Phonebook drop-down, choose an existing empty phonebook or add a new one to hold the imported records.

-
Use the Always Query CRM option to decide whether Cloud Voice looks up contacts in Salesforce in real time.

- Enabled: Cloud Voice queries Salesforce in real time for contact details and supports live dial search of CRM contacts in the Cloud Voice App for the associated extension users.
- Disabled: Cloud Voice only queries Salesforce when no matching record is found in the company contacts.
-
Click Save.
What happens next
Section titled “What happens next”Under Contacts > Phonebooks, the destination phonebook now carries a CRM label.


When an associated user answers an inbound call from one of the selected Salesforce contact types, or dials out to such a contact, Cloud Voice looks up the record and copies the matched contact’s details from Salesforce into the linked phonebook.
Question about this page?
Ask the AI assistant. It starts from this page, then searches the rest of the docs.
Ask Cloud Voice AI
Answers are AI-generated from the docs and may contain mistakes. Verify with the linked pages.