
Set up a Call Flow from Template
A call flow controls what happens to an inbound call before it reaches a person: which greeting plays, what options the caller hears, and where the call is sent. Rather than build one from scratch, you can begin with a template built into Cloud Voice. Each template lays out a working pattern for a common scenario, so you only tailor the pieces to your business and turn it on.
Available templates
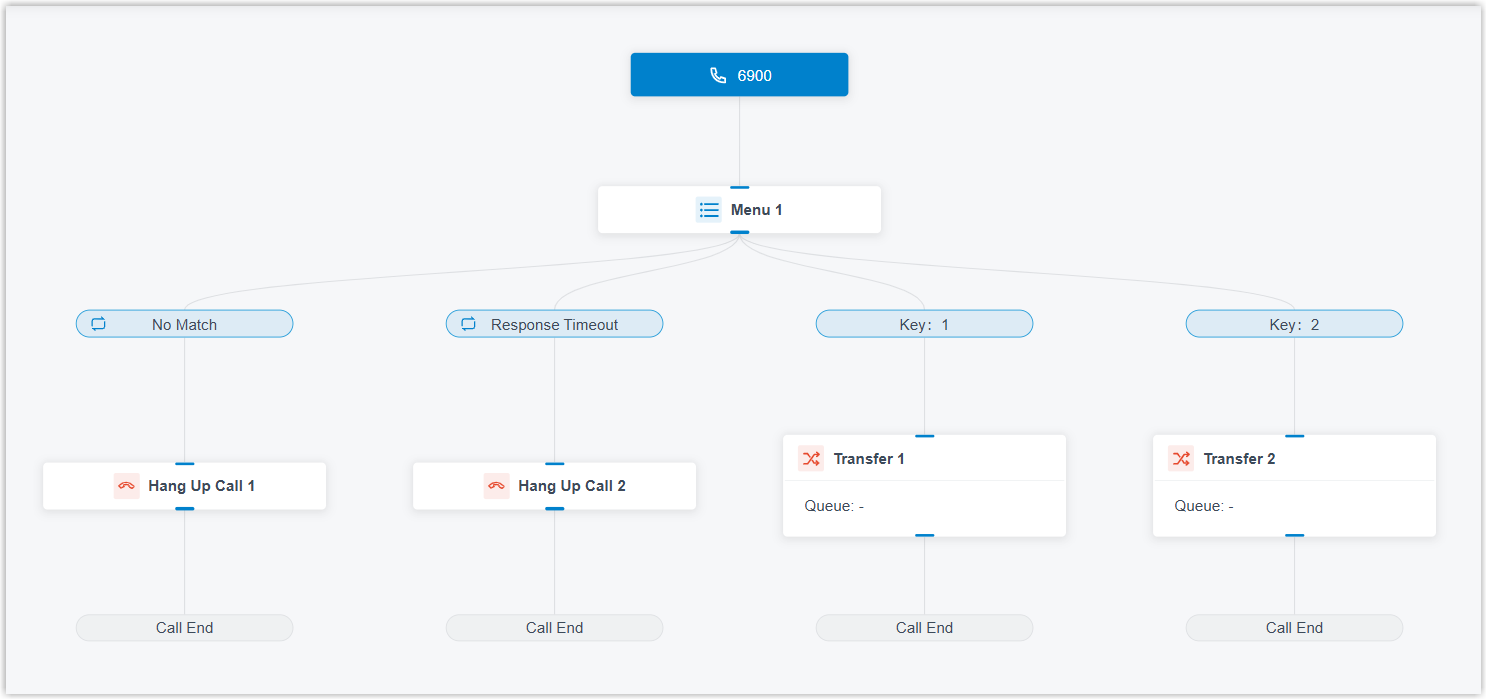
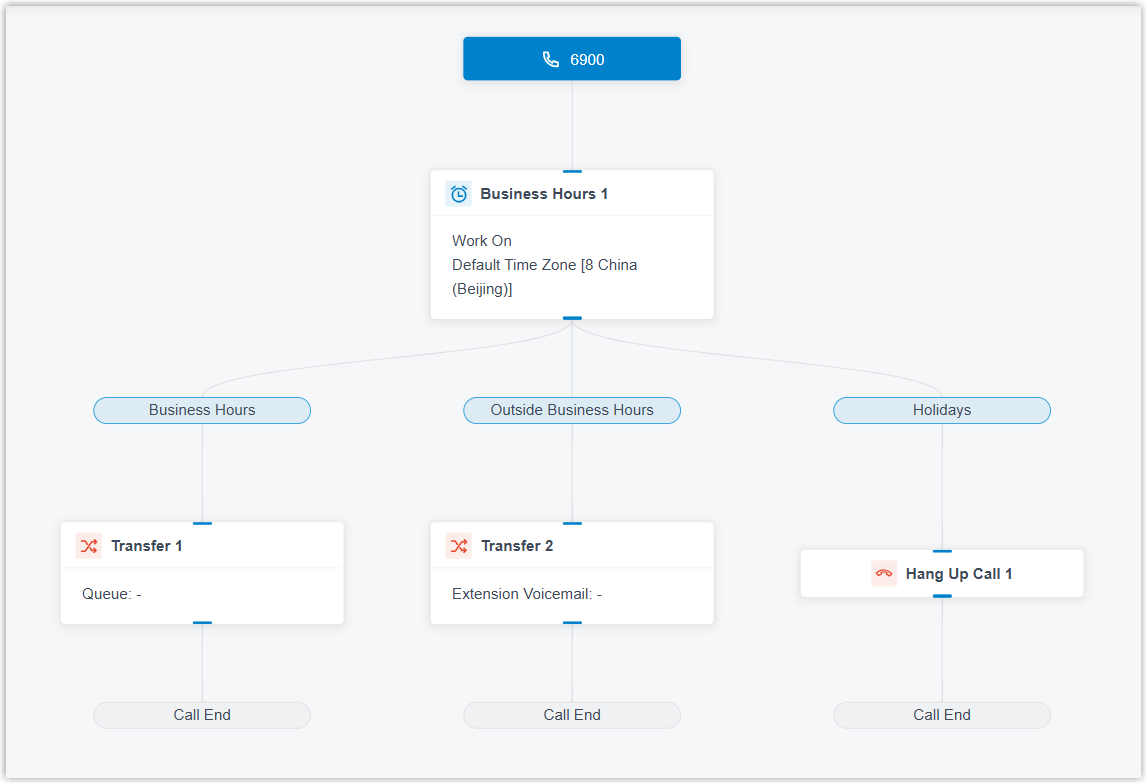
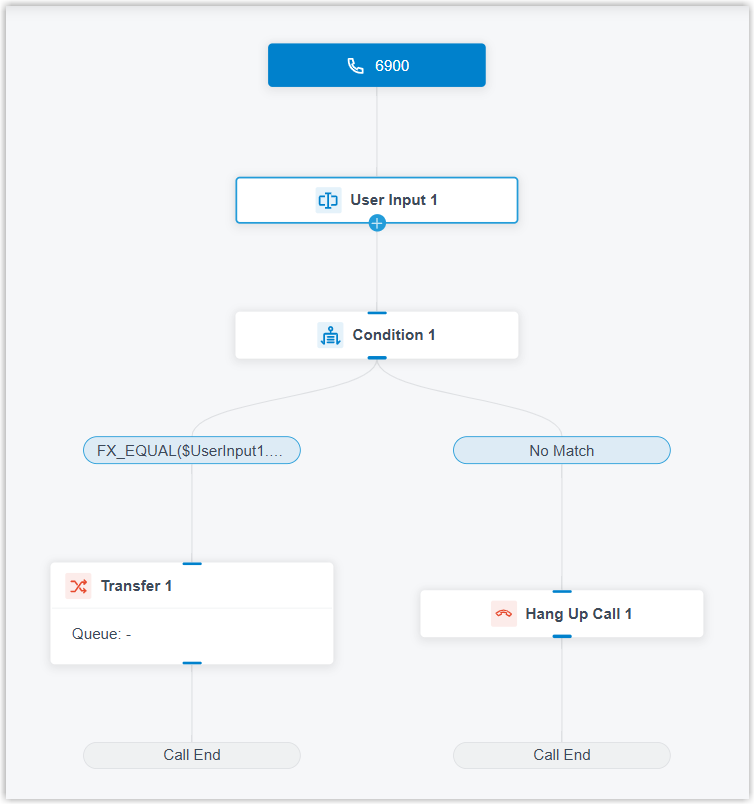
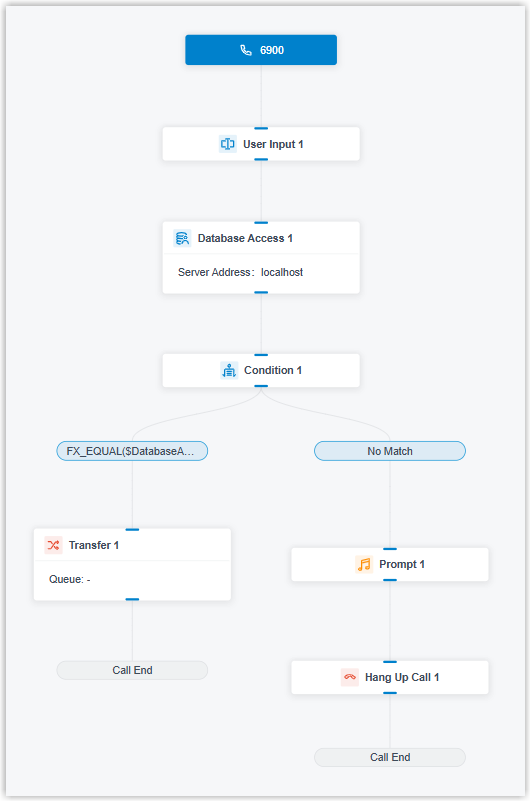
Section titled “Available templates”| Template | What it does |
|---|---|
| Linear Call Flow | Sends callers to different destinations according to the DTMF digit they enter. |
| Time-based Call Flow | Sends callers to different destinations according to your business hours in the default time zone. |
| Certified Call Flow | Sends callers to different destinations by checking their input against predefined expressions. |
| Database Authentication | Sends callers to different destinations by validating their input against a database. |
Step 1: Create the call flow
Section titled “Step 1: Create the call flow”-
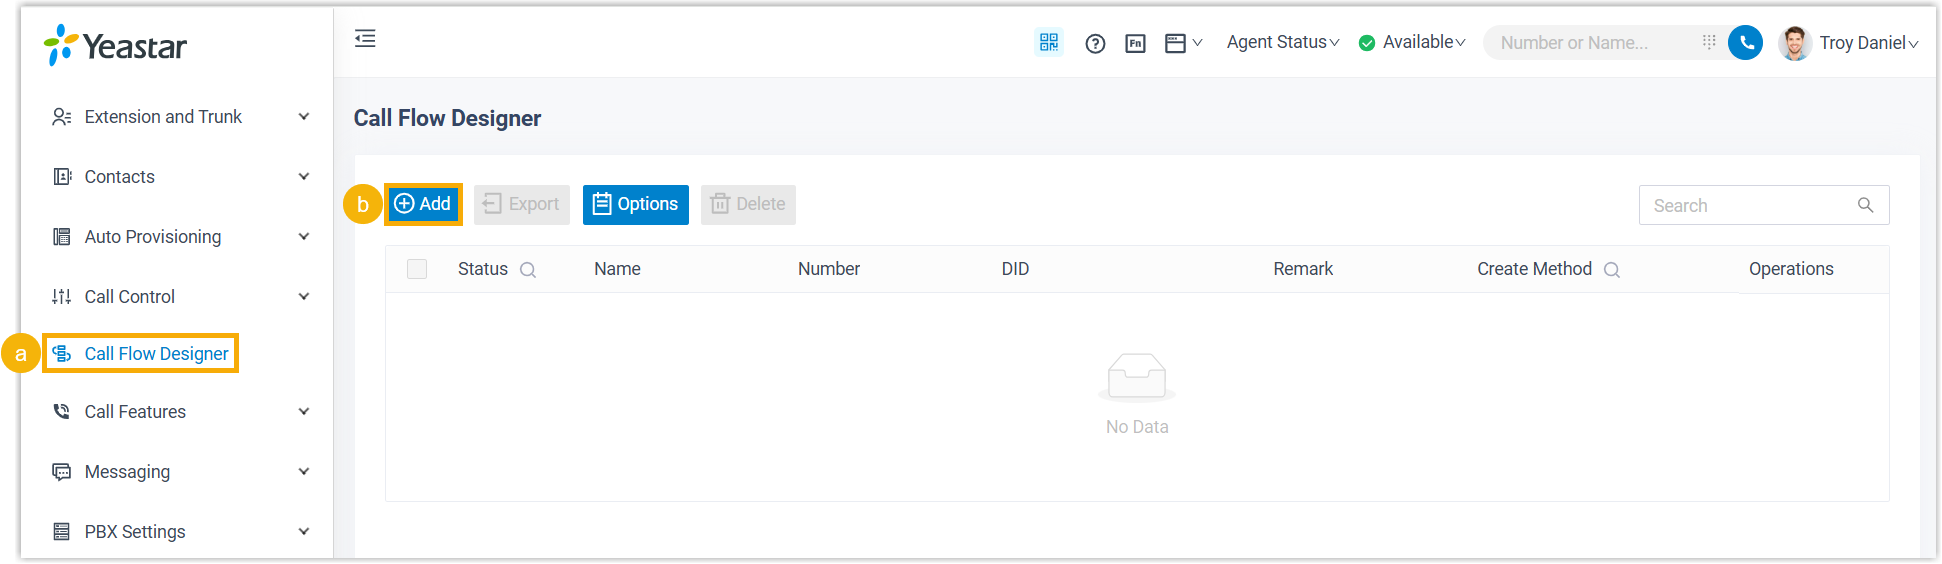
Sign in to your Cloud Voice management portal and go to Call Flow Designer.
-
Click Add.
-
In the dialog that opens, fill in the fields below, then click Save.
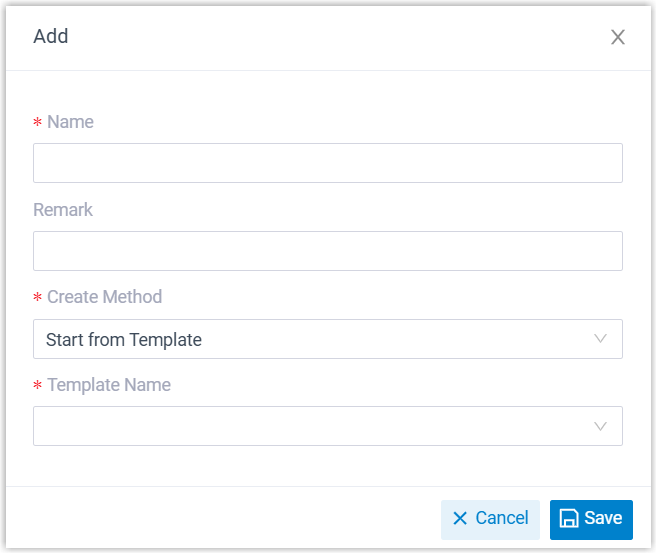
- Name: A label that helps you recognize the call flow.
- Remark: A short description.
- Create Method: Choose Start from Template.
- Template Name: Pick the template you want to base the flow on.
Cloud Voice creates the flow and opens its configuration page, the visual canvas where the components are wired together.
Step 2: Adjust the components
Section titled “Step 2: Adjust the components”-
Click any component to open and change its settings. The table below explains what each component does and links to its full reference.
Component Description Initial Action The entry point of the flow. Set the number(s) callers dial to start it, and optionally play a prompt to greet callers or guide them. See Initial Action. Prompt Plays one or more audio prompts, or a text-to-speech message, to the caller. See Prompt. Business Hours Routes calls to different destinations depending on the time of day. See Business Hours. Menu Offers callers a set of options and routes the call based on the DTMF digit they press. See Menu. User Input Collects DTMF digits from the caller, usually paired with a Condition component to evaluate the input and route the call. See User Input. Language Switches the system-prompt language for the components that follow in the flow. See Language. Record Starts recording once the caller connects to another party, with optional prompts to notify participants at the start and during the recording. You can also use it to turn off recording for calls that would otherwise be recorded. See Record. Dial by Number Lets callers dial a number directly to reach a destination. See Dial by Number. Dial by Name An end component that closes the caller’s connection to the flow. Callers reach an extension user by entering the first three letters of that user’s name. See Dial by Name. Transfer An end component that closes the caller’s connection to the flow by sending them to a chosen destination, with optional prompts announcing the transfer. See Transfer. Hang Up Call An end component that closes the caller’s connection to the flow. When a caller reaches it, the call is disconnected. See Hang Up Call. Condition Routes calls based on logical expressions. See Condition. Loop Runs a group of components repeatedly, either a set number of times or until a condition is met. See Loop. Internal Data Ops Reads from and writes to the Cloud Voice native database. See the components below. Email Sender Sends email for real-time notifications, alerts, or delivering user-specific details. See Email Sender. Database Access Interacts with a database during the flow, running SQL (Structured Query Language) operations to read or update data as needed. See Database Access. HTTP Request Sends HTTP (Hypertext Transfer Protocol) requests to external web servers to exchange data with third-party services. See HTTP Request. The Internal Data Ops group covers these components:
-
Optional: To add a component, click
 on a branch, then choose the component you want.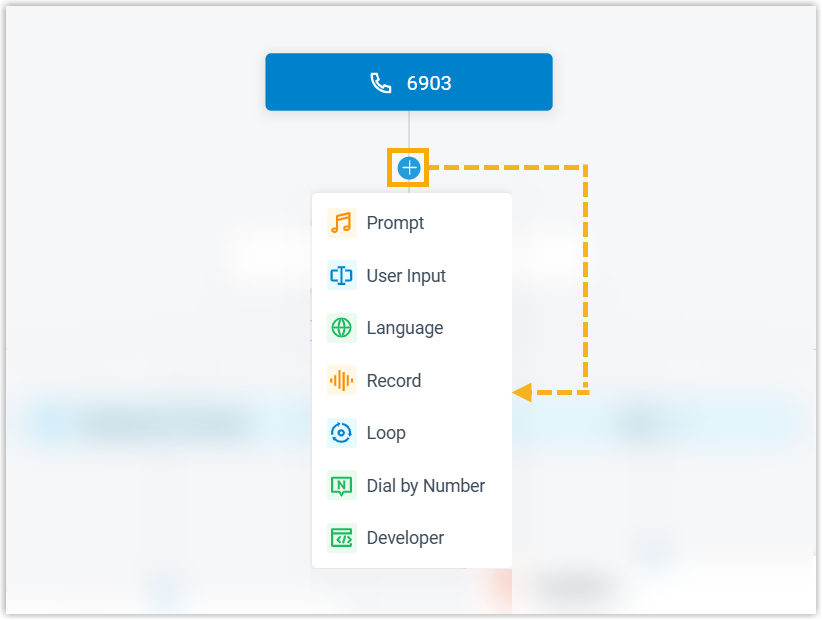
-
Click Save in the top-right corner.
Step 3: Enable the call flow
Section titled “Step 3: Enable the call flow”A call flow does nothing until you enable it. Once it is on, Cloud Voice starts routing matching calls through it.
-
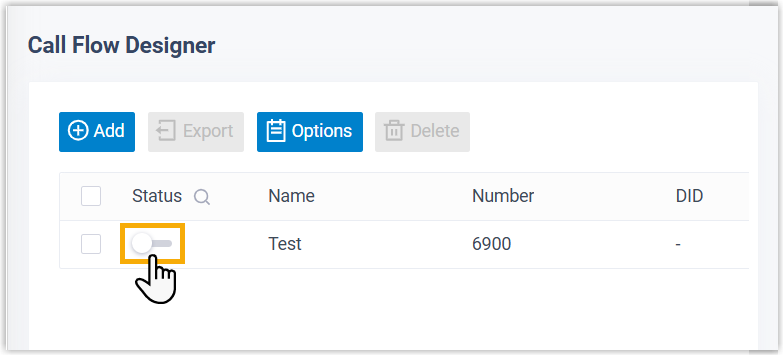
On the call flow list, turn on the switch for the flow you want to activate.
-
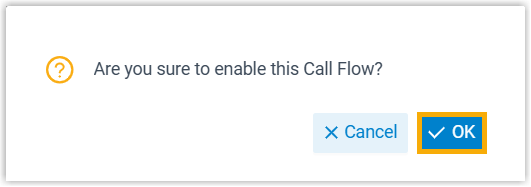
Click OK in the confirmation dialog.
Question about this page?
Ask the AI assistant. It starts from this page, then searches the rest of the docs.
Ask Cloud Voice AI
Answers are AI-generated from the docs and may contain mistakes. Verify with the linked pages.