
Delete AI Receptionists
Once an AI receptionist is no longer needed to handle incoming calls, you can remove it from your Cloud Voice system for good. This page walks through deleting a single receptionist, clearing several at once, or wiping the entire list.
Before you begin
Section titled “Before you begin”Sign in to the Cloud Voice web portal and open AI > AI Receptionist to display the list of configured receptionists.
Remove a single AI receptionist
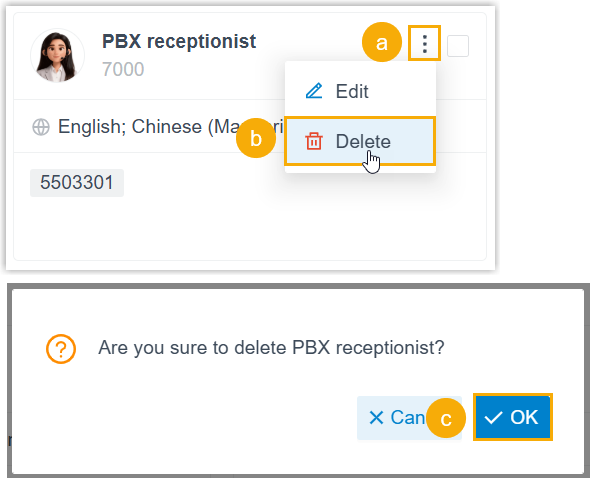
Section titled “Remove a single AI receptionist”- Find the receptionist you want to remove in the list.
- Click the more-options icon
 on that row.
 - Choose Delete from the menu.
- Confirm by clicking OK in the dialog that appears.
Remove several AI receptionists at once
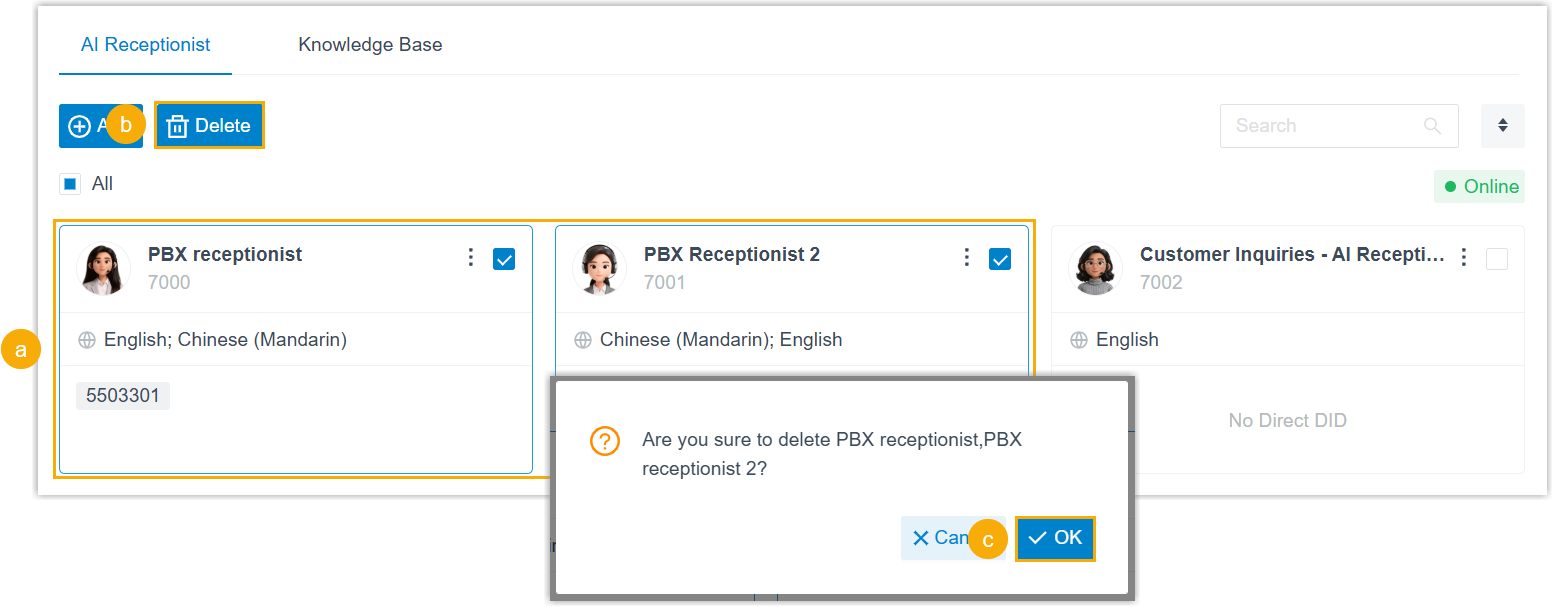
Section titled “Remove several AI receptionists at once”- Tick the checkbox beside each receptionist you want to remove.
- Click Delete above the list.
- Confirm by clicking OK in the dialog that appears.
Remove every AI receptionist
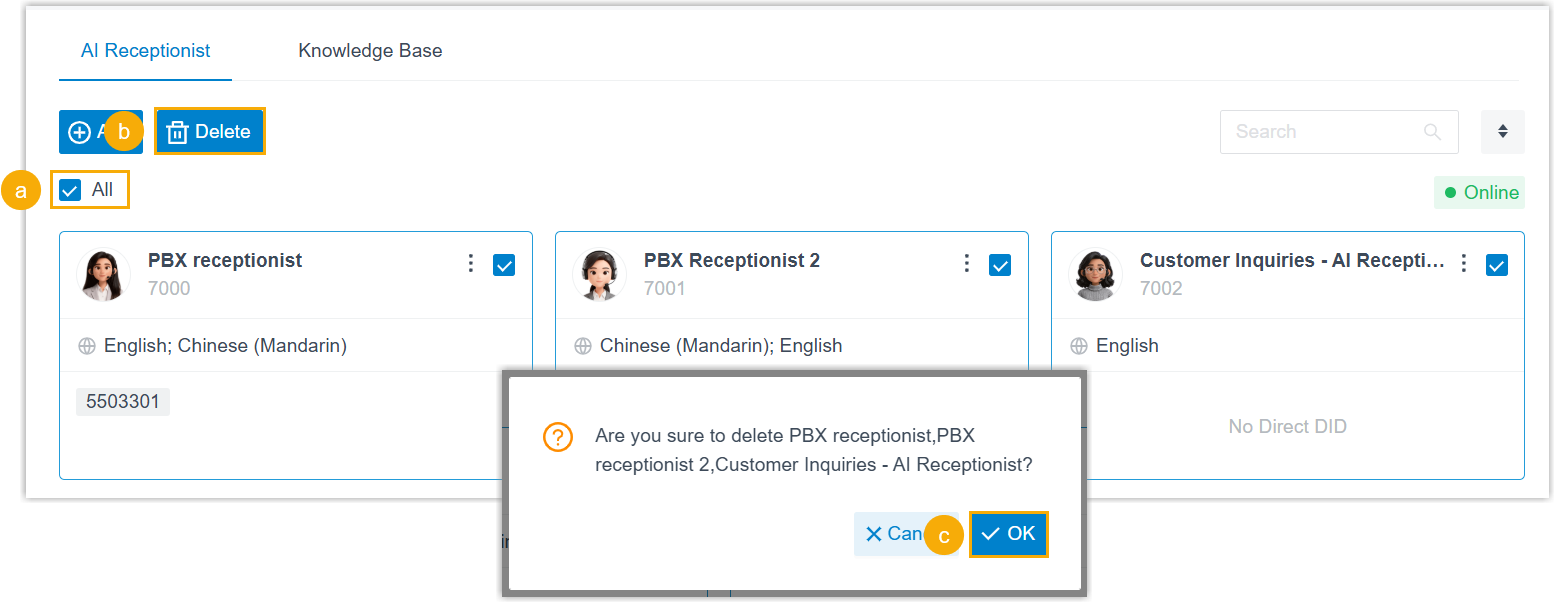
Section titled “Remove every AI receptionist”- Select the All checkbox at the top of the list to include every receptionist.
- Click Delete above the list.
- Confirm by clicking OK in the dialog that appears.
Save your changes
Section titled “Save your changes”After deleting, click Apply at the top of the page to commit the changes to your phone system.
Question about this page?
Ask the AI assistant. It starts from this page, then searches the rest of the docs.
Ask Cloud Voice AI
About
Answers are AI-generated from the docs and may contain mistakes. Verify with the linked pages.