
Create an AI Receptionist
This page walks you through creating an AI receptionist and filling in the settings it needs before it can start answering calls.
Before you begin
Section titled “Before you begin”Confirm that your Cloud Voice system meets the following conditions.
Firmware
The system must be running firmware 84.23.0.123 or later.
Subscription
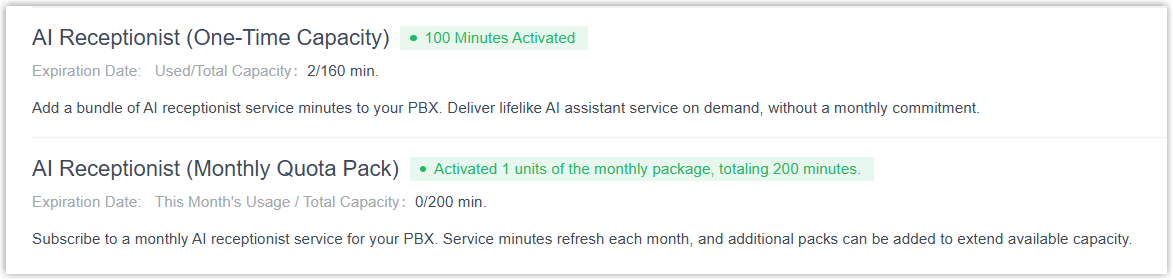
Your plan comes with 60 one-time free minutes so you can try the feature right away. To add more capacity, ask your service provider to enable one or both of the following add-on services under Plan > Add-on Subscription:
- AI Receptionist (One-Time Capacity): a one-off block of minutes. When it runs out, buy more capacity to continue.
- AI Receptionist (Monthly Quota Pack): a recurring pack of 200 minutes that refreshes each month. Leftover minutes are not carried into the following month.
Network
The PBX (Private Branch Exchange, the phone system that routes your calls) must have a valid domain certificate installed from a trusted certificate authority (CA).
SIP settings
Turn on the SIP TCP port so AI receptionist calls can connect, under PBX Settings > SIP Settings > General > Basic. SIP (Session Initiation Protocol) is the signaling that sets up and ends voice calls, and TCP (Transmission Control Protocol) is the network transport the receptionist uses to reach the AI service.

Limitations
Section titled “Limitations”- There is no cap on how many AI receptionists you can create.
- A single AI receptionist handles up to 10 concurrent calls.
Create the receptionist
Section titled “Create the receptionist”- Sign in to the PBX web portal and go to AI > AI Receptionist.
- Click Add.
- Work through the five setup stages in order: Personalization, Company Information, Greeting, Dial By Name, and Failover Destination.
- Click Save, then Apply.
The sections below explain each stage.
Personalization
Section titled “Personalization”On the Personalization page, set the receptionist’s basic details, its language, and its voice.
-
Fill in the basic information.

-
Name: a label that helps you recognize this receptionist.
-
Number: the number the receptionist answers. Calls placed to it are picked up by the receptionist.
-
LLM: the large language model that drives how the receptionist understands callers and forms its replies. Pick a model that fits your needs, weighing factors such as task complexity, response latency, context window size, and compliance requirements. For instance, choose Claude Sonnet 4 when calls call for deeper reasoning, or Gemini Flash when speed matters most.
-
-
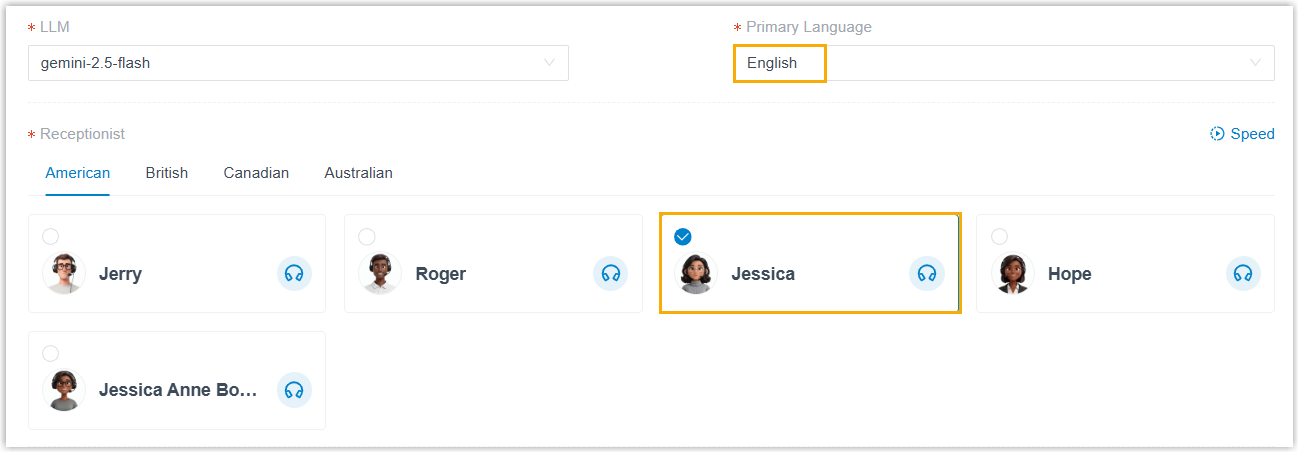
Choose the primary language and its voice.
-
Primary Language: the main language the receptionist speaks with callers.
-
Receptionist: the voice profile used for that language.
-
-
(Optional) To let the receptionist speak more than one language, click Add in the Additional Languages section and configure each entry.
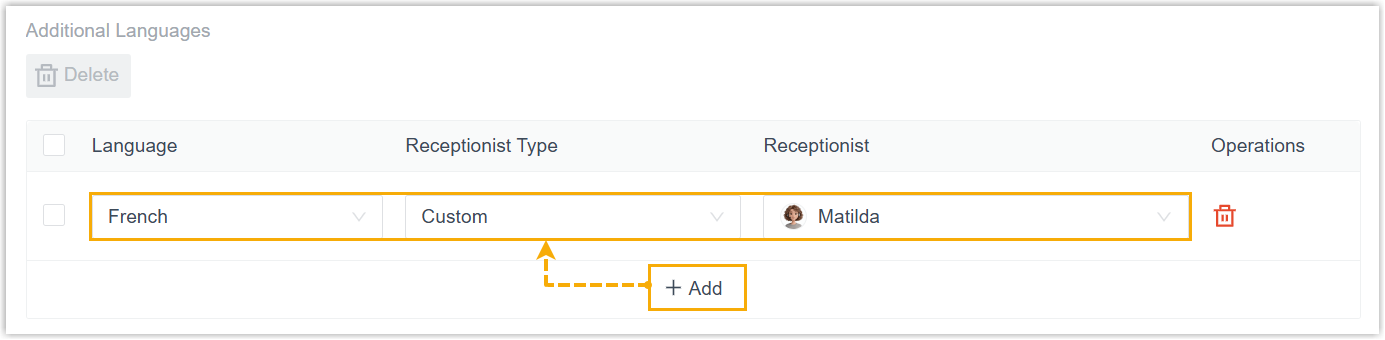
- Language: an extra language the receptionist can use with callers.
- Receptionist Type: the voice for that language:
-
Follow Primary Language: reuse the primary language’s voice profile.
-
Custom: use a different voice. Pick one from the Receptionist drop-down list.
-
-
Click Next.
Company Information
Section titled “Company Information”On the Company Information page, provide the business details the receptionist draws on to answer company-related questions.
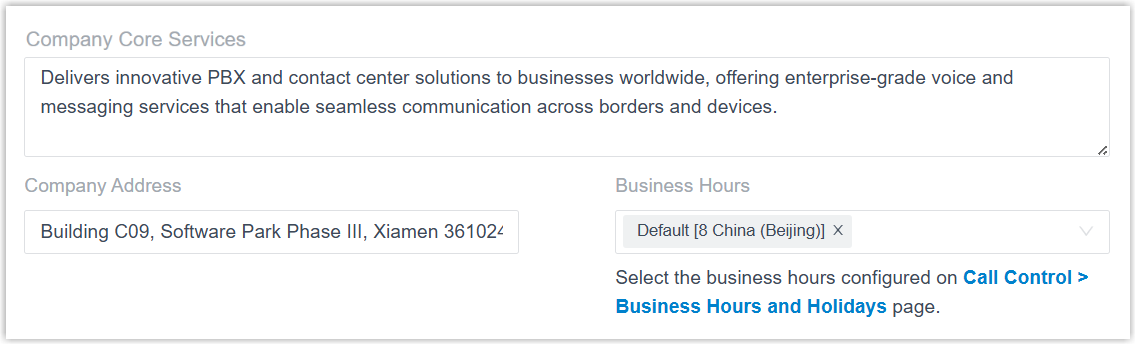
- In Company Core Services, describe what your company offers. The description can be up to 5,000 characters.
- In Company Address, enter your company’s address, up to 255 characters.
- In the Business Hours drop-down list, select the time zone or zones where your company operates. The receptionist relies on the business hours you have configured for those time zones when callers ask about your opening times.
- Click Next.
Greeting
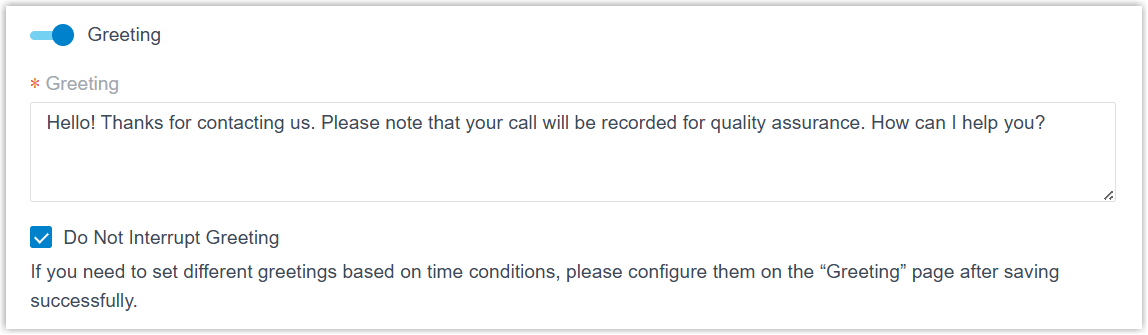
Section titled “Greeting”On the Greeting page, set the message the caller hears as soon as the receptionist answers.
-
Turn on the Greeting switch.
-
In the Greeting field, type a welcome message in the receptionist’s primary language.
-
(Optional) Select Do Not Interrupt Greeting to stop callers from talking over the greeting.
-
Click Next.
Dial By Name
Section titled “Dial By Name”On the Dial By Name page, enable this option if you want the receptionist to connect a caller to a specific extension when the caller says that user’s name.
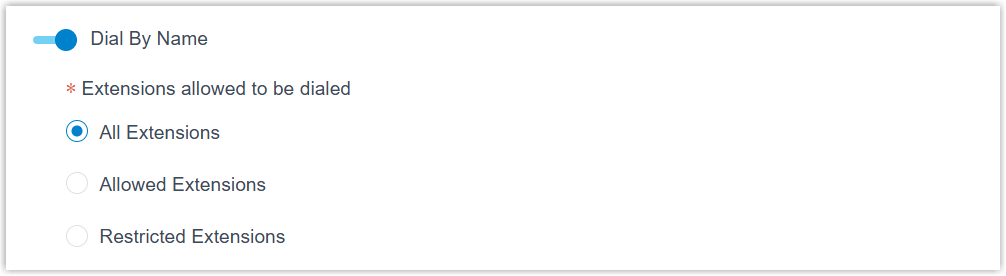
- Turn on the Dial By Name switch.
- Under Extensions allowed to be dialed, choose which extensions are in scope:
- All Extensions: every extension can be reached.
- Allowed Extensions: only the extensions you pick can be reached. Move them from the Available box to the Selected box.
- Restricted Extensions: the extensions you pick cannot be reached, and every other extension can. Move the ones to block from the Available box to the Selected box.
- Click Next.
Failover Destination
Section titled “Failover Destination”On the Failover Destination page, decide where a call should go when the receptionist can’t resolve the caller’s request or match one of your transfer rules.

-
In the Failover Destination drop-down list, choose a destination type:
-
Extension
-
Inbound Queue
-
Ring Group
-
Conference
-
Call Flow
-
IVR (Interactive Voice Response, an automated menu callers navigate with their keypad)
-
Group Voicemail
-
-
In the field that appears, select the exact destination.
Result
Section titled “Result”-
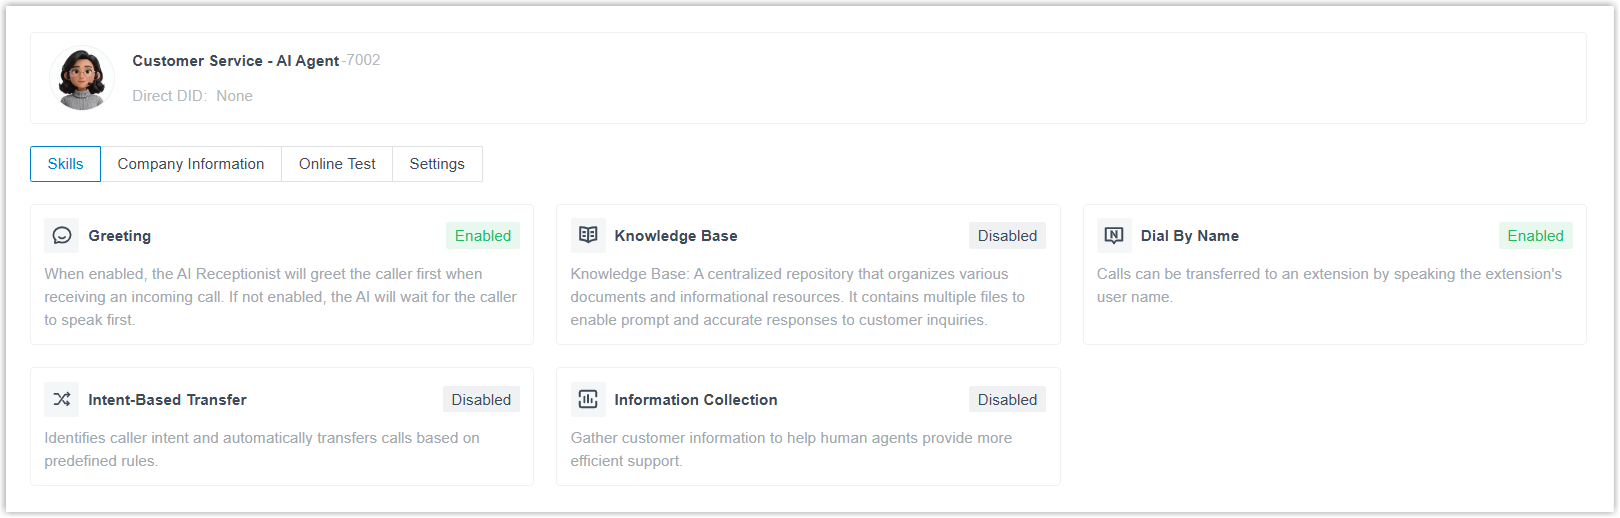
The AI receptionist is created.
-
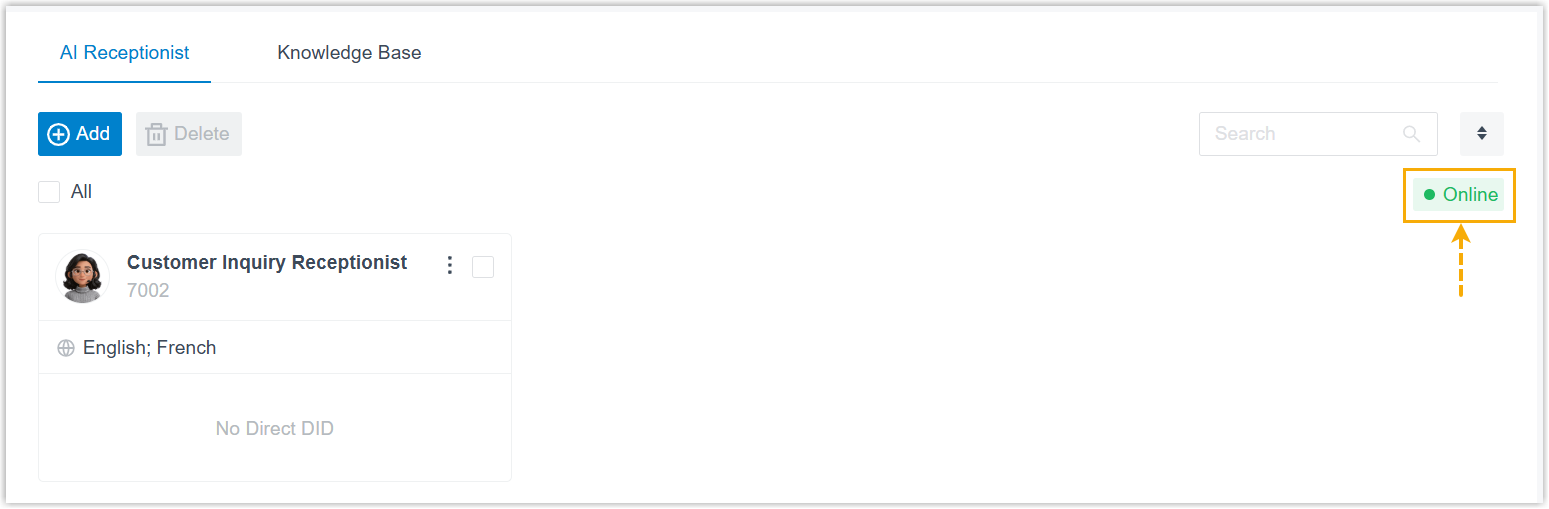
Back on the AI receptionist list, the feature’s global status reads Online, which means it has connected successfully and is ready to take calls.
What to do next
Section titled “What to do next”Question about this page?
Ask the AI assistant. It starts from this page, then searches the rest of the docs.
Ask Cloud Voice AI
Answers are AI-generated from the docs and may contain mistakes. Verify with the linked pages.