
Get Data from the Cloud Voice Database
Cloud Voice can expose its underlying system database so that reporting tools and other third-party software can read records such as call detail records (CDRs) directly. This page walks you through granting database access from the PBX (Private Branch Exchange) web portal and then connecting to it with the Navicat for MySQL client.
The work happens in two stages: first you enable and secure access on the PBX, then you build a connection from your MySQL client.
Grant access to the PBX database
Section titled “Grant access to the PBX database”-
Sign in to the PBX web portal and navigate to Integrations > Database Grant.
-
Enable the Database Grant switch, then set the credentials that external software will use to connect.

- User Name: Keep the automatically generated user name, or replace it with one of your own.
- Password: Keep the automatically generated password, or replace it with one of your own.
-
Under Permitted IP, define which addresses are allowed to reach the database.

-
Click Add.
-
Enter the permitted IP address and subnet mask. For example, entering the public IP address of your current network (
110.80.36.162) with a subnet mask of255.255.255.0lets every host on that network connect.
-
-
Click Save, then Apply. The PBX now displays the Database Address and Port; these values are fixed and cannot be edited.

Connect with Navicat for MySQL
Section titled “Connect with Navicat for MySQL”-
Open Navicat for MySQL on your computer.
-
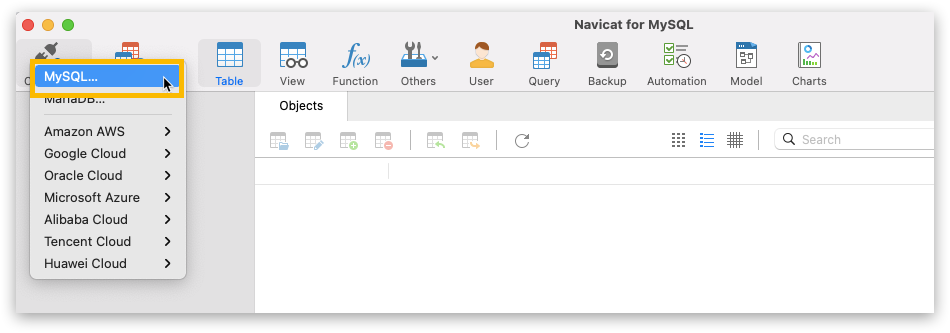
Click Connection and choose MySQL.
-
In the dialog that appears, fill in the connection details:
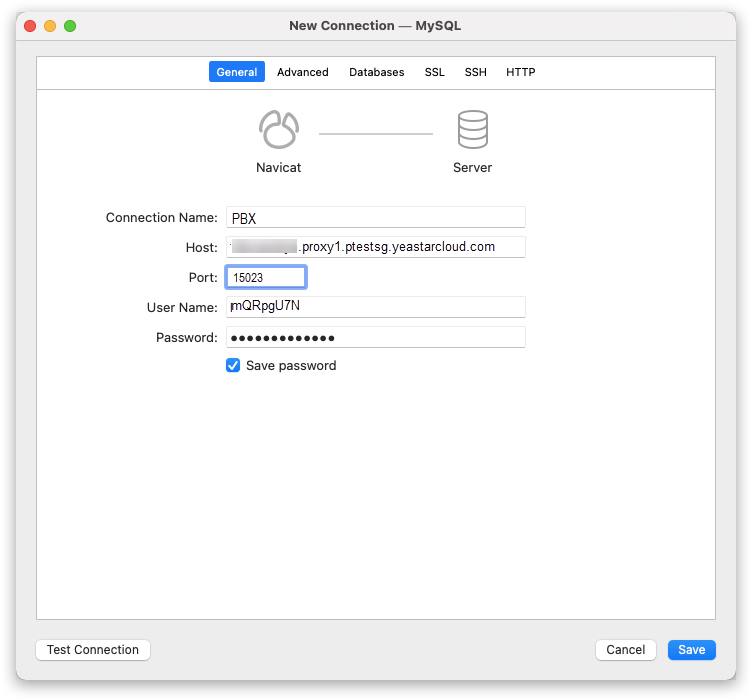
- Connection Name: Any label that helps you recognize this connection.
- Host: The database address shown on the PBX.
- Port:
15023. - User Name: The user name you configured on the PBX (for example,
mQRpgU7N). - Password: The password you configured on the PBX (for example,
Ydugei296kd).
-
Click Save.
-
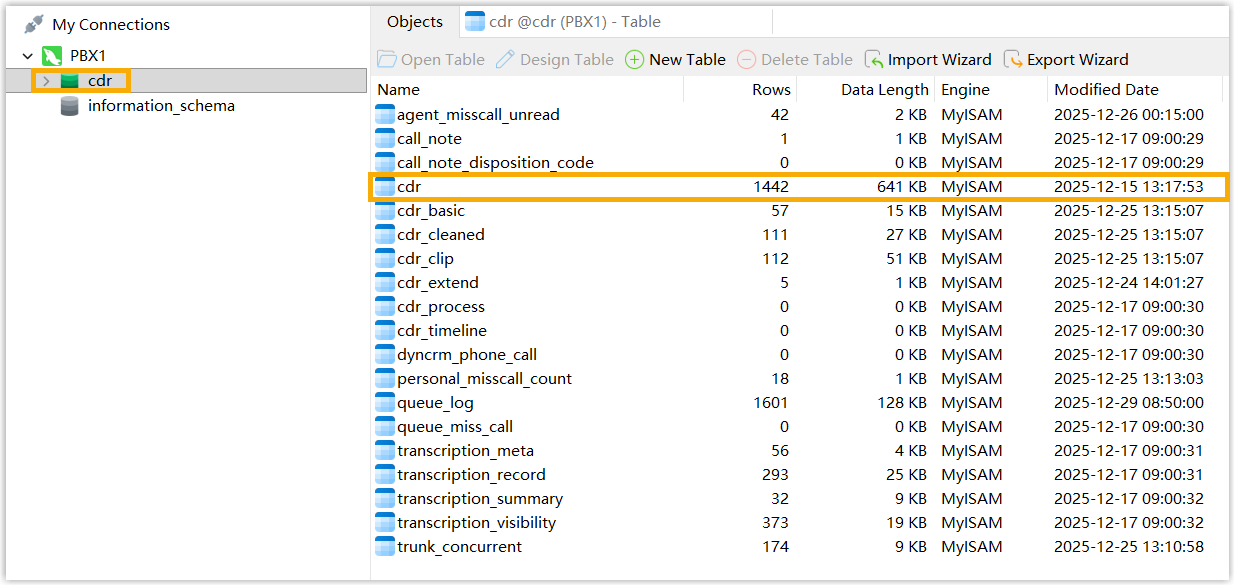
Double-click the connection to open it, then select a table to view its data.
Question about this page?
Ask the AI assistant. It starts from this page, then searches the rest of the docs.
Ask Cloud Voice AI
Answers are AI-generated from the docs and may contain mistakes. Verify with the linked pages.