
Extension Call Accounting Details Report
The Extension Call Accounting Details report itemizes the charge for each outbound call an extension makes over a given trunk (the connection that carries calls to and from the phone network). Use it when you need line-by-line billing detail rather than a summary. This page explains how to open the report and what each figure represents.
Prerequisites
Section titled “Prerequisites”At least one call rate rule must already be in place, since the report prices calls against the rates you define.
Open the report
Section titled “Open the report”-
Sign in to the PBX (Private Branch Exchange, your phone system) web portal and go to Reports and Recordings > Call Reports.
-
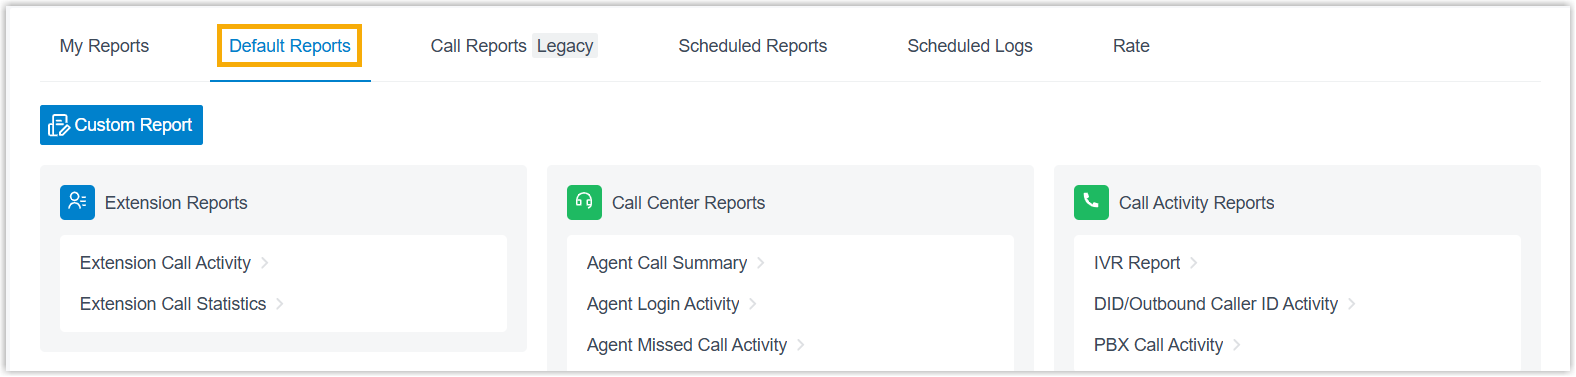
Open the Default Reports tab.
-
In the Accounting Reports pane, select Extension Call Accounting Details.
-
Define what the report should include.

- Use the Time field to set the date and time range the report covers.
- Narrow the results by extension, extension group, organization, PIN (Personal Identification Number) code, or trunk.
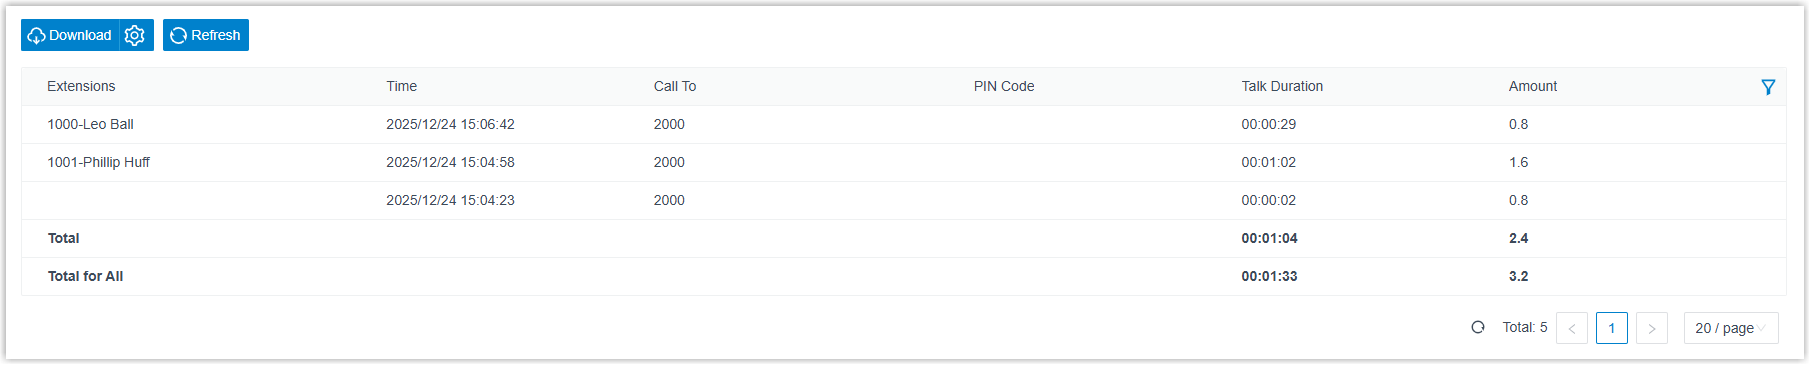
Entries matching your filters load on the page.
Adjust the columns
Section titled “Adjust the columns”Reshape the table so the figures you track stay in view.
-
Show or hide columns: Select the filter icon, then choose which columns to display.

-
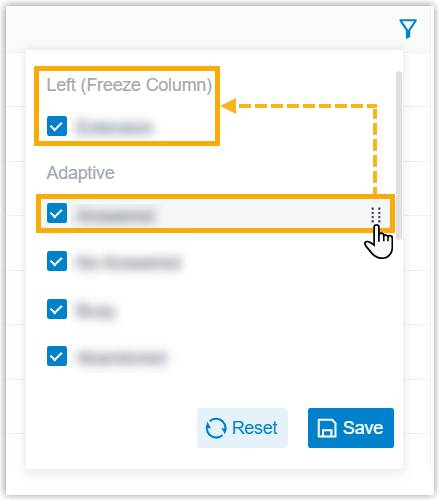
Pin a column: Select the drag handle beside a field and move it to Left (Freeze Column) or Right (Freeze Column).
-
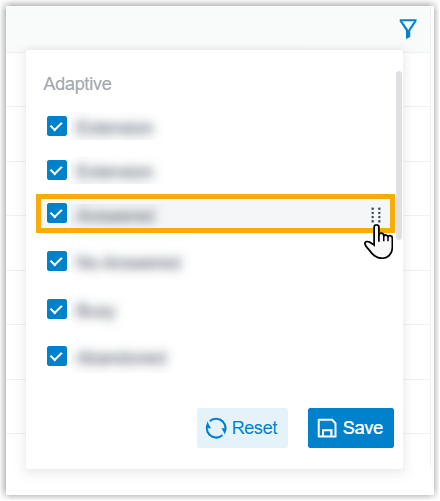
Reorder columns: Select the drag handle beside a field and drop it in the position you want.
Save, schedule, or download
Section titled “Save, schedule, or download”When the report is set up the way you like, keep it for reuse, have it emailed automatically, or export a copy.
Save to My Reports
Section titled “Save to My Reports”Store the report in your My Reports list so you can reopen it without rebuilding the filters.
- At the bottom of the page, select Add to My Reports.
- Enter a name that identifies the report, and tweak the filters or metrics if needed.
- Select Save.
Schedule automatic delivery
Section titled “Schedule automatic delivery”Have the report emailed on a recurring basis.
- At the bottom of the page, select Add to Scheduled Reports.
- Complete the remaining fields as described in Schedule call reports.
Download a copy
Section titled “Download a copy”Export the report to your computer for offline review or further analysis.
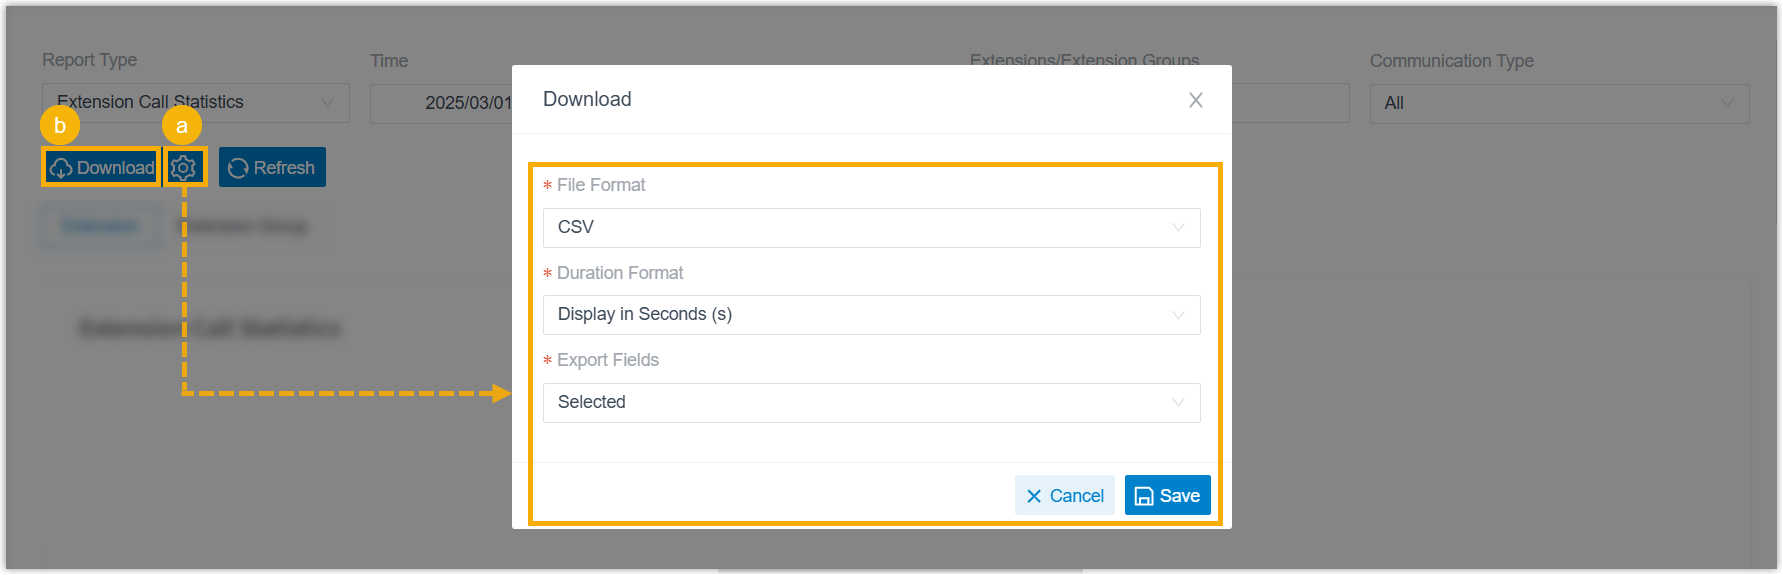
- Optional: Select the settings icon to change how the file is exported, then save your changes:
- File Format: Export as CSV, XLS, HTML, or PDF.
- Duration Format: Show every duration field either Display in Second (s) or Display as HH:MM:SS.
- Export Fields: Include All fields or only the Selected ones.
- Select Download.
Report details
Section titled “Report details”Each row describes a single outbound call. The columns are:
| Metric | Description |
|---|---|
| Time | When the outbound call was placed. |
| Call To | The number that was dialed. |
| PIN Code | The PIN entered to place the call through a restricted outbound route. |
| Talk Duration | The elapsed time from when the call was answered until it ended. |
| Amount | The charge for the call. |
Question about this page?
Ask the AI assistant. It starts from this page, then searches the rest of the docs.
Ask Cloud Voice AI
Answers are AI-generated from the docs and may contain mistakes. Verify with the linked pages.