
Set up an Inbound Route
An inbound route tells Cloud Voice what to do with calls that arrive from the outside world. Before external callers can reach anyone on your system, at least one inbound route must be in place.
Cloud Voice ships with a default route that sends every incoming call to an IVR (interactive voice response menu, the automated “press 1 for sales” prompt). You can leave that route as-is, or delete it and build your own routes that match how your organization actually handles calls.
Before you begin
Section titled “Before you begin”Set up at least one trunk so that external callers have a way to dial in. Without a trunk, an inbound route has nothing to receive calls from.
Create the route
Section titled “Create the route”-
Sign in to the PBX (Private Branch Exchange) web portal, the admin interface for your phone system, and go to Call Control > Inbound Route, then click Add.
-
In the Name field, enter a label that will help you recognize the route later.
-
Optional: Enter an alert info text. Cloud Voice adds this value to the Alert-Info header of the INVITE request (the SIP message that sets up an incoming call) for calls on this route. When a phone receives the call, it reads the Alert-Info header to decide which ring tone to play, so you can give this route a distinctive ring.
-
In the Trunk section, move the trunks you want to use from the Available box to the Selected box. Any call that comes in on a selected trunk number will be handled by this route.
-
Optional: To route calls by the number the caller dialed, known as the DID (Direct Inward Dialing) number, fill in the DID Pattern field. Only calls whose dialed number matches the pattern will follow this route.
For details and examples, see Route Inbound Calls based on DID Numbers.
-
Optional: To route calls by who is calling, fill in the Caller ID Pattern field. Only calls whose Caller ID matches the pattern will follow this route.
For details and examples, see Route Inbound Calls based on Caller ID.
-
Set the destination for the route.
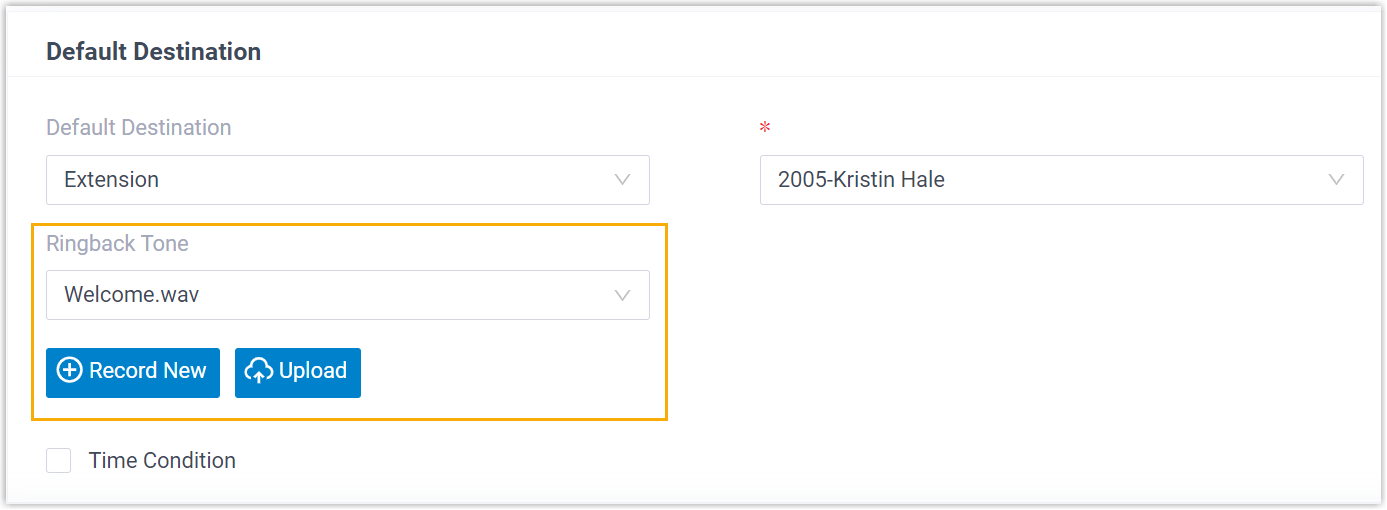
Choose one of the following approaches:
-
Send every call to the same place. Leave Time Condition unselected and set the Default Destination.
-
Send calls to different places depending on the time of day. Select the Time Condition checkbox, then:
-
Pick an option from the Time-based Routing Mode drop-down list.
-
Set a destination for each time period. When a call arrives during a given period, Cloud Voice sends it to the matching destination.
-
Optional: Select Ignore the Holiday Destination if you want calls during holidays handled by your normal business-hours and after-hours destinations instead of a separate holiday destination.
-
Optional: Select Play Holiday Prompt During Holidays to play an announcement before a call is routed to the holiday destination.
For time-based routing examples, see:
-
-
-
Optional: To accept faxes on this route, turn on Fax Detection and choose where faxes should go:
-
Extension: Faxes are delivered to the extension you select. That extension must be registered on a SIP (Session Initiation Protocol) compatible fax machine.
-
Fax to Email: Faxes are converted to attachments and emailed to the address on an extension.
For more about fax handling, see Fax Overview.
-
-
Click Save, then Apply.
Question about this page?
Ask the AI assistant. It starts from this page, then searches the rest of the docs.
Ask Cloud Voice AI
Answers are AI-generated from the docs and may contain mistakes. Verify with the linked pages.