
Auto Provision TA FXS Gateways
Cloud Voice can provision TA-series FXS (Foreign Exchange Station) gateways for you, so you don’t have to configure each device by hand. An FXS gateway connects analog equipment, such as desk phones or fax machines, to your phone system over the network, so each analog port behaves like a normal extension.
The workflow has two halves: you build a configuration file on the PBX (Private Branch Exchange, your phone system), copy the provisioning link it produces, and paste that link into the gateway. From then on the gateway pulls its settings remotely, which makes it easy to deploy hardware that lives at another site.
Supported gateway models
Section titled “Supported gateway models”- TA100, TA200
- TA400, TA800
- TA1600, TA2400, TA3200
Before you begin
Section titled “Before you begin”- Make sure the PBX is running firmware 84.18.0.18 or later.
- Have the gateway’s MAC address (Media Access Control address, the unique hardware ID printed on the device label) on hand.

Step 1. Build the gateway’s configuration file on the PBX
Section titled “Step 1. Build the gateway’s configuration file on the PBX”-
Sign in to the PBX web portal and open Auto Provisioning > Gateways.
-
Click Add.
-
Under Gateway, identify the device:

- Model: Choose the gateway model.
- MAC Address: Enter the gateway’s MAC address.
- Remark: Optional. A short label to help you recognize the device later.
-
Under Options, generate the configuration file:
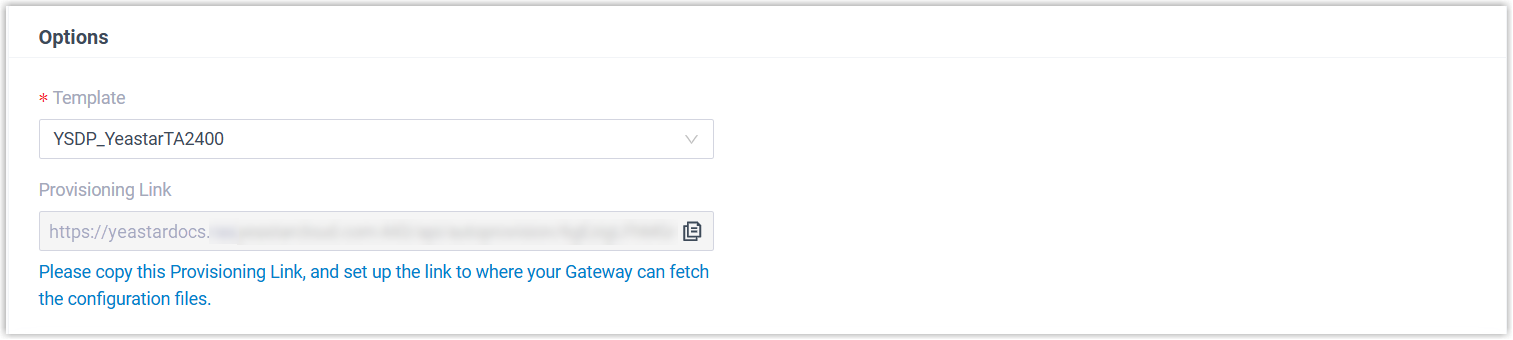
- Template: Pick the matching template from the drop-down list.
- Provisioning Link: Click the copy icon next to the link and keep it somewhere handy, you’ll paste it into the gateway in Step 2.
-
Under Assign Extension, map extensions to the gateway’s ports:
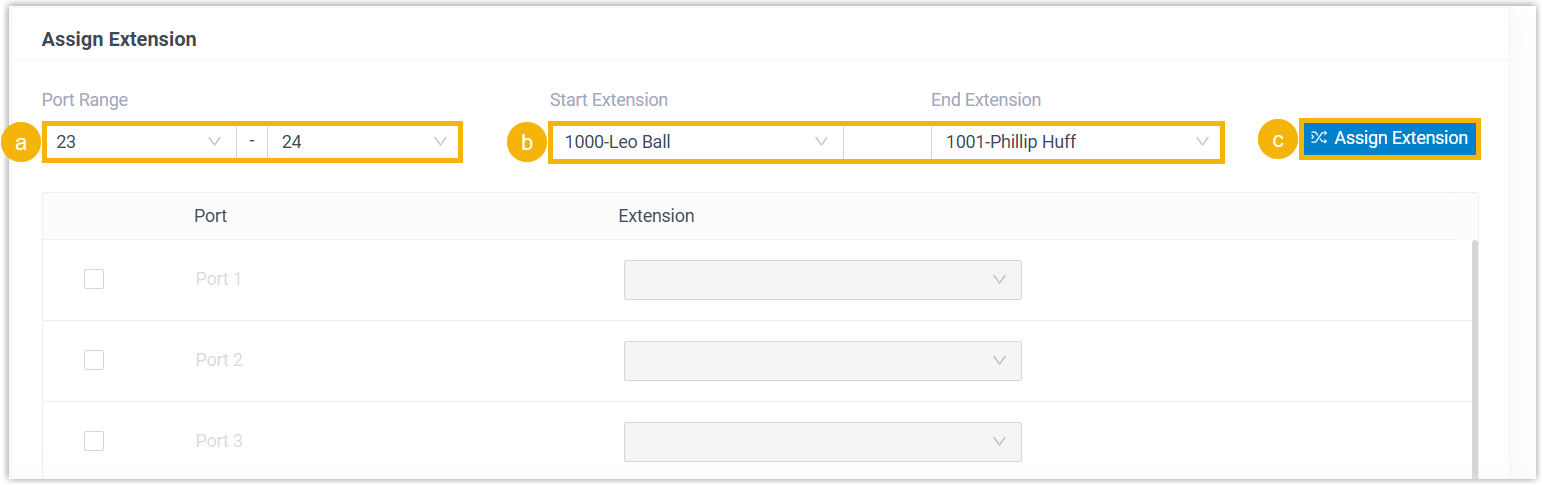
- In Port Range, choose the ports you want to fill.
- In Start Extension and End Extension, choose the extension range to hand out across those ports.
- Click Assign Extension. The port-to-extension pairings appear below.
-
Optional. Under Preference, adjust these as needed:

-
Key as Send: Choose the pound key (
#) or asterisk key (*) that a caller presses to tell the gateway the dialed number is complete so it places the call right away. -
SIP VoIPServer IDX: Select the VoIP (Voice over Internet Protocol) server template ID to provision. This is the SIP (Session Initiation Protocol, the signaling standard that sets up and tears down calls) server the gateway will register to.
-
Admin Password: Set the password for the gateway’s web interface.
-
LAN Settings: Leave at the default (LAN, Local Area Network, the gateway’s network settings).
-
-
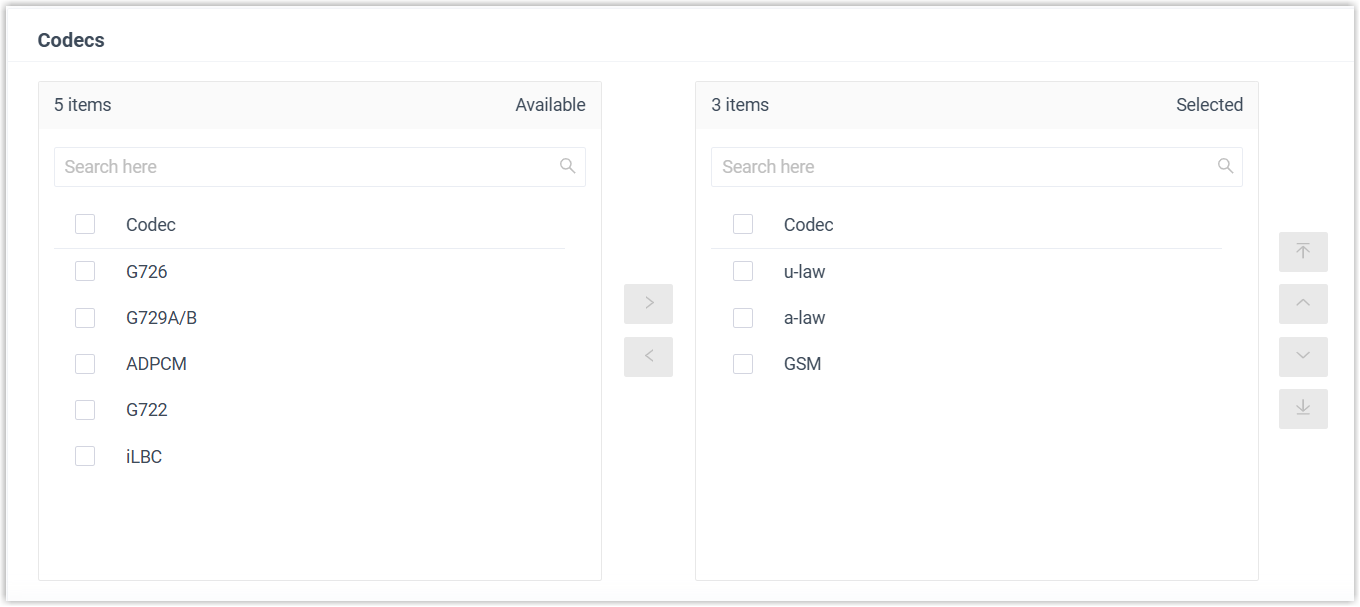
Optional. Under Codecs, choose the codec list you want the gateway to use. A codec (coder-decoder) is the format that compresses and decompresses call audio.
-
Click Save.
Step 2. Point the gateway at the configuration file
Section titled “Step 2. Point the gateway at the configuration file”-
Sign in to the gateway’s web interface and open System > System Preferences > Auto Provision Settings.
-
Under Provision Method, set Server URL to Yes.

-
Under Server Address, finish the setup:

- In the Server URL field, paste the provisioning link you copied from the PBX in Step 1.
- Set the time when auto provisioning should run.
-
Click Save, then Apply Changes.
Result
Section titled “Result”When the scheduled time arrives, the gateway downloads its configuration and registers the assigned extensions on the matching ports. You can confirm registration from either end:
-
On the gateway: Go to Status > System Status > FXS Port Status. A registered port shows OK.

-
On the PBX: Go to Extension and Trunk > Extension > Online Status. A registered extension shows the SIP-connected indicator.

Question about this page?
Ask the AI assistant. It starts from this page, then searches the rest of the docs.
Ask Cloud Voice AI
Answers are AI-generated from the docs and may contain mistakes. Verify with the linked pages.