
Manually Switch Extension Presence
As an administrator you can set an extension’s presence status yourself from the Cloud Voice management portal (the web interface for your PBX, or Private Branch Exchange, which is the hosted phone system), instead of waiting for the extension user to change it or for an automatic schedule to switch it. Set it on someone’s behalf when, for example, they have left for the day without updating their status, or you need to place them in Do Not Disturb during a meeting.
Change the presence status
Section titled “Change the presence status”-
Sign in to the Cloud Voice management portal and go to Extension and Trunk > Extension.
-
In the extension list, locate the extension you want to update.
-
In the Presence column for that extension, open the drop-down list and choose the status you want to apply.
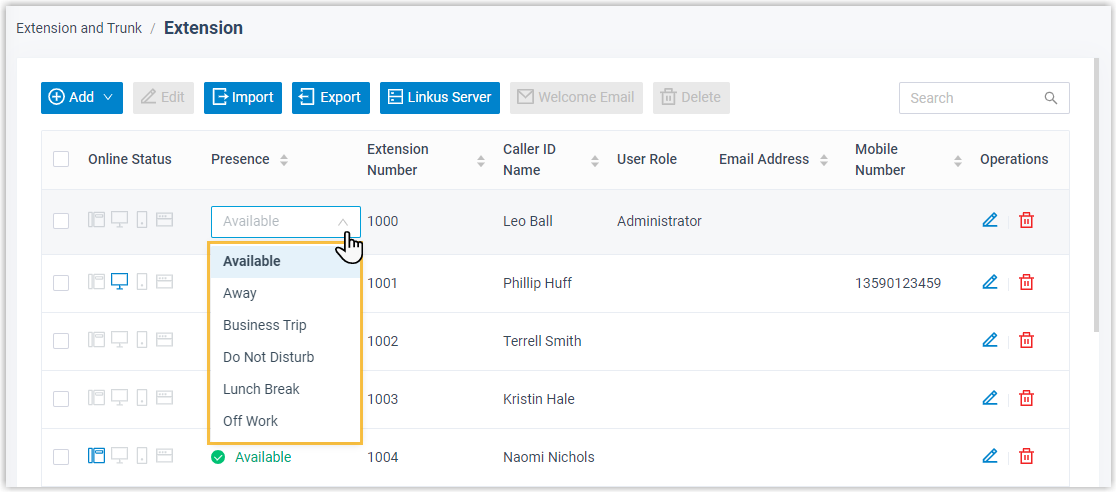
-
Click any empty area of the page to confirm the selection.
-
Click Apply.
Result
Section titled “Result”The extension’s new presence is pushed to its Cloud Voice App sessions, and any presence settings tied to the selected status take effect.
Question about this page?
Ask the AI assistant. It starts from this page, then searches the rest of the docs.
Ask Cloud Voice AI
Answers are AI-generated from the docs and may contain mistakes. Verify with the linked pages.