
Queue Callback Activity Report
When callers choose to be called back rather than wait on hold in a queue, the Queue Callback Activity report captures what happened with each of those callbacks. Use it to confirm that requested callbacks went out, to see how long callers waited before the system reached them, and to investigate any attempts that did not connect. This page covers how to open the report and what each metric represents.
Open the report
Section titled “Open the report”-
Sign in to the Cloud Voice management portal and go to Reports and Recordings > Call Reports.
-
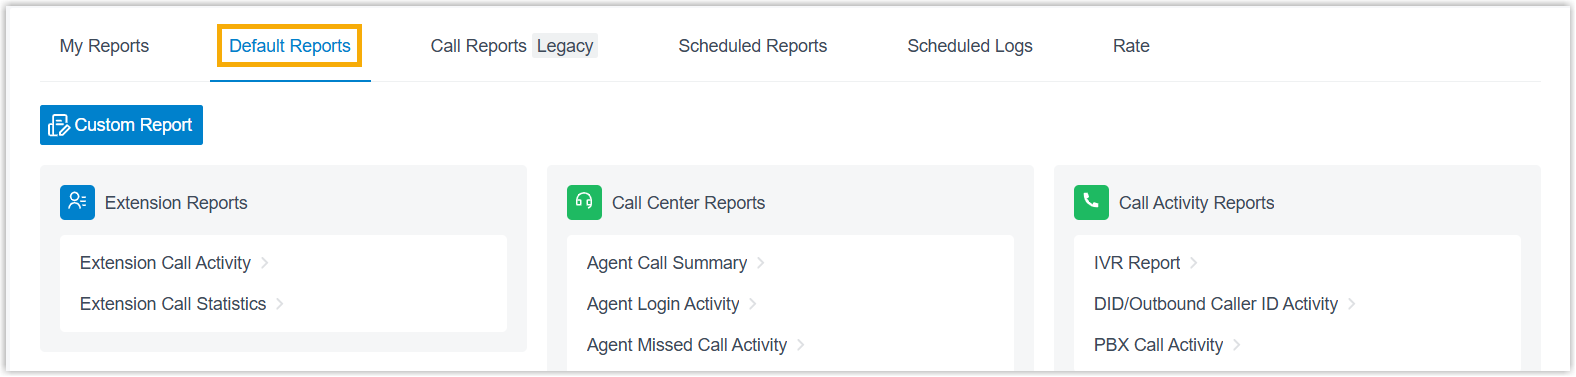
Open the Default Reports tab.
-
In the Call Center Reports pane, select Queue Callback Activity.
-
Set the filters for the report.

- In the Time field, choose the date range you want the report to cover.
- Narrow the results by queue or by callback result.
The report refreshes to show only the entries that match your filters.

Adjust the columns (optional)
Section titled “Adjust the columns (optional)”Shape the table so the metrics you care about stay in front of you.
| Action | How to do it |
|---|---|
| Choose which columns appear | Select the column icon  and pick the columns to show. and pick the columns to show. |
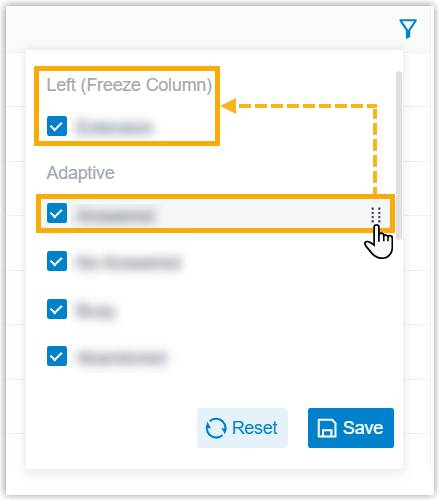
| Freeze a column | Select the handle  next to a field, then drag it to Left (Freeze Column) or Right (Freeze Column). A frozen column stays visible while you scroll the rest of the table sideways. next to a field, then drag it to Left (Freeze Column) or Right (Freeze Column). A frozen column stays visible while you scroll the rest of the table sideways. |
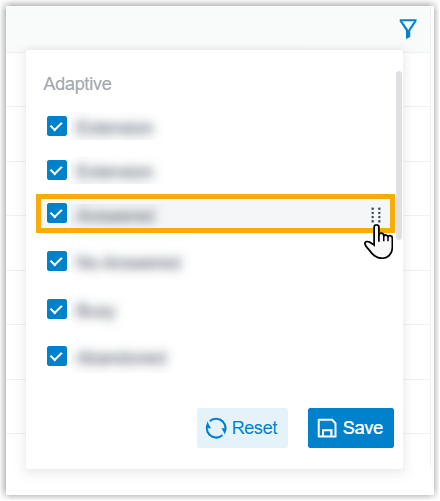
| Reorder columns | Select the handle next to a field and drag it to the position you want. |
Choosing which columns appear:
Freezing a column to the left or right:
Dragging a column into a new position:
Save or schedule the report (optional)
Section titled “Save or schedule the report (optional)”Once the report looks the way you want, you can keep it for quick access or have it delivered by email on a schedule.
Add it to My Reports for one-click access later:
- At the bottom of the page, select Add to My Reports.
- Give the report a name you will recognize, and adjust the filters or metrics if needed.
- Select Save.
Add it to Scheduled Reports to have Cloud Voice email it automatically:
- At the bottom of the page, select Add to Scheduled Reports.
- Complete the delivery schedule and recipient settings, then save.
Download it for offline review or deeper analysis:
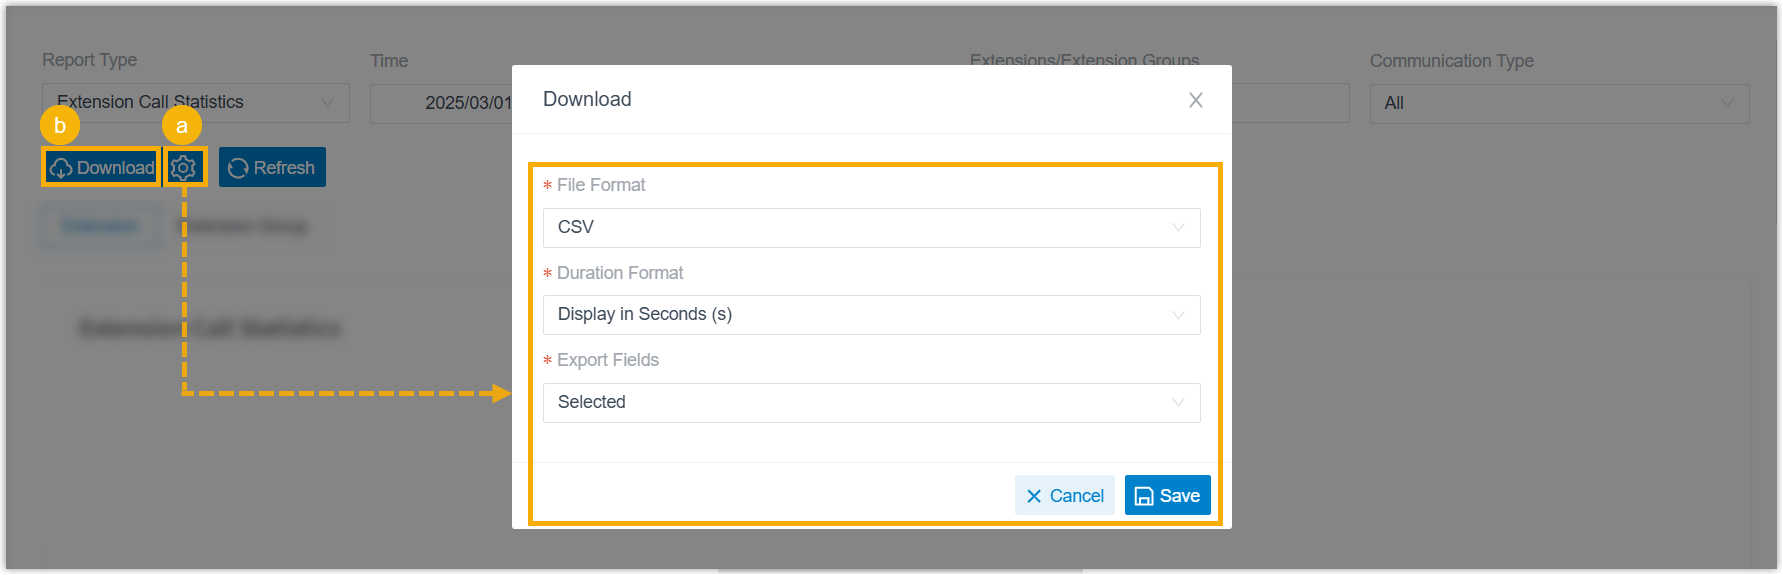
- (Optional) Select the settings icon
 to change how the file is exported, then save your changes:
- File Format: the format of the downloaded file: CSV, XLS, PDF, or HTML.
- Duration Format: how every duration field is shown: Display in Second (s) or Display as HH:MM:SS.
- Export Fields: which fields are included: All or Selected.
- Select Download.
Report metrics
Section titled “Report metrics”| Metric | What it shows |
|---|---|
| Time | When the caller first reached the queue. |
| Call From | The caller ID of the person who called in. |
| Callback Time | When Cloud Voice placed the callback. |
| Callback Number | The number the caller left for the callback. |
| Wait Time | How long passed between the original call and the caller answering the callback. |
| Callback Result | Whether the callback connected. |
| Failed Reason | Why a callback did not go through, when it failed. |
Question about this page?
Ask the AI assistant. It starts from this page, then searches the rest of the docs.
Ask Cloud Voice AI
Answers are AI-generated from the docs and may contain mistakes. Verify with the linked pages.