
Set up a Facebook Channel
A Facebook channel links a Facebook Page to Cloud Voice, letting your agents read and answer Messenger conversations directly from the system. Setting it up spans two places: you build and configure a Meta app on the Meta for Developers portal, then create a matching channel in the Cloud Voice portal and connect the two with a webhook (a URL that Meta calls automatically whenever your Page receives a new message).
Work through the four steps in order, keeping the credentials you copy along the way close at hand.
Step 1. Create a Meta app
Section titled “Step 1. Create a Meta app”Start on the Meta for Developers portal by registering an app for the integration.
-
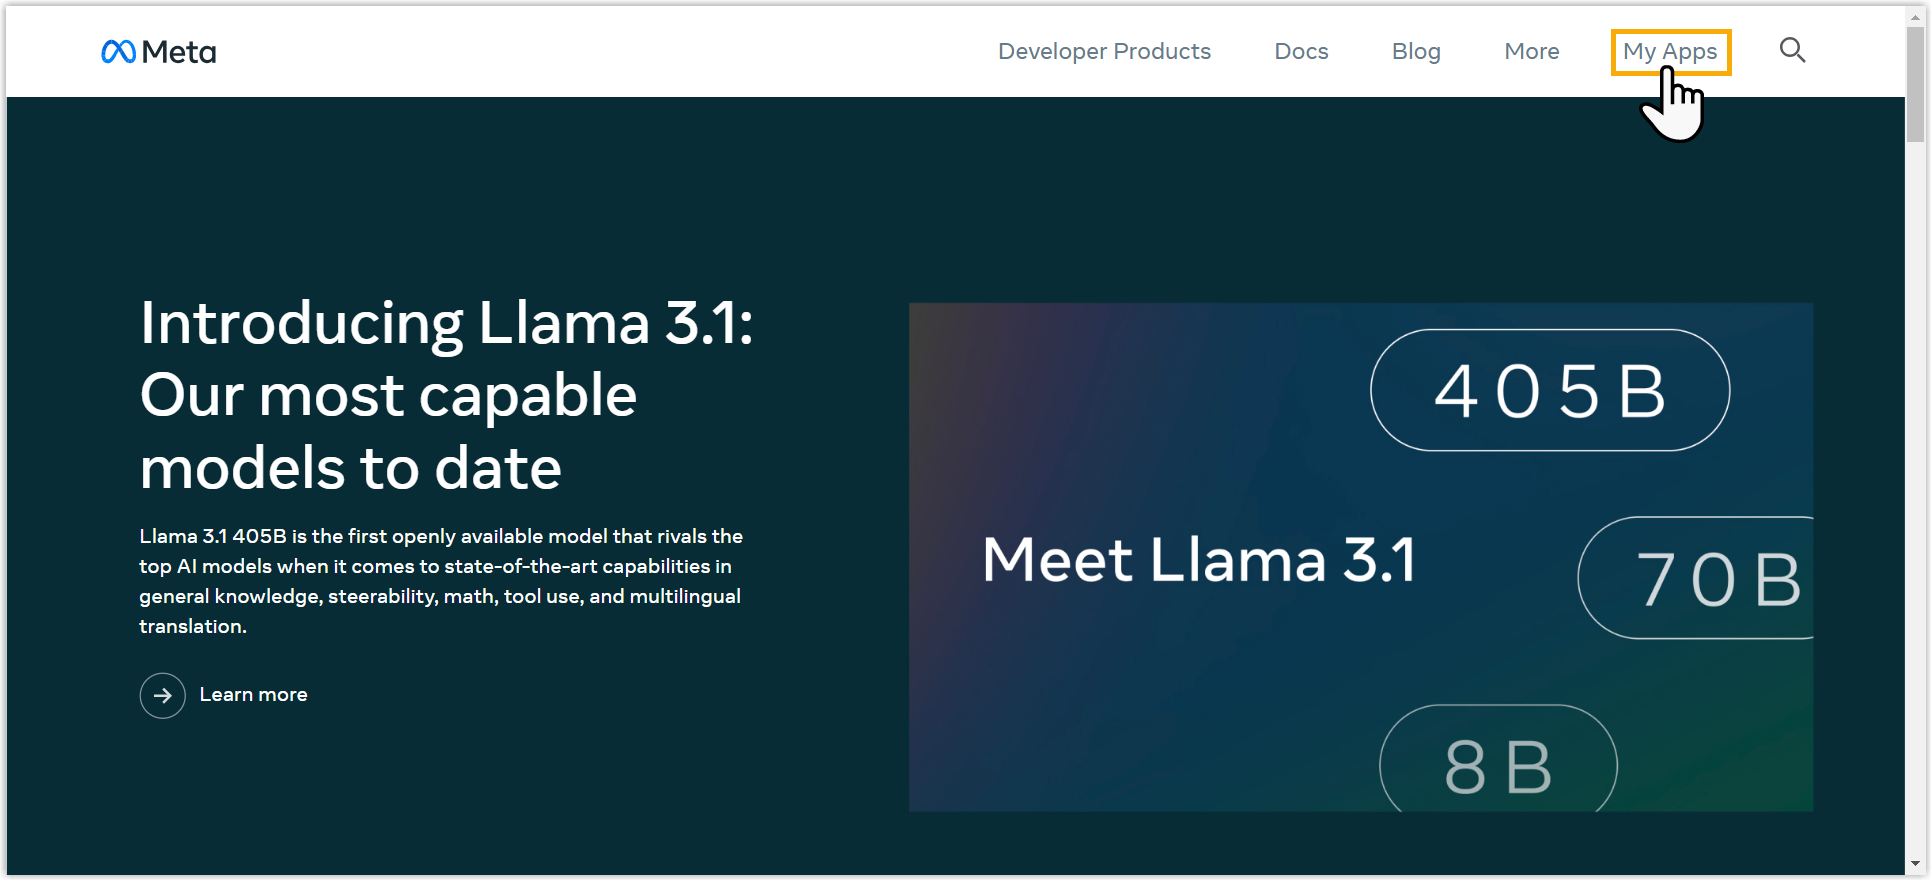
Sign in to the Meta for Developers portal, then open My Apps from the top menu.
-
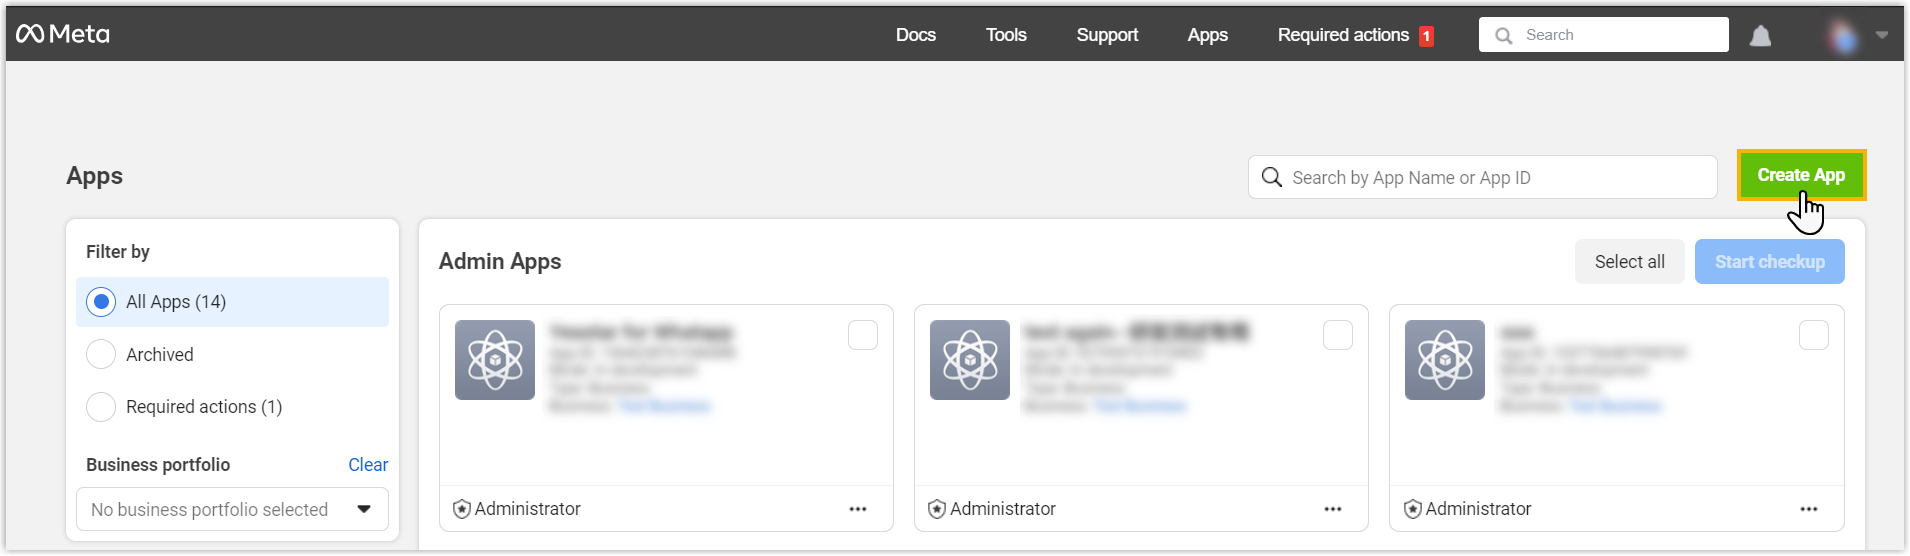
Click Create App in the top-right corner.
-
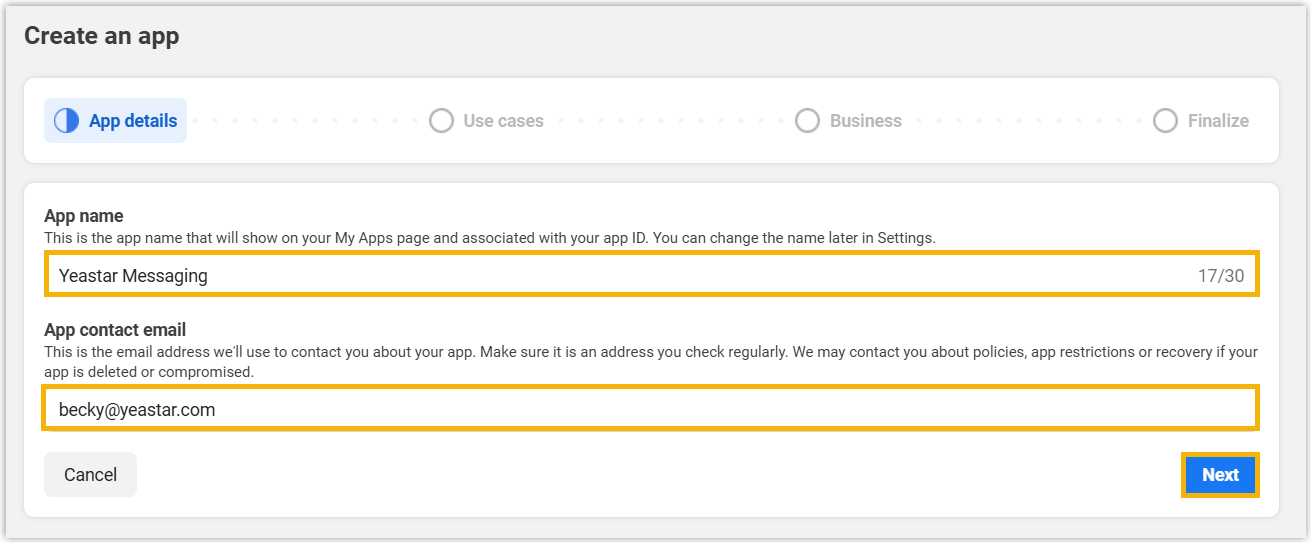
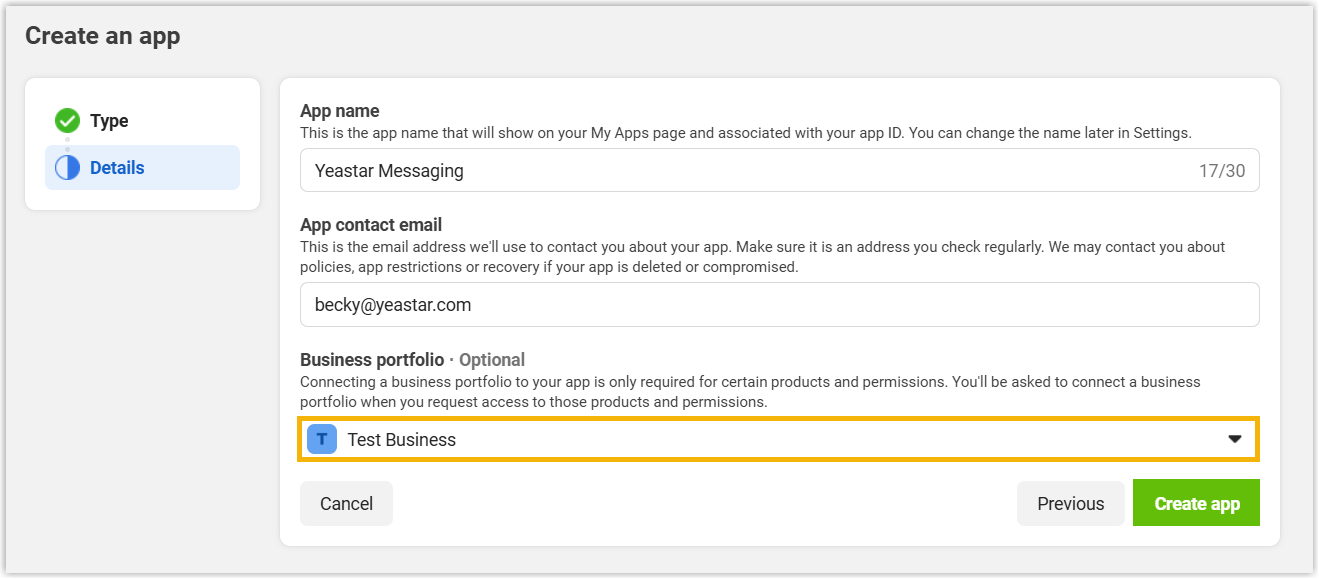
Under App details, fill in an app name and a contact email, then click Next.
-
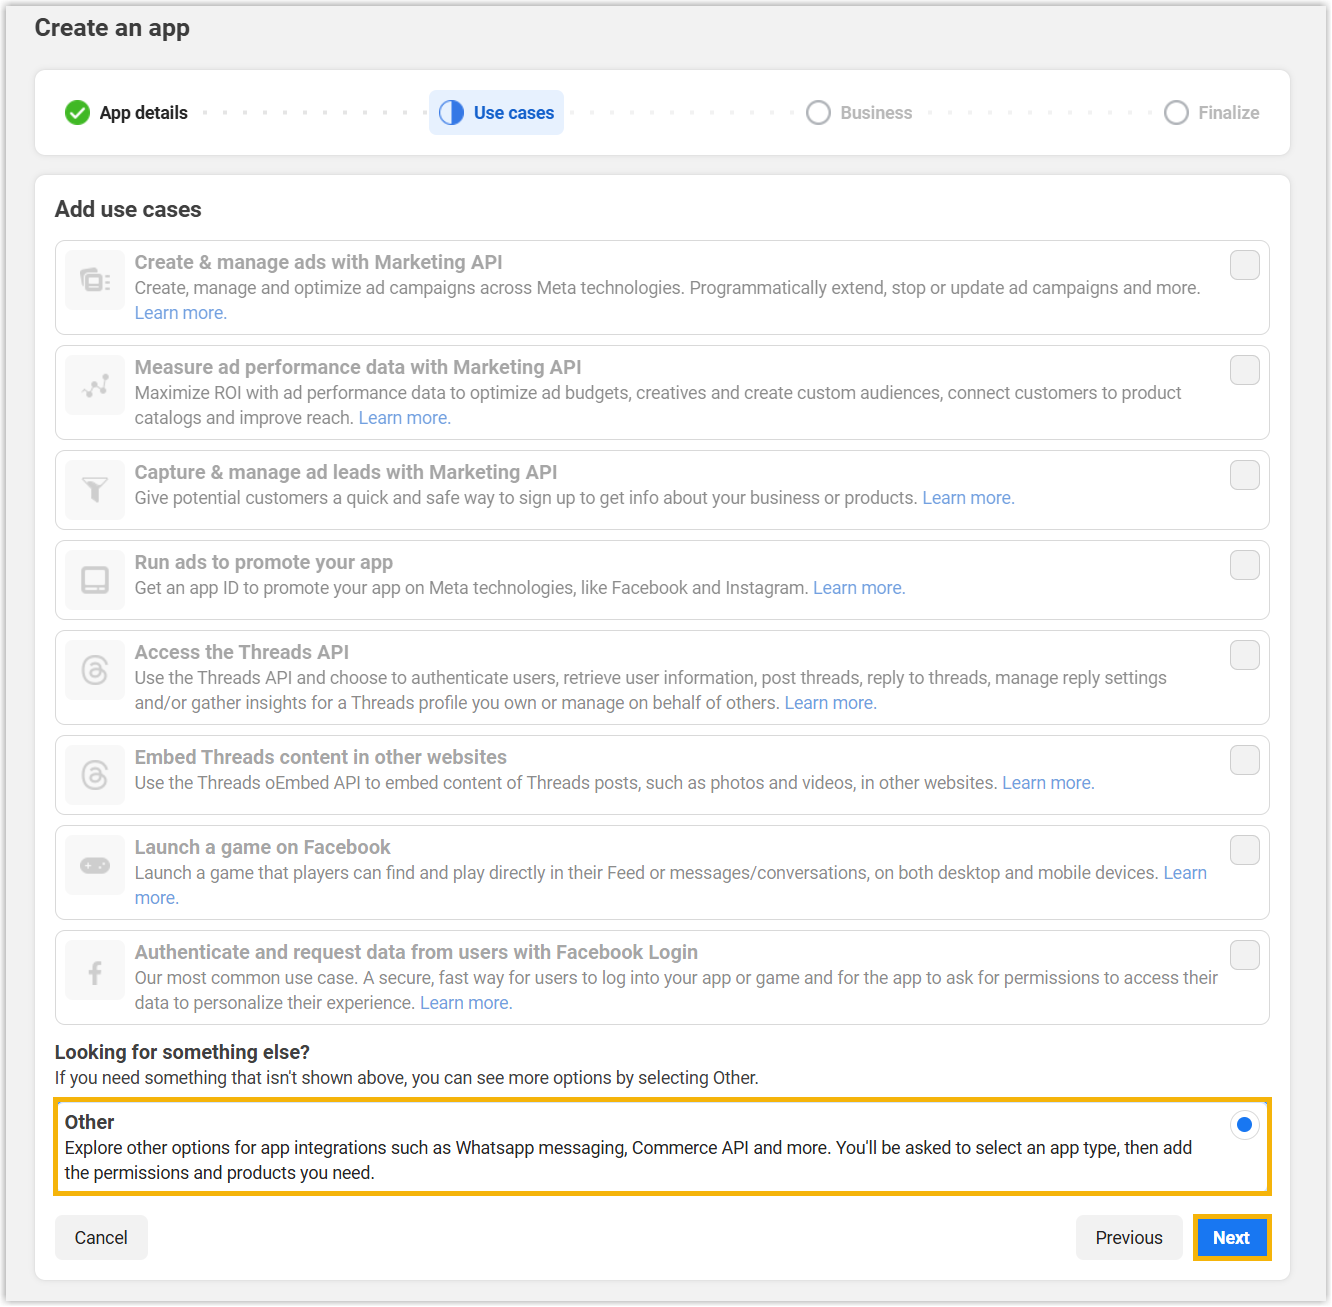
Under Use cases, choose Other, then click Next.
-
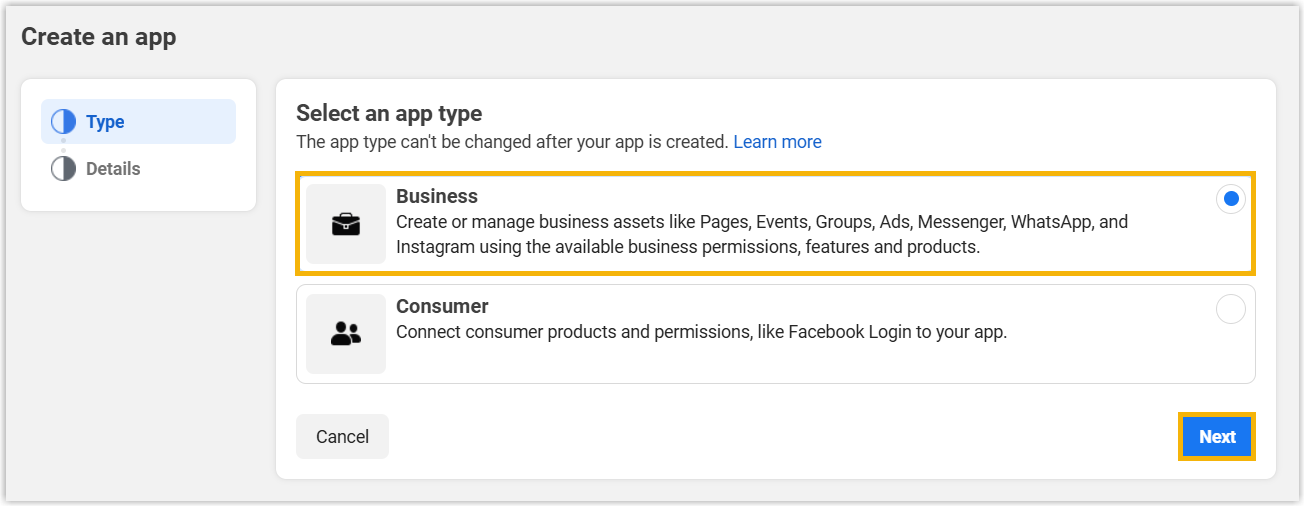
For App type, select Business, then click Next.
-
Under App details, pick the Meta business portfolio you want to use.
-
Click Create app.
The app is created and Meta takes you to the App Dashboard.
Step 2. Set up the Meta app
Section titled “Step 2. Set up the Meta app”Next, add the Messenger platform to the app and gather the three credentials Cloud Voice needs: an access token, the App Secret, and your Page’s name and ID.
-
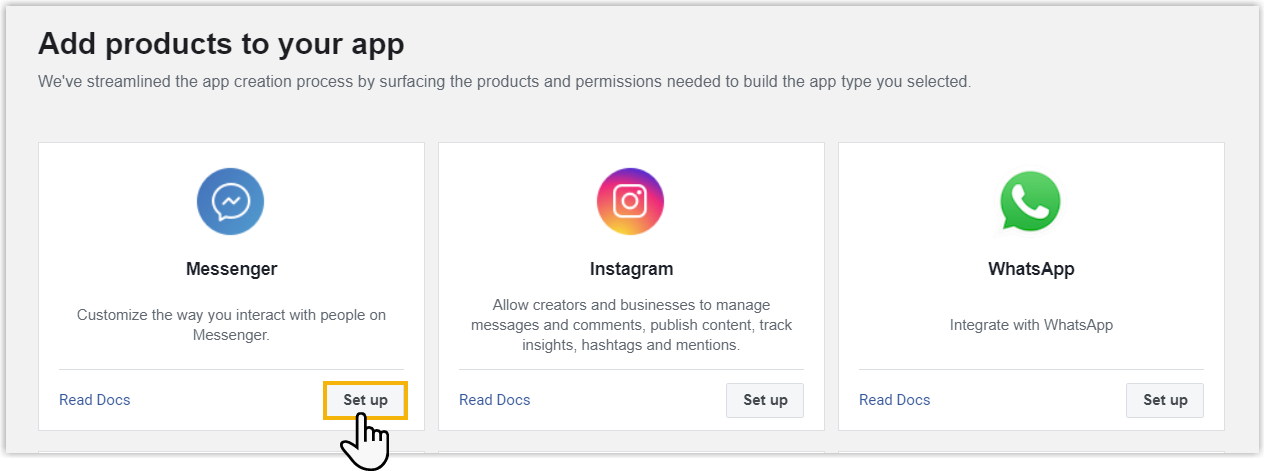
On the Add products to your app page, click Set up on Messenger. Meta opens the Messenger API configuration page.
-
Connect the app to your Facebook Page and generate an access token.
a. Scroll to the 2. Generate access tokens section and click Connect to add your Facebook Page.
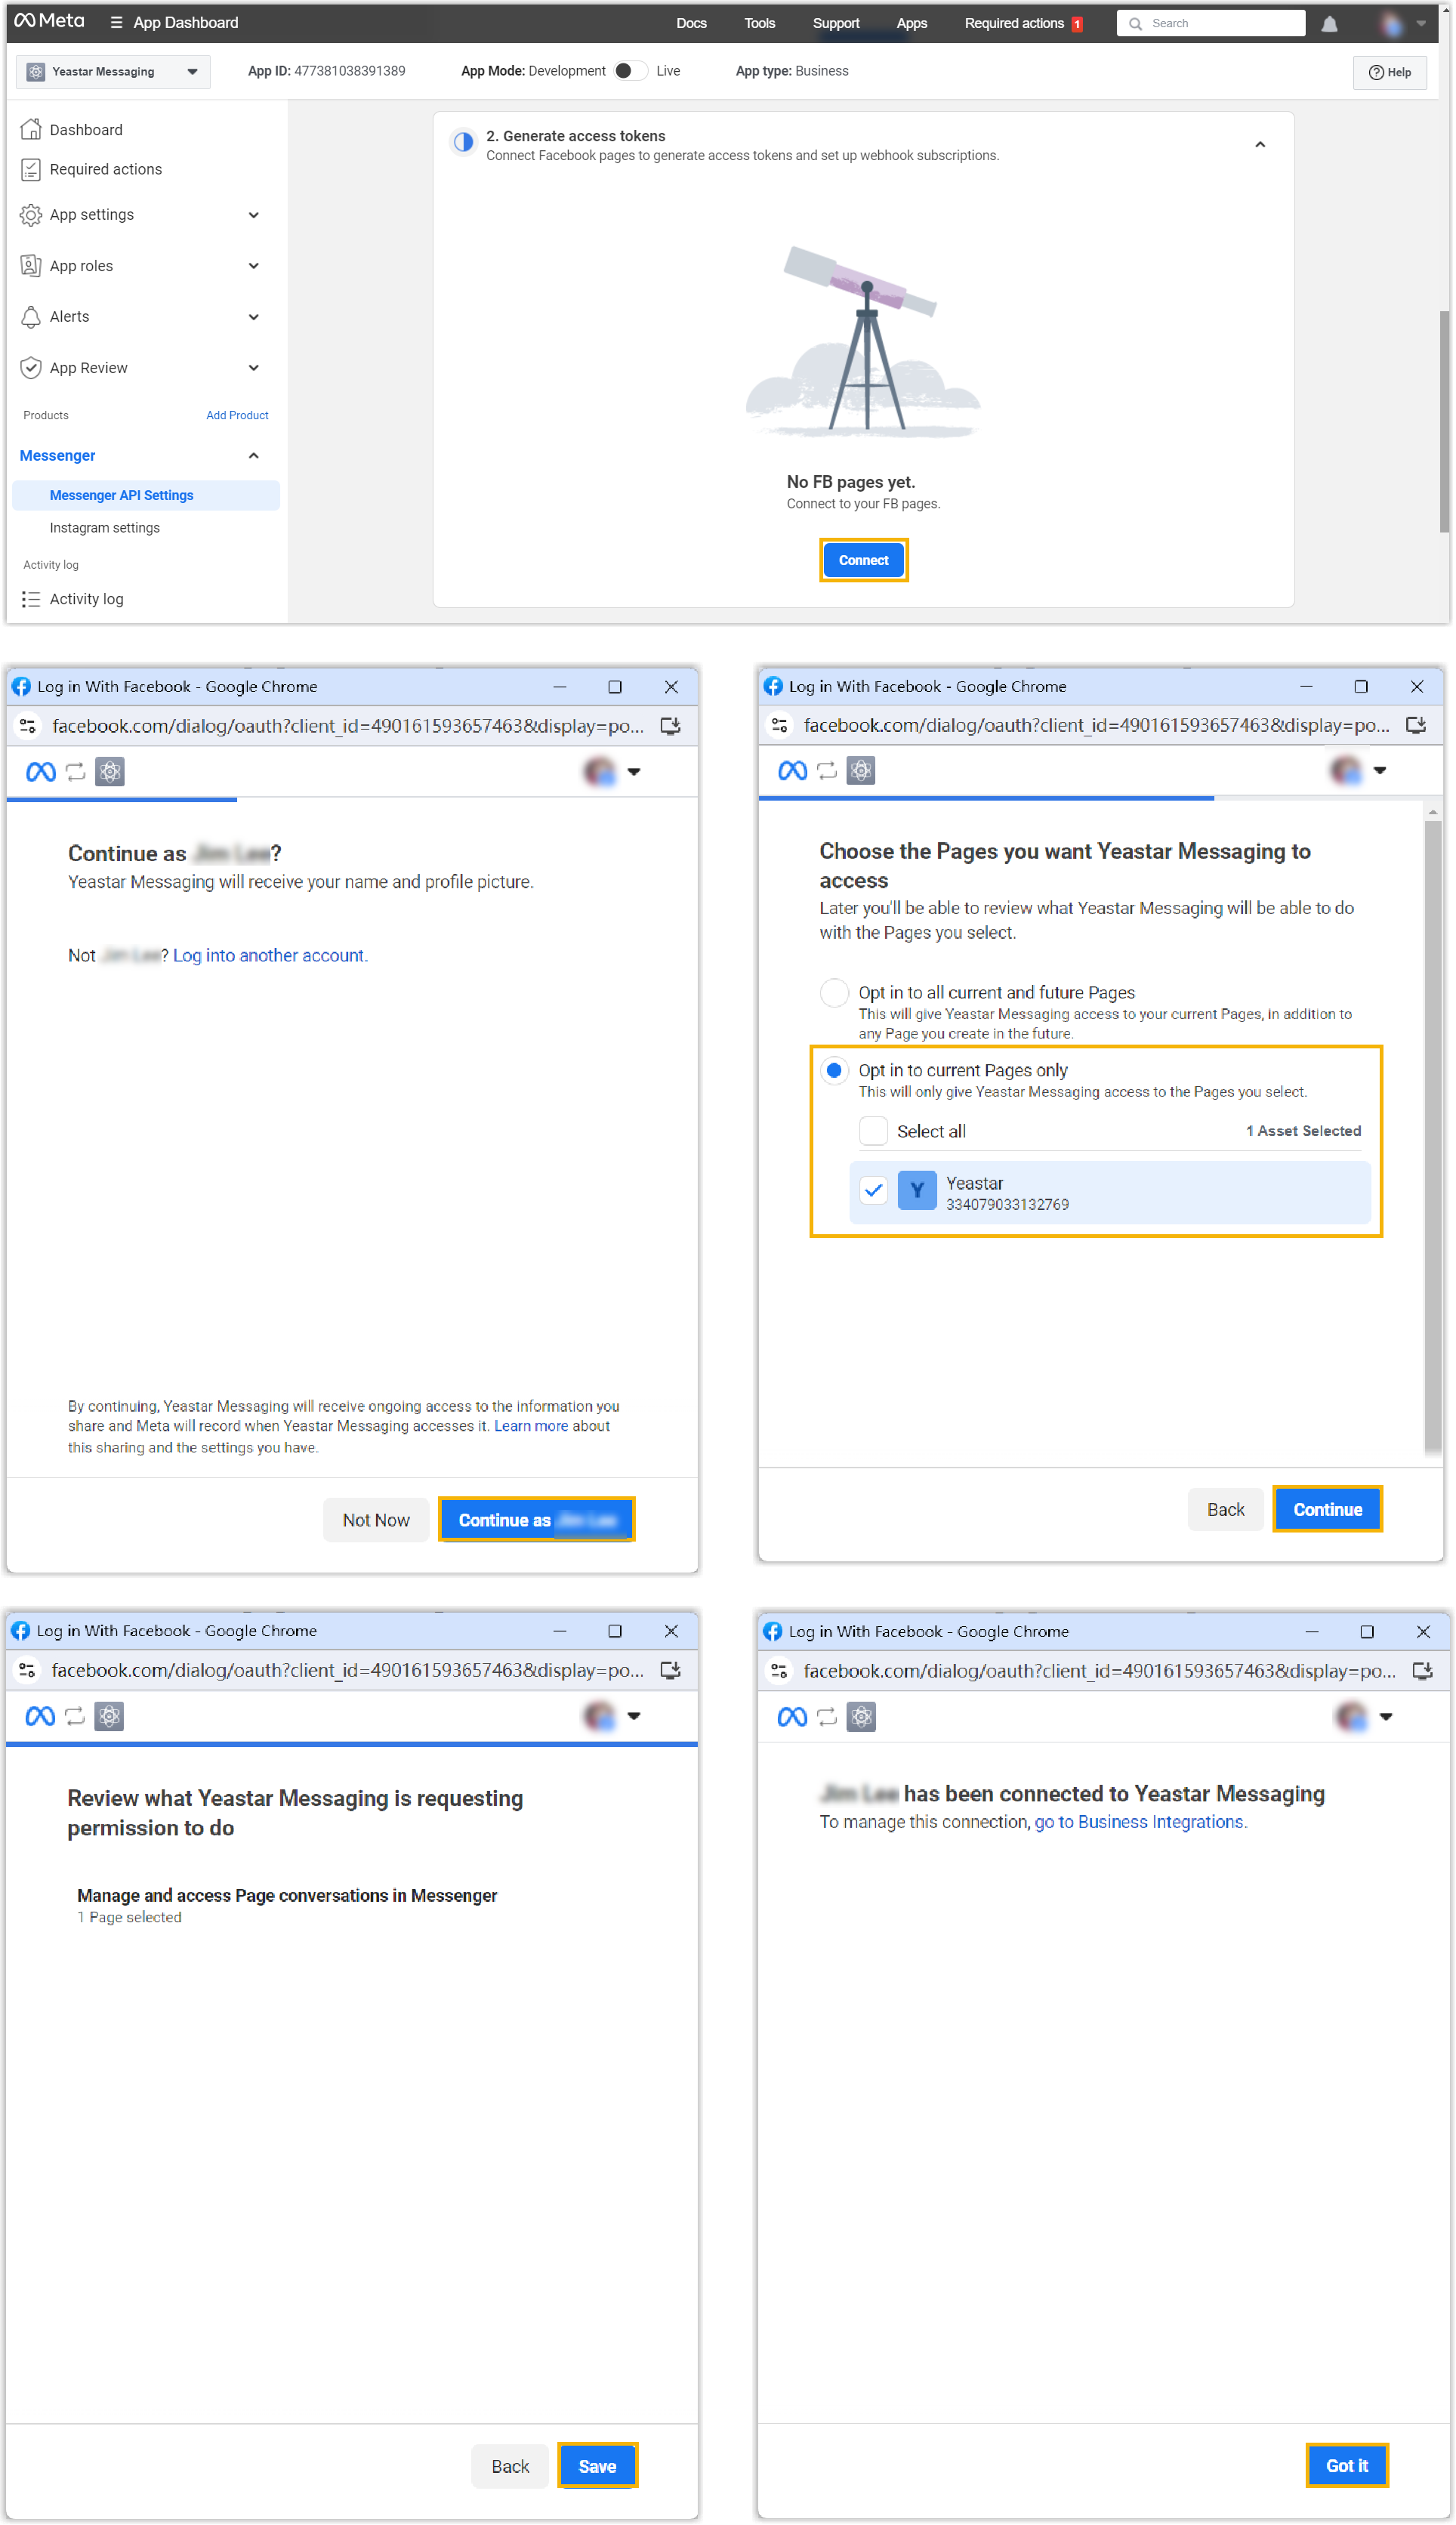
Refresh the page; your Facebook Page now appears as connected.
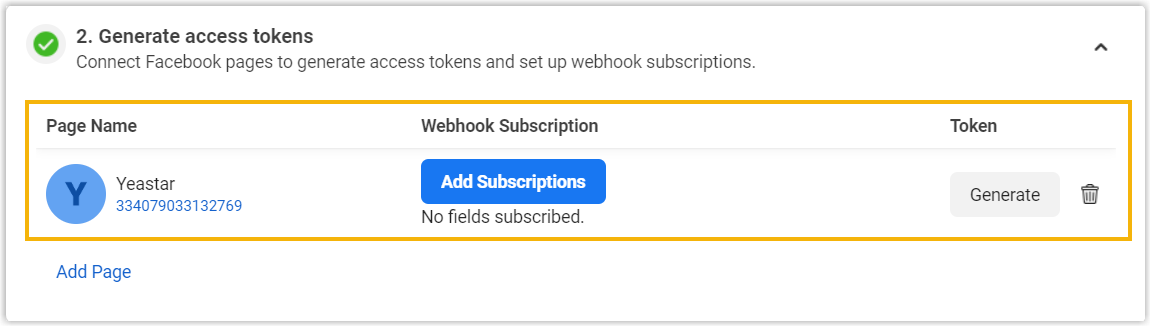
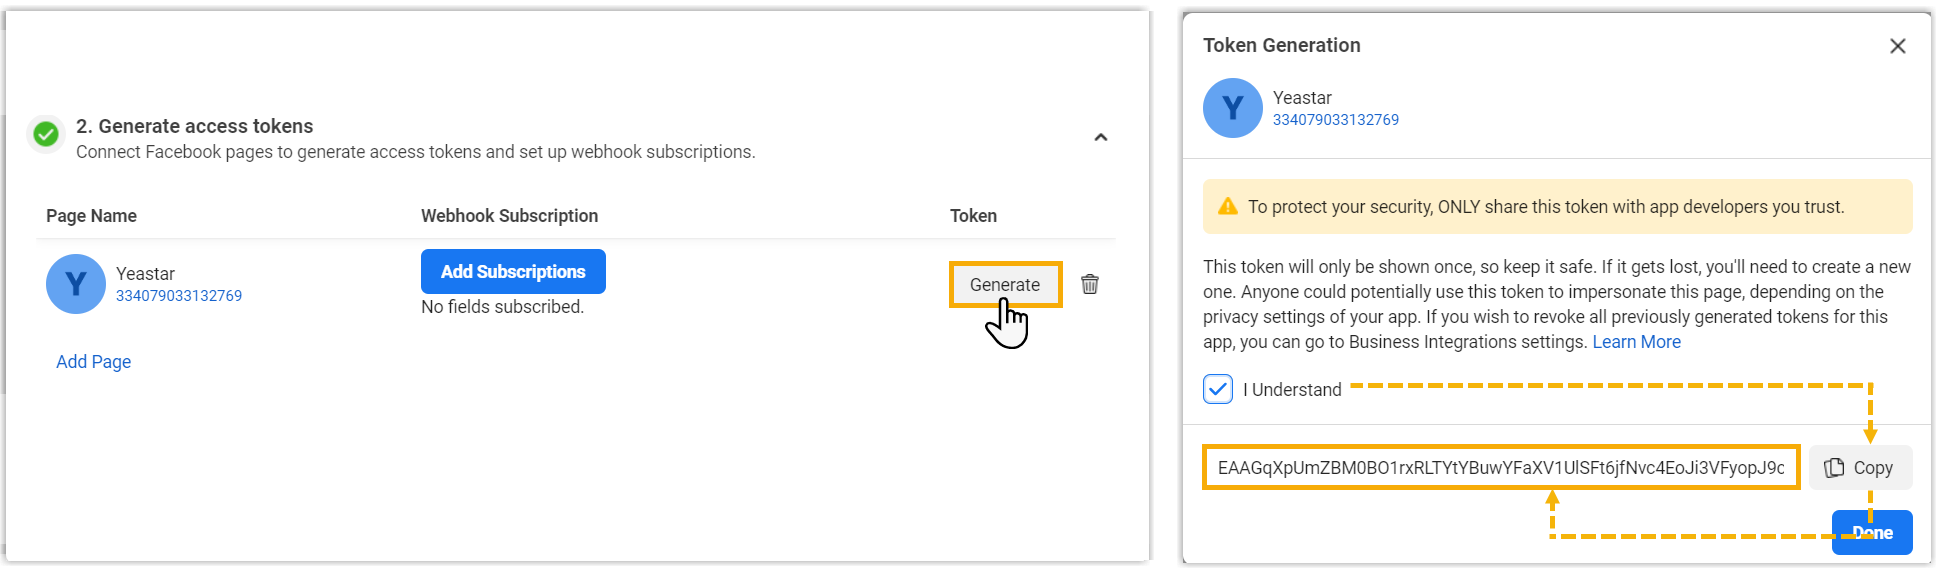
b. Generate an access token. This authorizes the app to act on behalf of the Page.
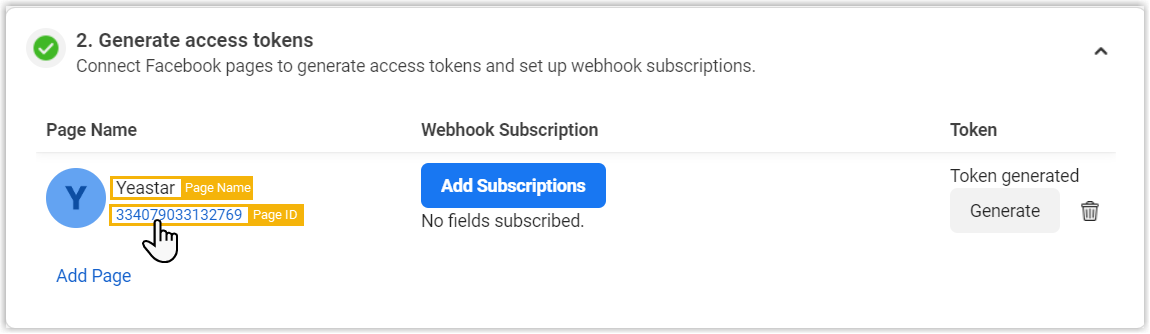
c. Copy and note down your Facebook Page’s name and ID as well; both are required in Cloud Voice.
-
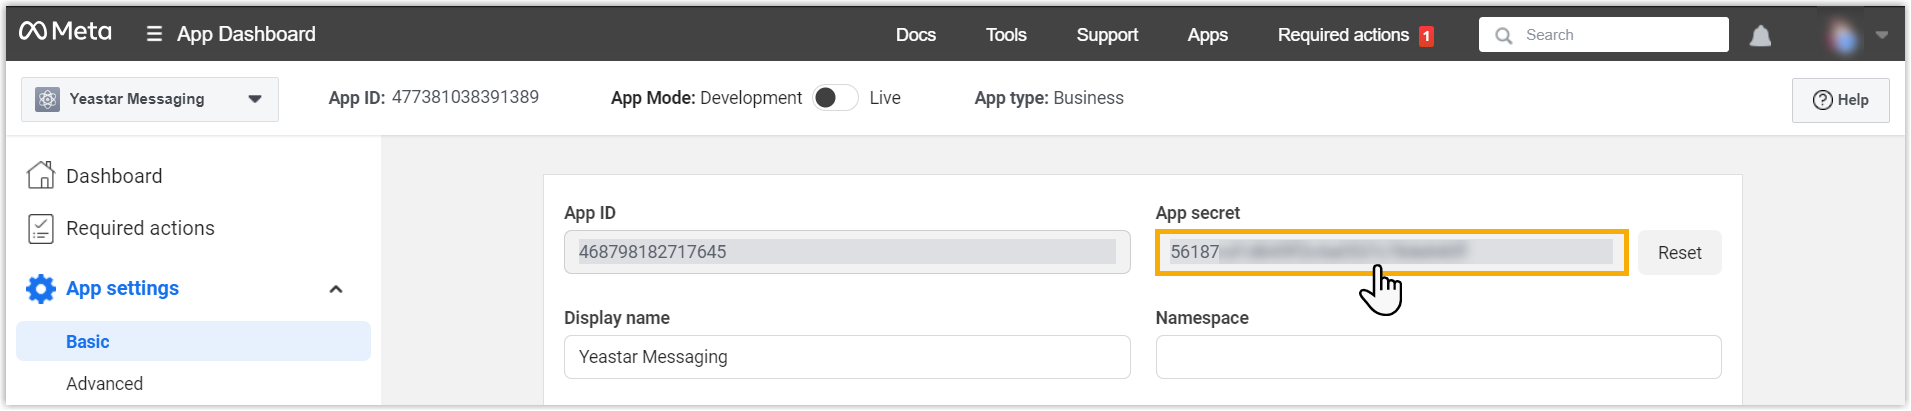
Retrieve the app’s secret key.
a. In the left navigation, go to App settings > Basic.
b. Click Show next to the App secret field to reveal the key.
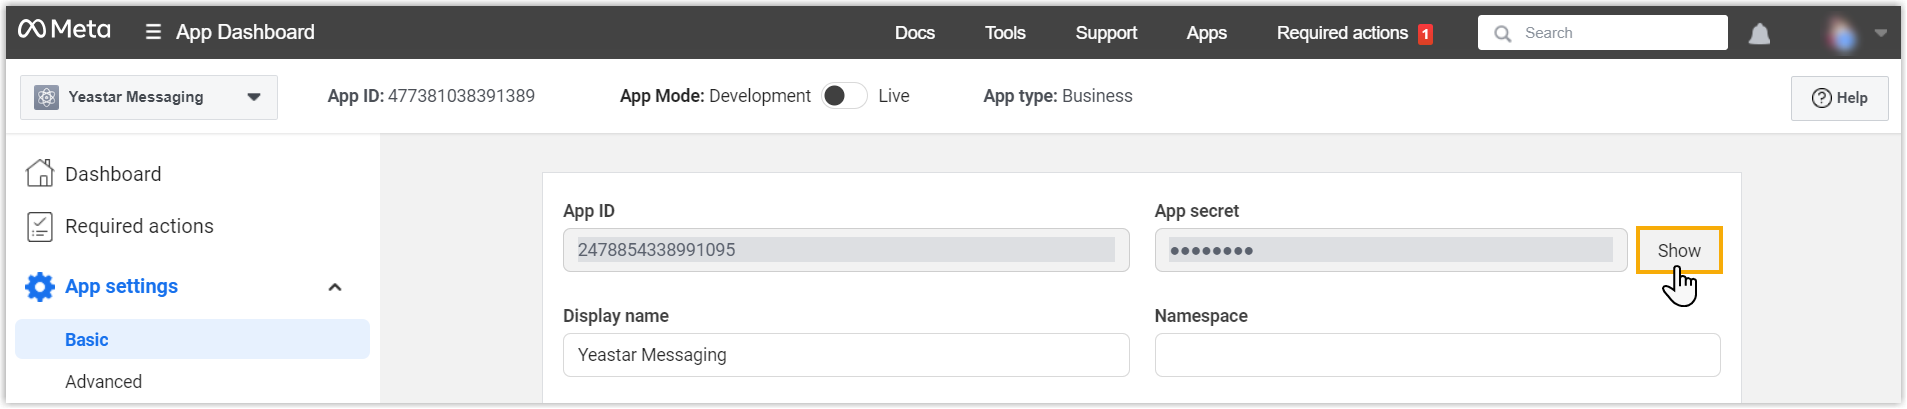
c. Copy the revealed key and note it down for use in Cloud Voice.
Step 3. Create a Facebook channel
Section titled “Step 3. Create a Facebook channel”Now create the channel in Cloud Voice using the credentials you collected.
-
Sign in to the Cloud Voice portal and go to Messaging > Message Channel.
-
Click Add and choose Facebook Messenger.
-
On the Authentication tab, supply the Facebook details.
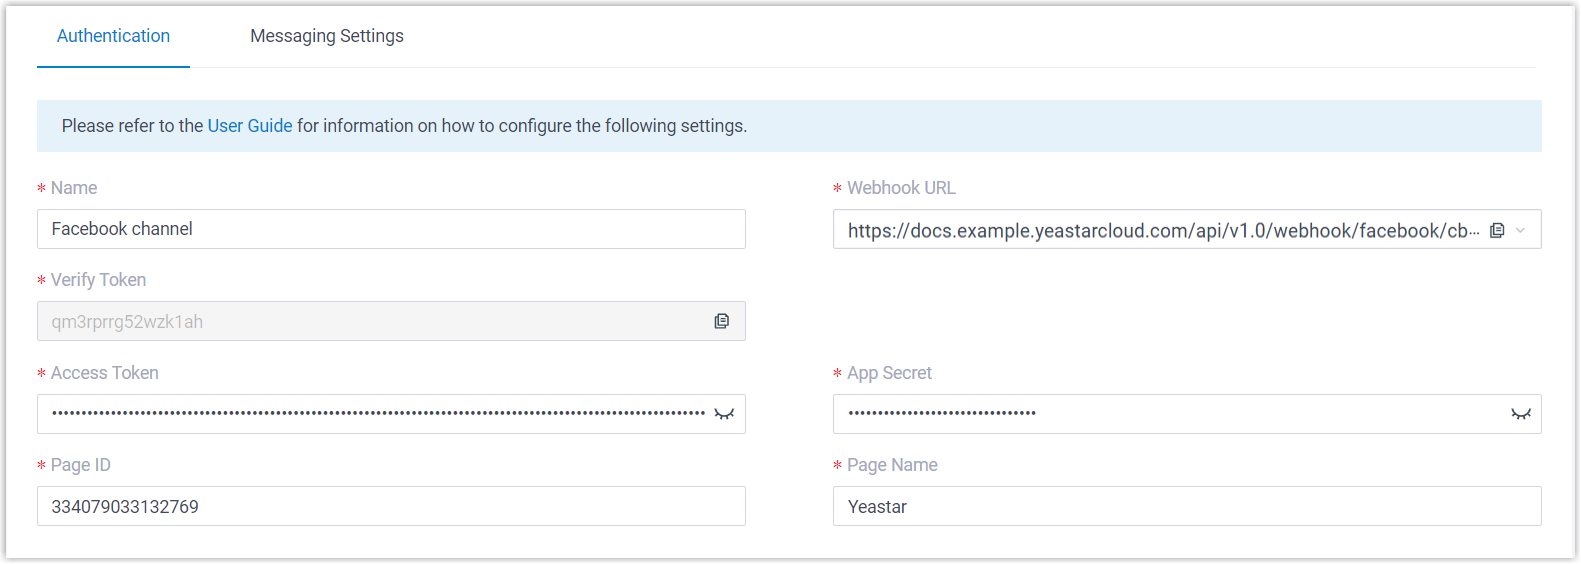
- Name: A label that helps you recognize the channel.
- Webhook URL: Note this value down. You will paste it into the Meta portal in Step 4.
- Verify Token: Note this value down as well; it is also needed in Step 4.
- Access Token: Paste the access token you generated in Step 2.
- App Secret: Paste the App Secret you retrieved in Step 2.
- Page ID: Paste your Facebook Page ID from Step 2.
- Page Name: Paste your Facebook Page name from Step 2.
-
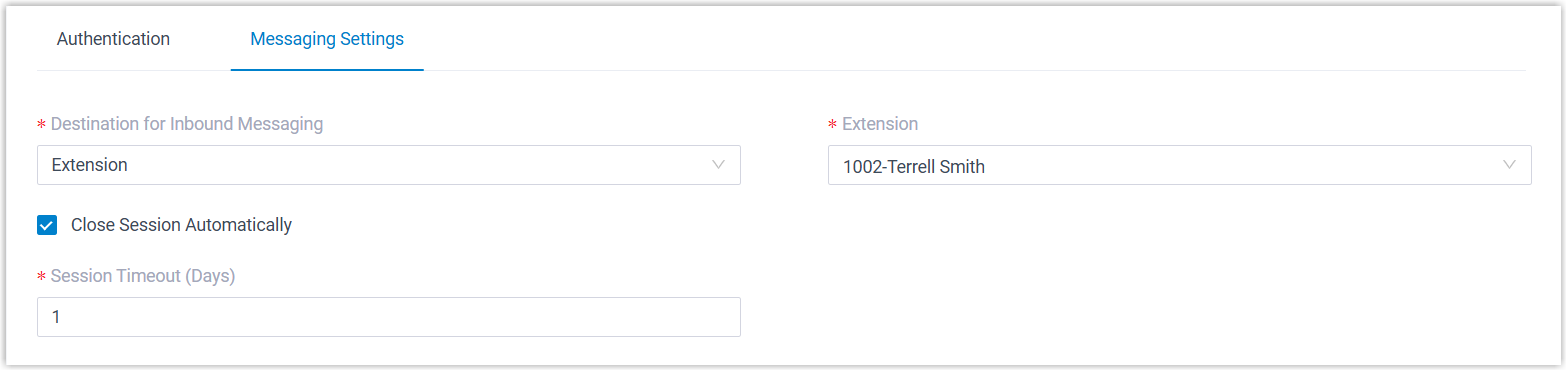
On the Messaging Settings tab, configure how the channel behaves.
-
Destination for Inbound Messaging: Decide where incoming messages from the Page are routed.
Option Description Extension Choose an extension from the Extension list. Only that extension user receives inbound messages from the Page. Message Queue Choose a queue from the Message Queue list. Every agent in the queue sees the first message of a new session, but once an agent picks it up, only that agent receives and replies to the rest of that session. Third-Party Message Analytics Platform (Transmitted via API) Inbound messages are forwarded automatically to a third-party analytics platform over the API (Application Programming Interface) for further processing. -
Close Session Automatically: Optional. Select this checkbox to have the system end sessions that stay idle for a set time, then enter the number of days in the Session Timeout (Days) field.
-
-
Click Save.
Step 4. Set up Meta webhook
Section titled “Step 4. Set up Meta webhook”Return to the Meta for Developers portal to point the app’s webhook at Cloud Voice and subscribe to message events, so Cloud Voice is notified whenever the Page receives a message.
-
Open the Messenger API configuration page for your app.
-
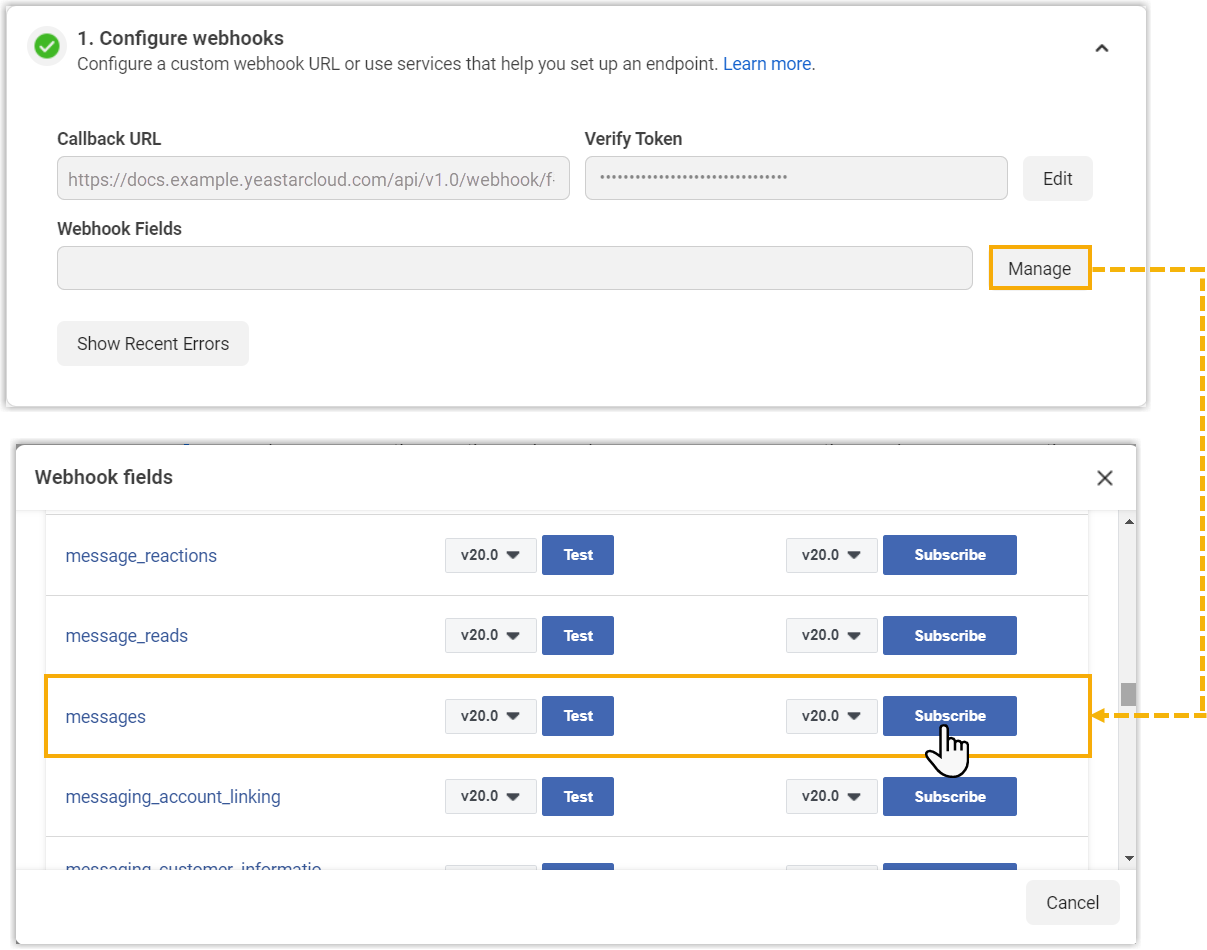
In the 1. Configure webhooks section, add a webhook and subscribe to the messages field.
a. Click Configure to add the webhook.
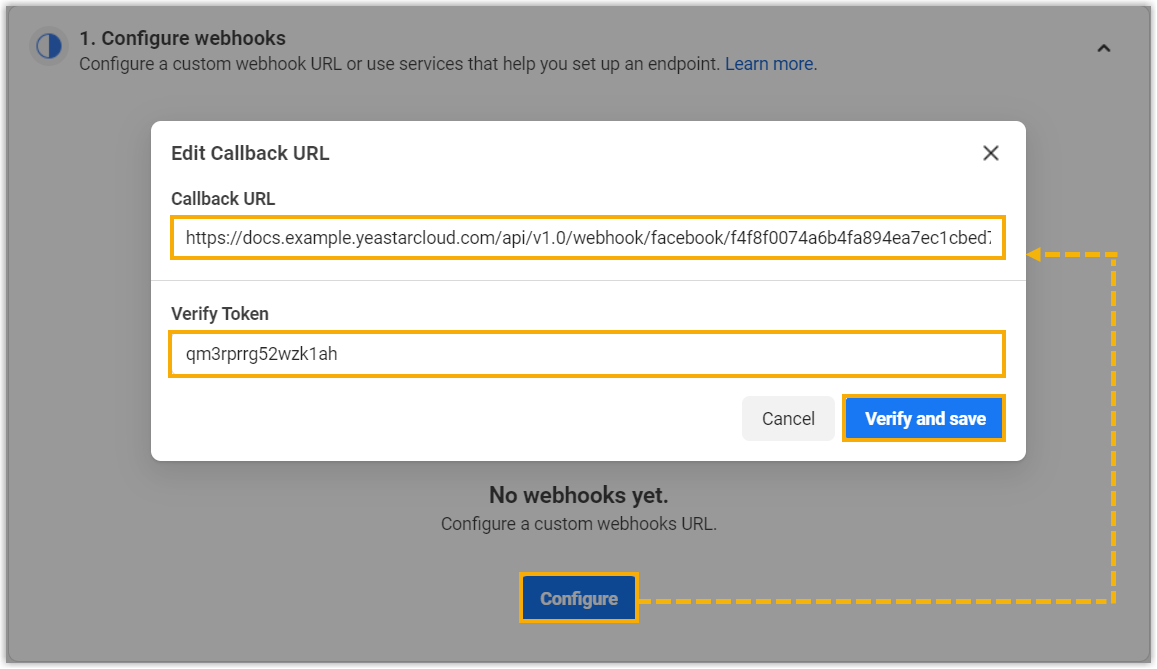
- Callback URL: Paste the Webhook URL you noted from Cloud Voice in Step 3.
- Verify Token: Paste the verify token you noted from Cloud Voice in Step 3.
b. Click Manage and subscribe to the messages field.
-
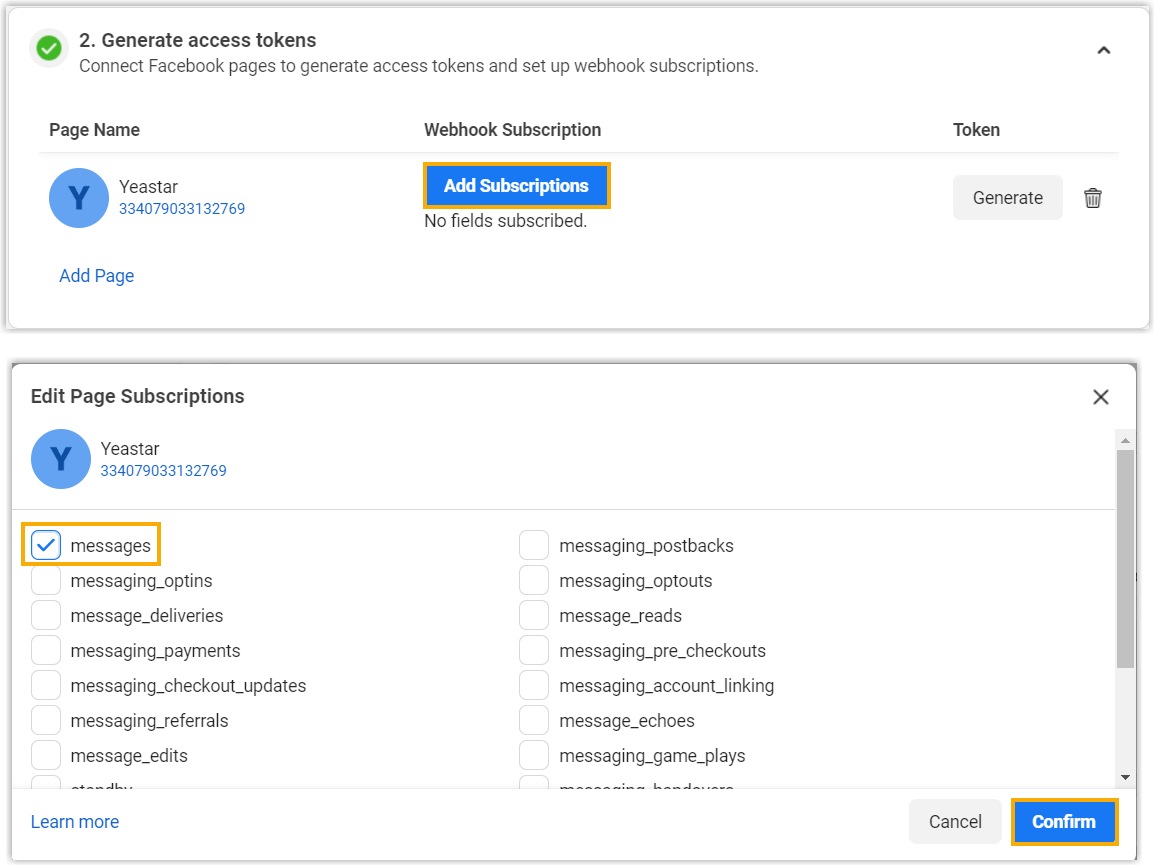
In the 2. Generate access tokens section, click Add Subscriptions and subscribe your Facebook Page to the messages field.
Result
Section titled “Result”-
In the Cloud Voice portal, the channel’s Status shows a green connected indicator (
 ), confirming the Facebook channel is set up.
-
Cloud Voice keeps a running count of messages sent and received on the channel. The Total column reflects every outbound message, including both successful and failed sends.

What to do next
Section titled “What to do next”Test message delivery between your Facebook Page and Cloud Voice, then submit your app for review.
Question about this page?
Ask the AI assistant. It starts from this page, then searches the rest of the docs.
Ask Cloud Voice AI
Answers are AI-generated from the docs and may contain mistakes. Verify with the linked pages.