
Create an SMS Campaign
An SMS (Short Message Service, a standard text message) campaign sends one text or multimedia message to a whole list of recipients in a single run, so you can reach a large group of customers on their mobile phones at once. This page walks you through building a campaign on an SMS channel.
Before you start
Section titled “Before you start”Your system must be running firmware 84.20.0.21 or later.
You also need the following in place before you create a campaign.
An SMS message channel
Section titled “An SMS message channel”Set up and configure an SMS channel first.
A list of contacts
Section titled “A list of contacts”Have the recipient phone numbers ready. A single campaign can target up to 1,000 contacts.
You can supply the recipients in any of three ways:
- Type the numbers in by hand.
- Import a CSV (comma-separated values) file of phone numbers.
- Pull numbers from an existing company phonebook.
If you plan to import a CSV file, it must meet these requirements:
- Format: UTF-8 encoded
.CSV - Size: under 50 MB
- File name: fewer than 127 characters
- Number column: use a
Numberfield for the phone numbers, entered in E.164 format (the international phone number standard: a plus sign, the country code, then the number, for example+1xxxxxxxxxx)
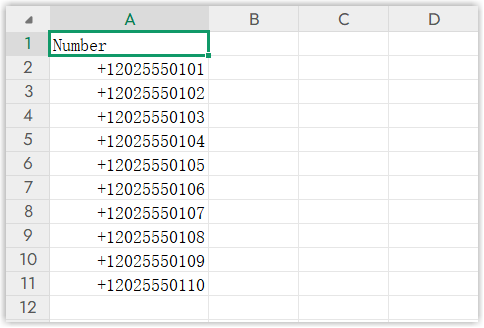
If you plan to pull numbers from a phonebook, store the phone numbers there in E.164 format.

A routing target (optional)
Section titled “A routing target (optional)”If you want the campaign to open a session for each recipient automatically, decide on the routing target in advance. A target can be either an extension or a message queue.
Create the campaign
Section titled “Create the campaign”-
Sign in to the PBX (Private Branch Exchange, your phone system) web portal and open Messaging > Message Campaign, then click Add.
-
In the Basic section, fill in the core details:
- Name: Give the campaign a recognizable name.
- Message Channel: Choose the SMS channel to send from.
- Sender: Choose the number tied to that SMS channel that the messages will come from.
- Recipient: Add the recipients using one of the methods below.
Enter numbers manually
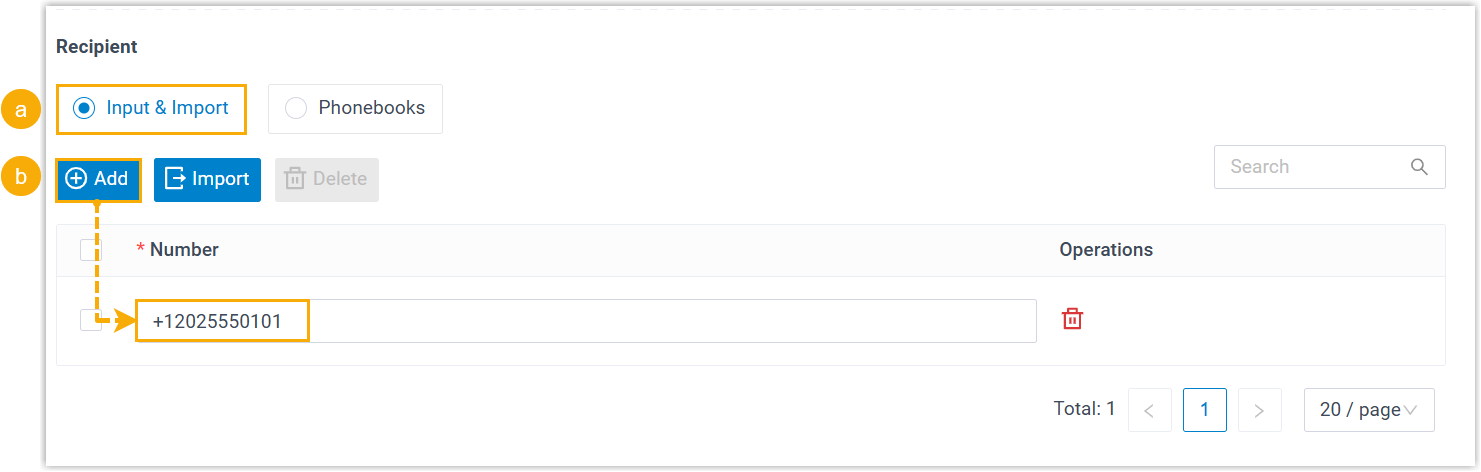
- Select Input & Import.
- Click Add and type each phone number in E.164 format (for example,
+1xxxxxxxxxx).
Import a CSV file
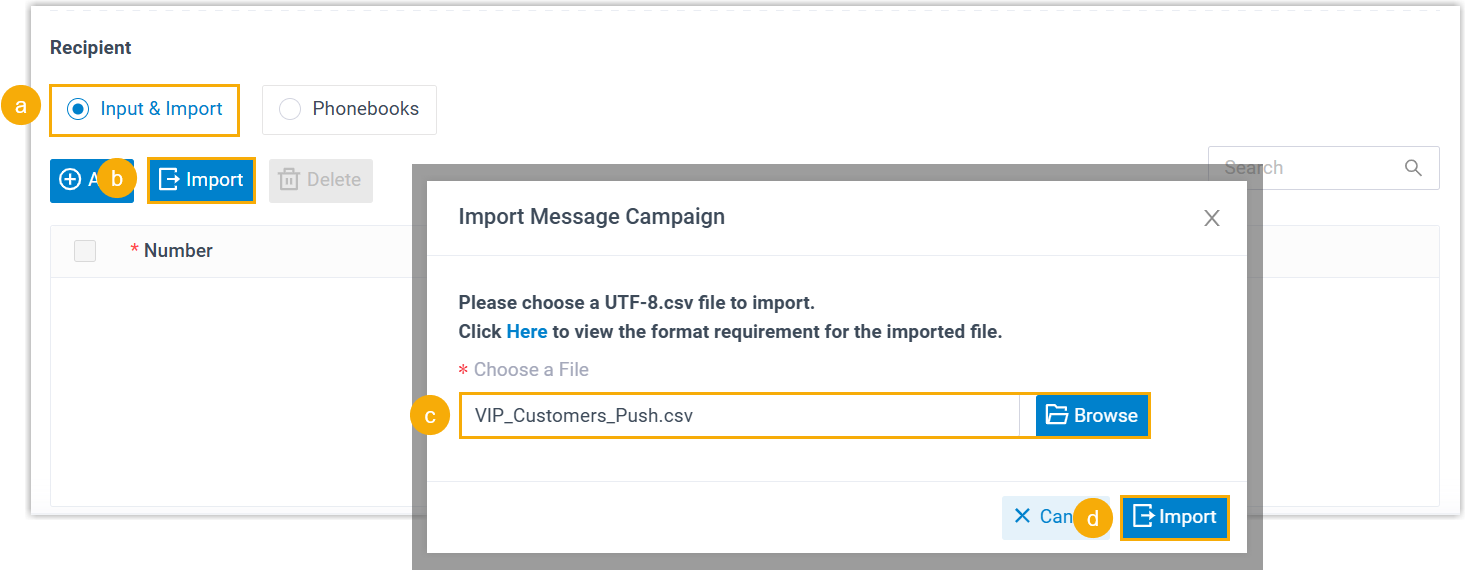
- Select Input & Import.
- Click Import.
- In the pop-up, click Browse and choose your file.
- Click Import.
Use an existing phonebook
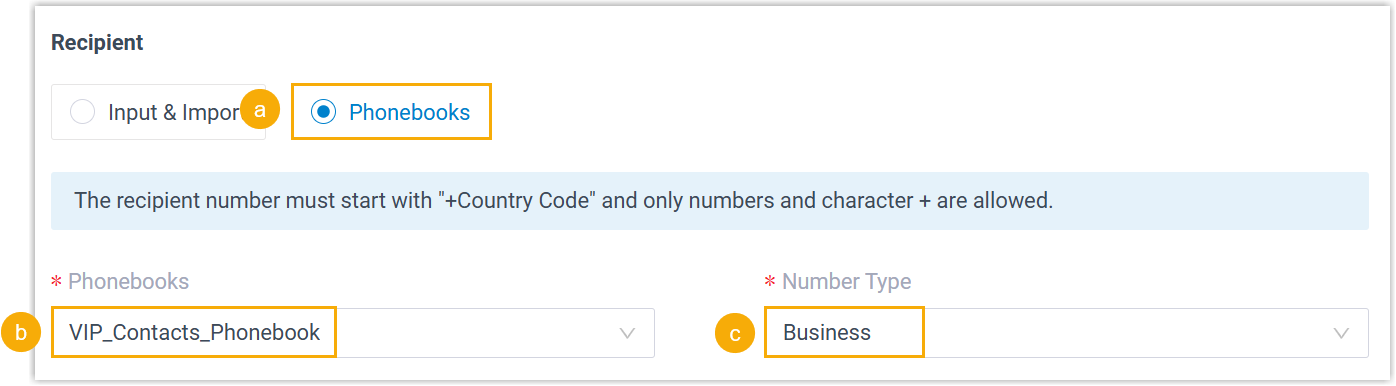
- Select Phonebooks.
- In the Phonebooks drop-down, pick the phonebook to use.
- In the Number Type drop-down, choose which number type to pull. The system collects the numbers stored under the types you select.
-
In the Message Content section, build the message you want to send. You can send a plain text message (SMS) or a multimedia message (MMS) that carries a file.
Send a text message (SMS)
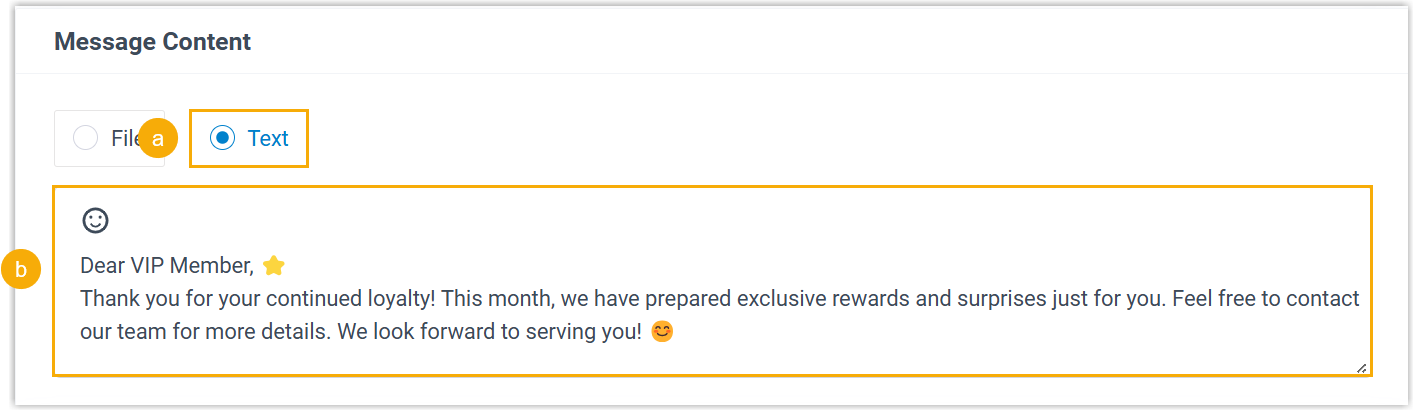
- Select Text.
- Type your message in the text field. Add emojis wherever you like.
Send a multimedia message (MMS)
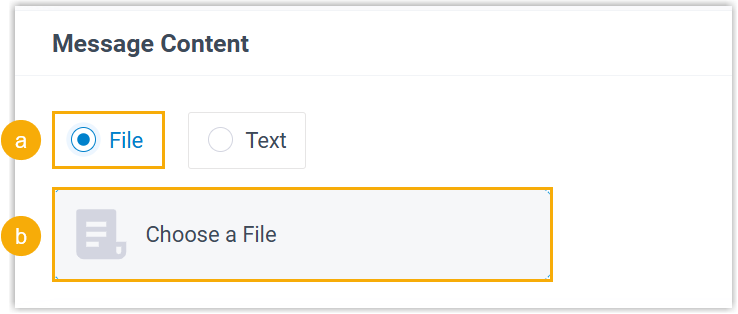
- Select File.
- Click Choose a File and pick the file to attach.
-
In the Sending Rules section, set when the campaign goes out and whether it opens sessions.
Under Send Time, choose one of the following:
Option What happens Send Now The campaign goes out as soon as you save it. Schedule Sending The campaign is sent automatically at a date and time you set. Do NOT Send, Save as Draft The campaign is saved as a draft so you can edit or send it later. 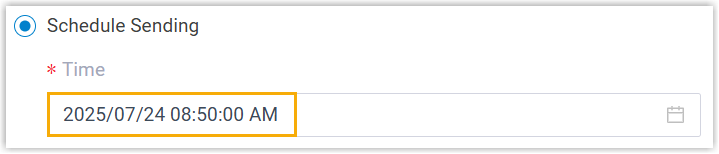
Under Send Mode, choose whether to create sessions:
Option What happens Create session and send message The system opens a session for each recipient as the campaign sends, and assigns each session to your chosen target (an extension or a message queue). Send messages directly without creating session No sessions are created, and the messages do not appear in External Chat Logs. 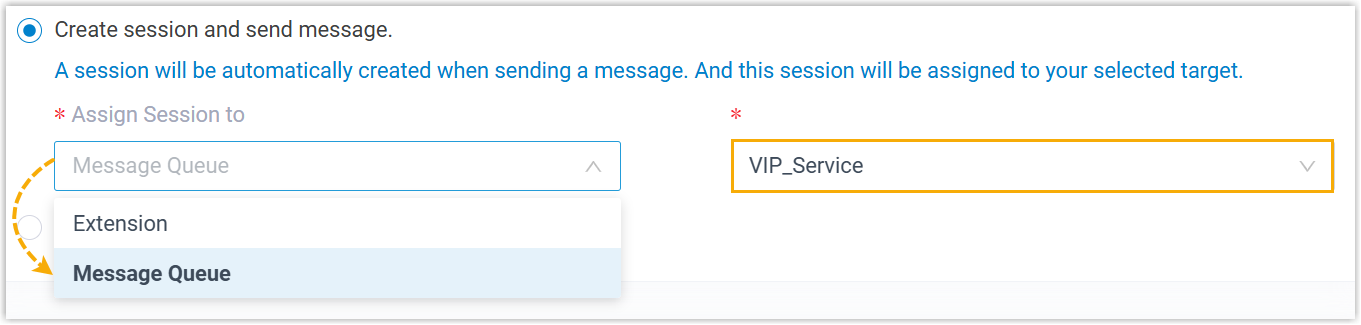
-
Click Save.
What happens next
Section titled “What happens next”The campaign is created and appears in the campaign list.
-
If you sent it immediately, its status shows as Executing and messages go out to the recipients right away.

-
If you scheduled it, its status shows as Scheduled and the messages are sent automatically at the set time.

Once a campaign reaches Completed status, you can review how it did from the campaign list.
-
Glance at the Result and Response Rate columns for a quick summary.

-
Click the details icon
 to open the full send report.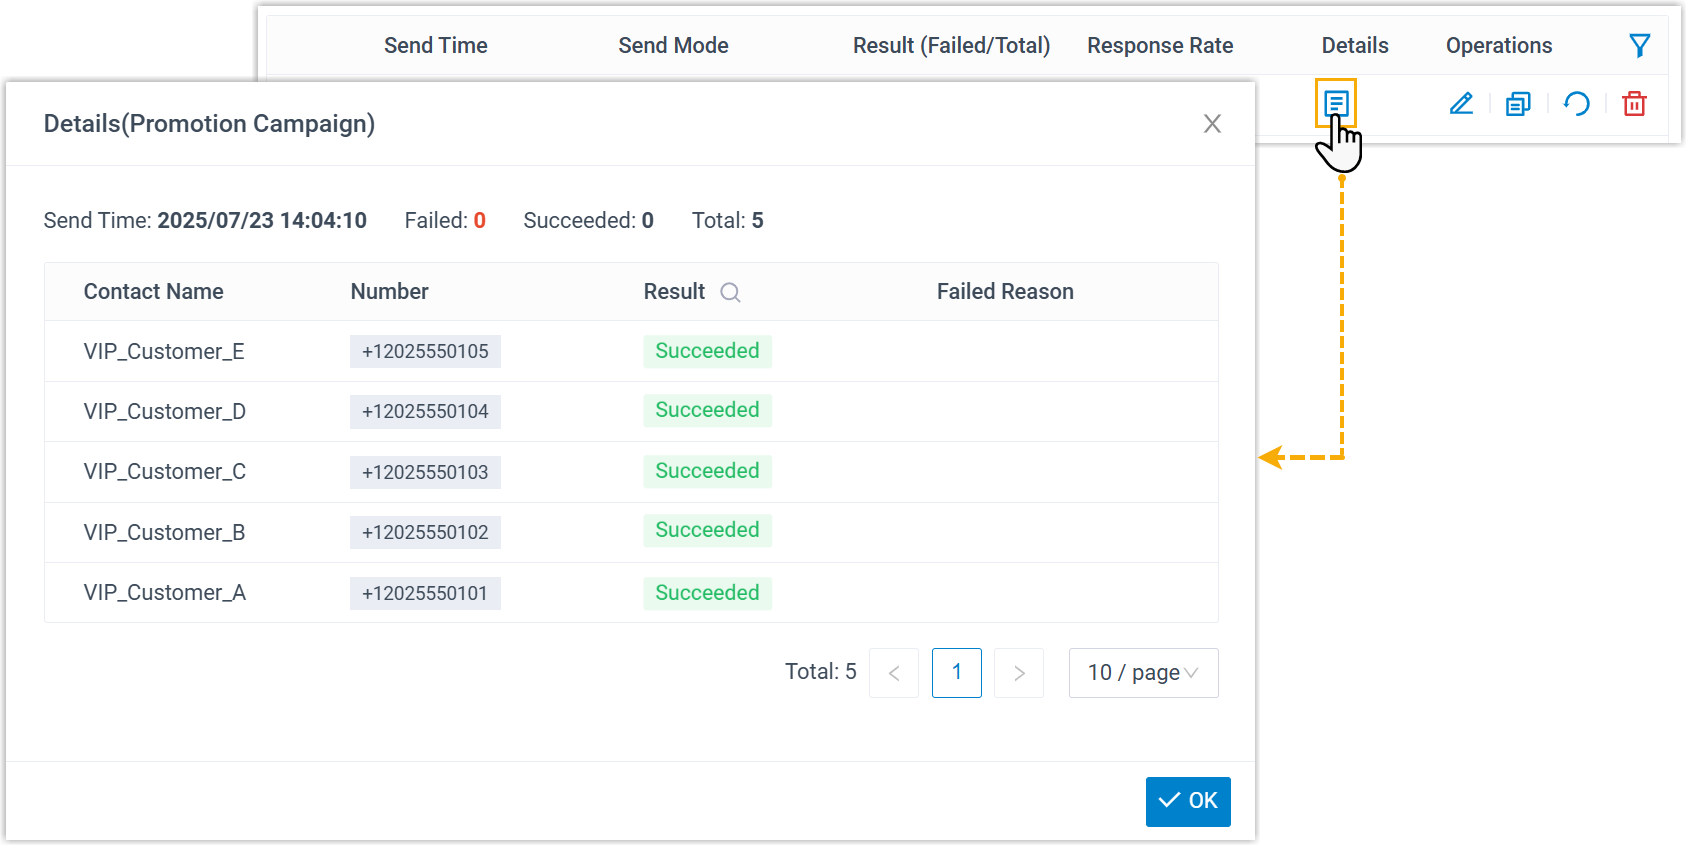
Question about this page?
Ask the AI assistant. It starts from this page, then searches the rest of the docs.
Ask Cloud Voice AI
Answers are AI-generated from the docs and may contain mistakes. Verify with the linked pages.