
Set Agent Status
Set Agent Status is one of the Internal Data Ops operations. It switches a specific agent to the status you choose, either across every queue or within a single queue. You can name the queue and the agent up front, or supply an expression so the target is resolved while the call is running.
Configure the component
Section titled “Configure the component”-
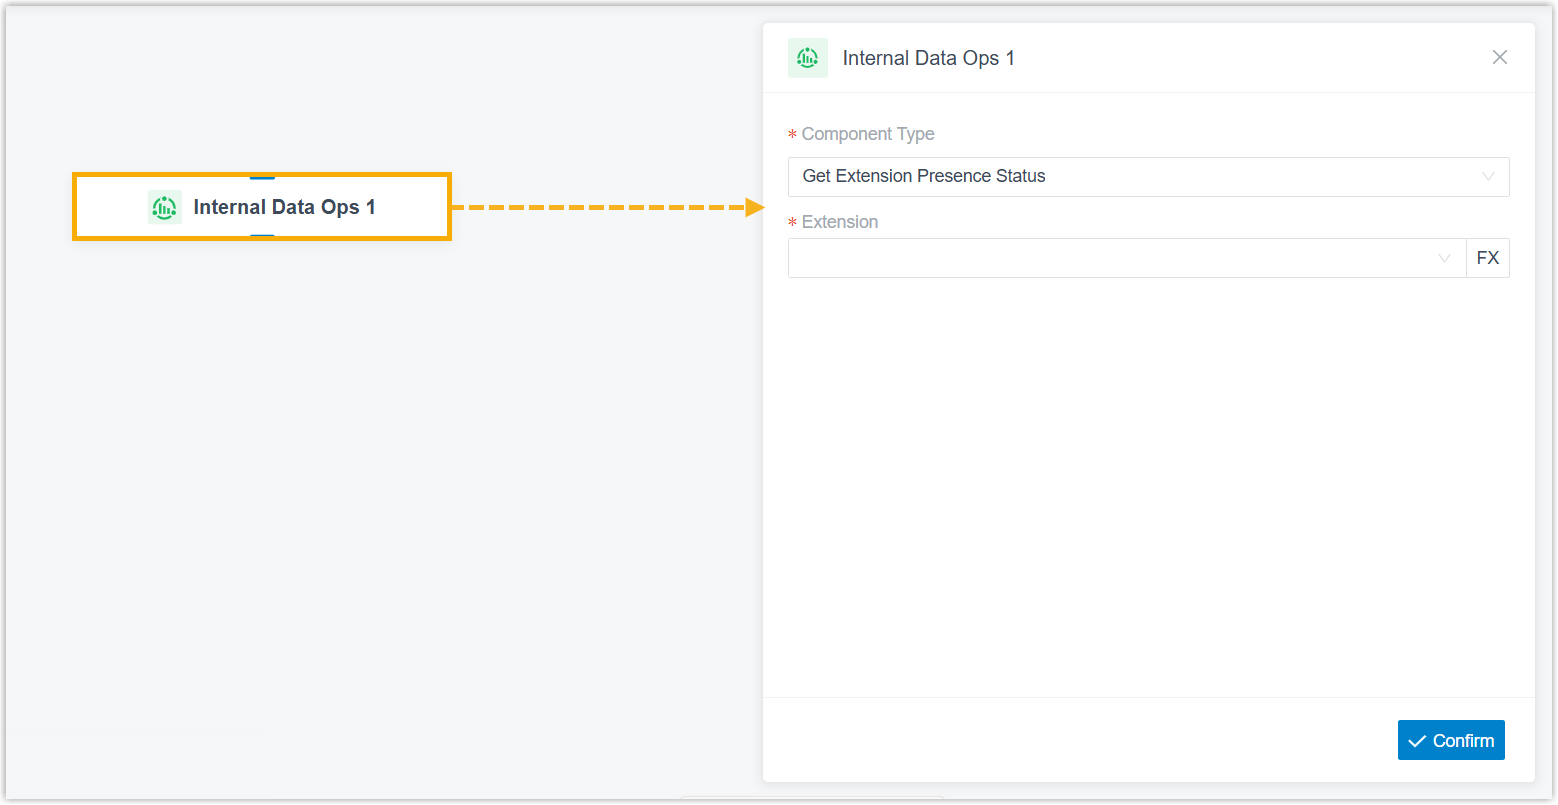
Drag the Internal Data Ops component onto the canvas, then click it to open its settings.
-
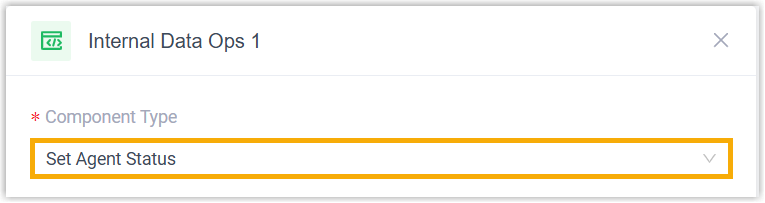
In the Component Type drop-down list, choose Set Agent Status.
-
In the Range drop-down list, choose which queues the status change applies to:

- Global: change the agent’s status in every queue.
- Specific: change the agent’s status in one queue only.
-
If you chose Specific, name the target queue using one of these methods:

-
Queue: pick a queue from the drop-down list.
-
Expression: click the fx icon and enter an expression to resolve the queue at runtime.
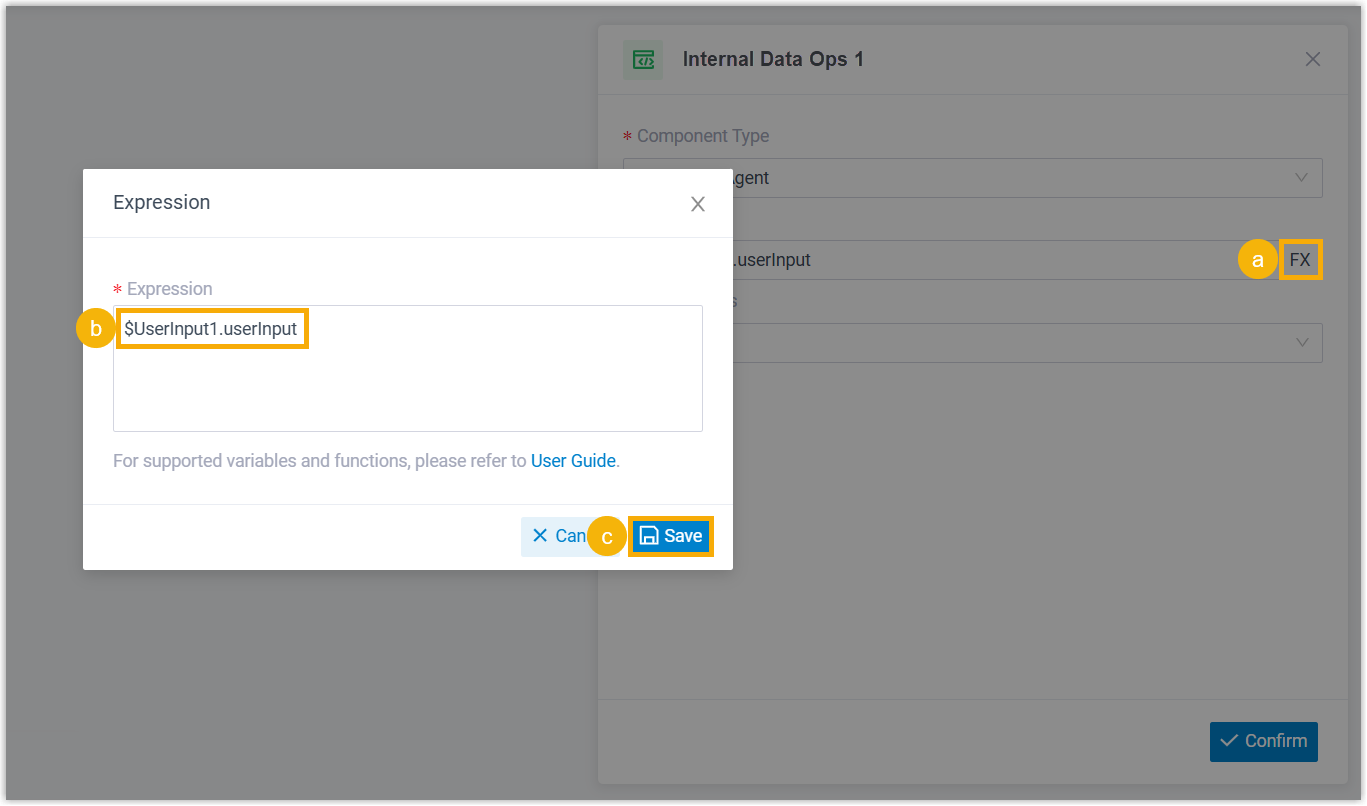
For example,
$UserInput1.userInputuses the queue number the caller keyed in.
-
-
Name the target agent using one of these methods:

-
Agent: pick an agent from the drop-down list.
-
Expression: click the fx icon and enter an expression to resolve the agent at runtime.
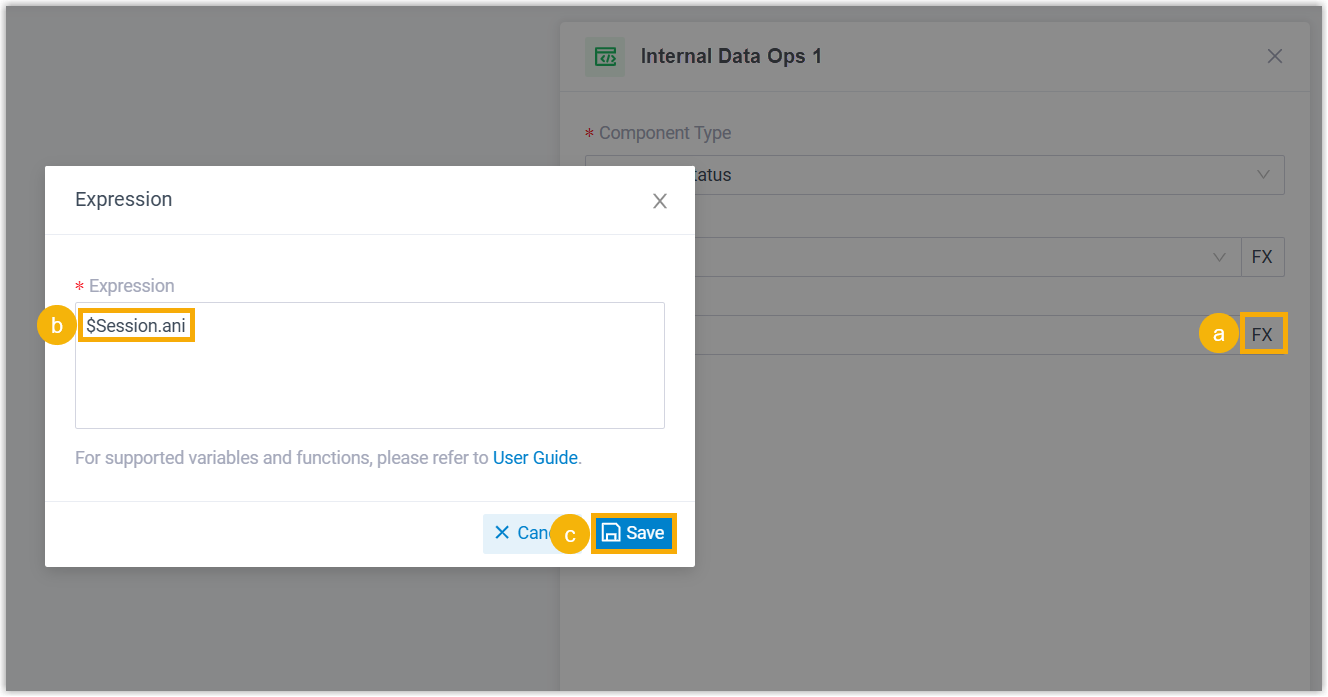
For example,
$Session.aniuses the caller’s own number (Caller ID) as the agent to update.
-
-
In the Agent Status drop-down list, choose the status to switch the agent to.

-
Click Confirm in the bottom-right corner.
What it can connect to
Section titled “What it can connect to”A Set Agent Status component leads to exactly one downstream component. Any of the following can follow it:
| Component | Purpose |
|---|---|
| Prompt | Play an audio file or a text-to-speech message to the caller. |
| Business Hours | Route the call to different destinations depending on the time of day. |
| Menu | Offer callers a set of options and route them by the DTMF (Dual-Tone Multi-Frequency, the tone a phone keypad makes) key they press. |
| User Input | Collect DTMF digits from the caller, usually paired with Condition to act on what was entered. |
| Language | Change the system prompt language for the rest of the flow. |
| Record | Start recording once the caller connects to another party, with optional notification prompts, or turn recording off for a call that would otherwise be recorded. |
| Dial by Number | Let callers dial a number directly to reach their destination. |
| Dial by Name | An end component that lets callers reach a user by typing the first three letters of their name. |
| Transfer | An end component that sends the caller to a chosen destination, with optional prompts announcing the transfer. |
| Hang Up Call | An end component that disconnects the call. |
| Condition | Route the call based on logical expressions. |
| Loop | Repeat a group of components a set number of times or until a condition is met. |
| Internal Data Ops | Read from and write to the Cloud Voice system’s own database. See Get Extension Presence Status, Set Extension Presence Status, Get Queue Agent, Get Queue Info, Get Agent Status, Set Agent Status, Get System Info, Get System Capacity, Get Extension Info, and Get Company Contact Info. |
| Email Sender | Send an email for real-time notifications, alerts, or user-specific information. |
| Database Access | Run a SQL operation against an external database during the call flow. |
| HTTP Request | Send an HTTP request to an external server to exchange data with a third-party service. |
Question about this page?
Ask the AI assistant. It starts from this page, then searches the rest of the docs.
Ask Cloud Voice AI
Answers are AI-generated from the docs and may contain mistakes. Verify with the linked pages.