📞 Set up a Hot Desking Phone
This topic describes how to set up a phone for hot desking via auto provisioning.
⚠️
Important: If the desired phone has been assigned to an extension, remove the phone from auto provisioning phone list and RESET the phone first.
Supported Devices
Hot desking is applicable on the IP phones listed in Auto Provisioning - Supported Devices.
Procedure
- Log in to PBX web portal, go to Auto Provision > Phones.
- Click +Add to add a phone.
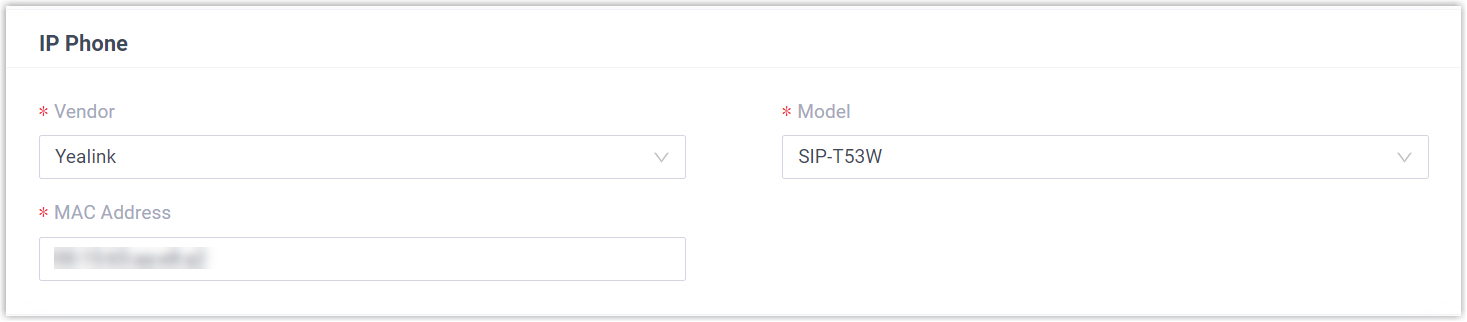
- In the Phone section, configure the settings:

- Vendor: Select a phone vendor.
- Model: Select a phone model.
- MAC Address: Enter the MAC address of the phone.
- In the Options section, configure the following settings:
- Template: Select a phone template.
- Provisioning Link: Add provisioning link.
- Click Save.
- Monitor the IP phone manually, ensure validation through registered hot desk ensuring verifying:

Note: Users only change extension using virtual login enabling reassigned calls: