📧 Set up Outlook as an Email Server
This topic describes how to set up Microsoft Outlook as the email server for IZT Cloud Voice to send and receive emails through your Microsoft account.
Requirements
| Requirement | Description |
|---|---|
| PBX Server | - Firmware Version 84.12.0.32 or later |
| - Enterprise Plan (EPP) or Ultimate Plan (UPP) | |
| Microsoft 365 | - A valid Microsoft 365 account |
| - App registered with Microsoft Entra ID to authenticate and secure the email server | |
| - Admin account with Global Administrator role for app registration and configuration |
Procedure
Follow these steps to set up Outlook as an email server for IZT Cloud Voice:
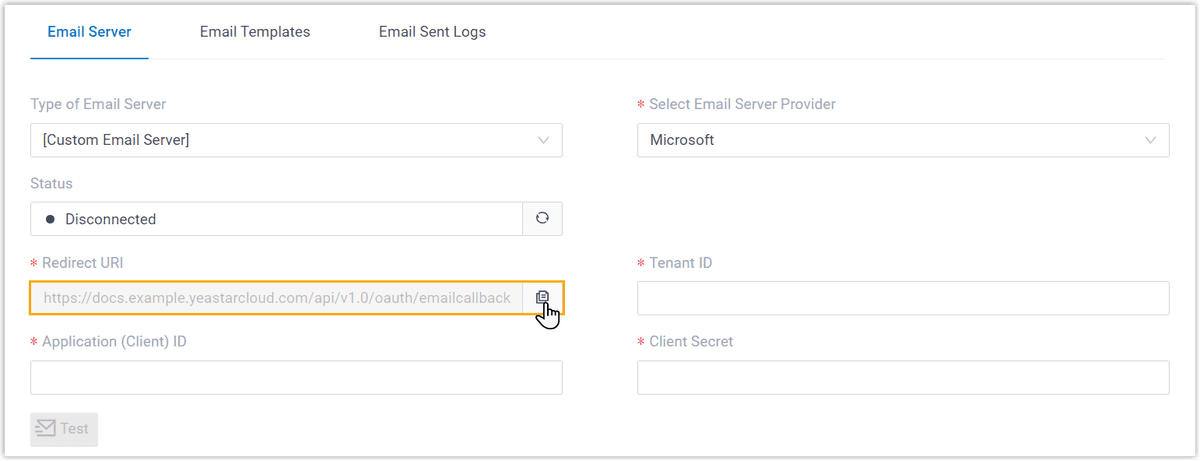
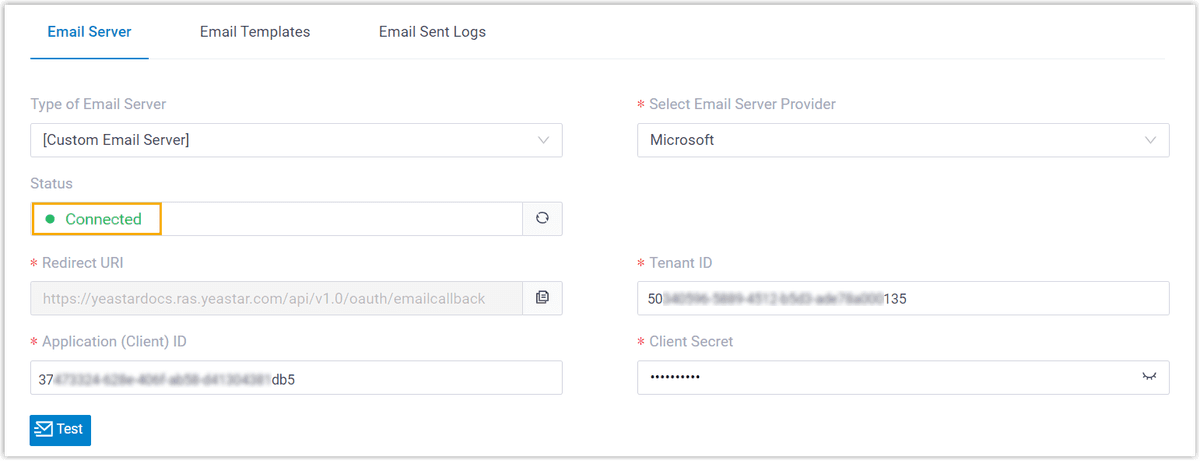
Step 1: Obtain Redirect URI from PBX
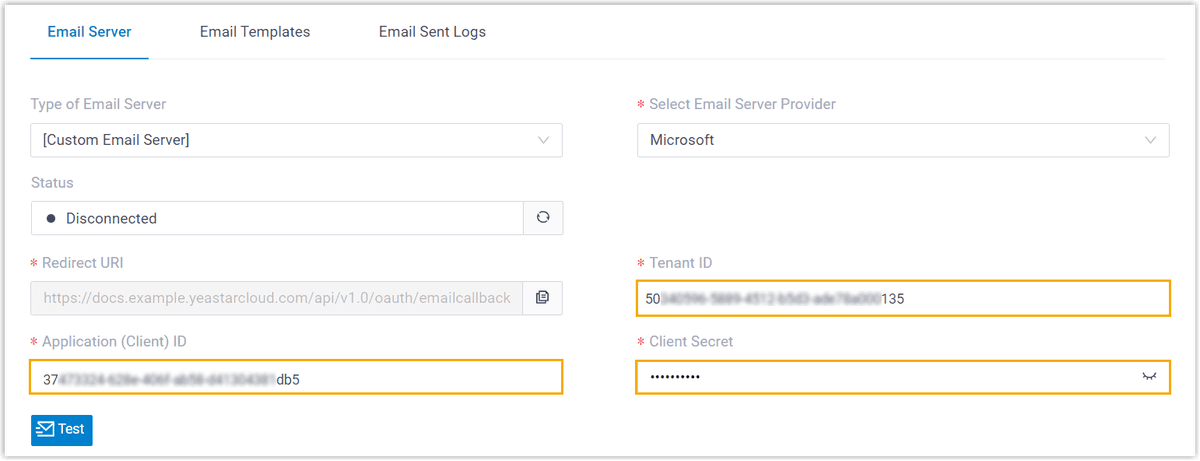
- Log in to PBX web portal, go to System > Email > Email Server.
- In the Type of Email Server drop-down list, select Custom Email Server.
- Select Microsoft 365 Email Server Provider (OAuth 2).
- In the Redirect URI field, copy the URI.
Step 2: Register an Application on Microsoft Entra ID
An application is required to access the Microsoft email server via OAuth 2.0. Follow these steps to create one:
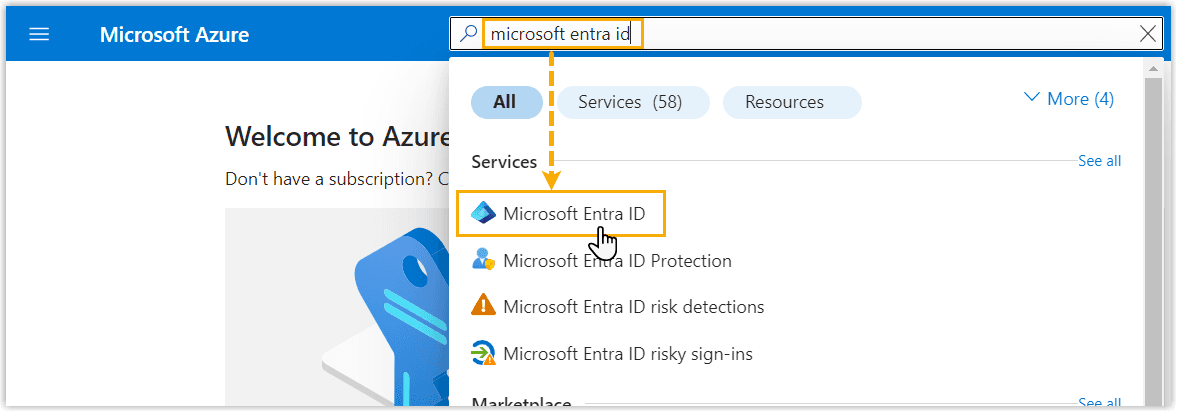
- Sign in to the Microsoft Entra admin center using your Microsoft admin account.
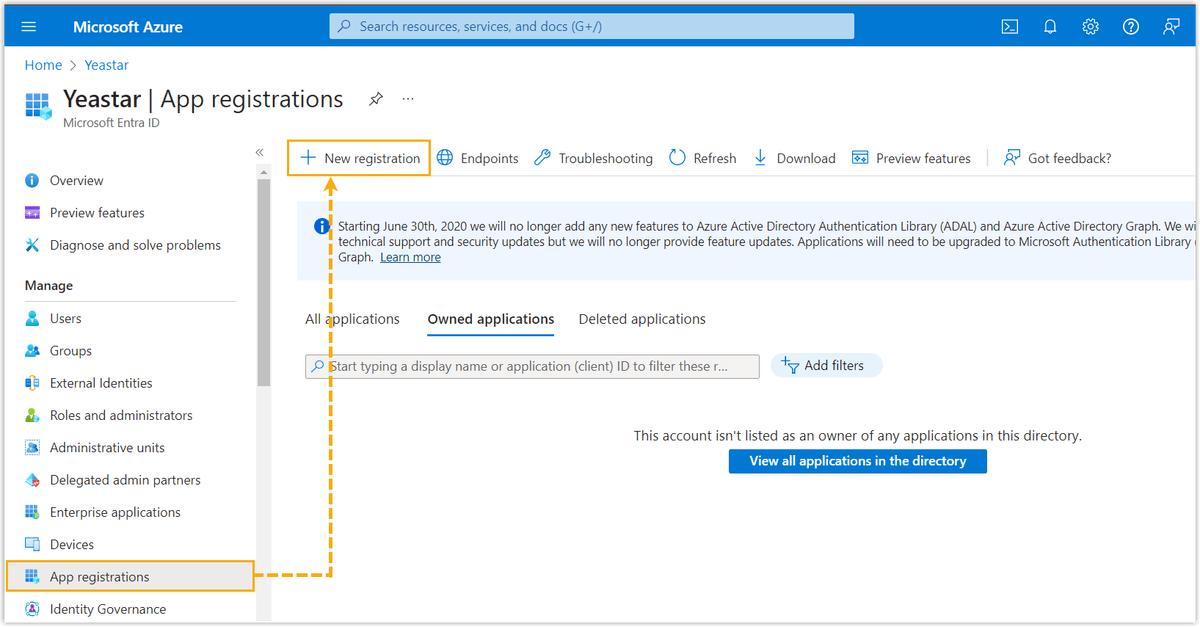
- In the left navigation pane, click App registrations, then click New registration.
- In the Register an application page, configure the registration:
- Name: Enter a name to help you identify the application.
- Supported account types: Select Accounts in this organizational directory only.
- Redirect URI: Select Web, paste the copied URI from the PBX.
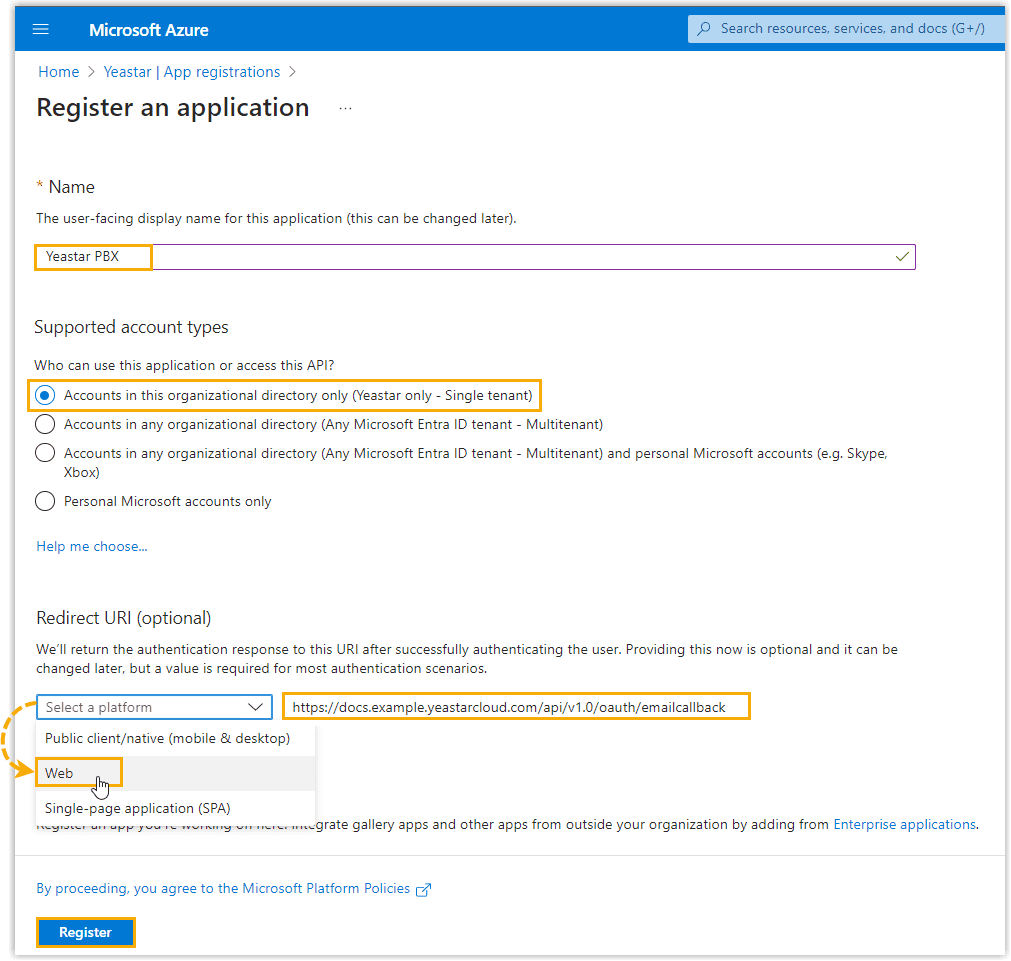
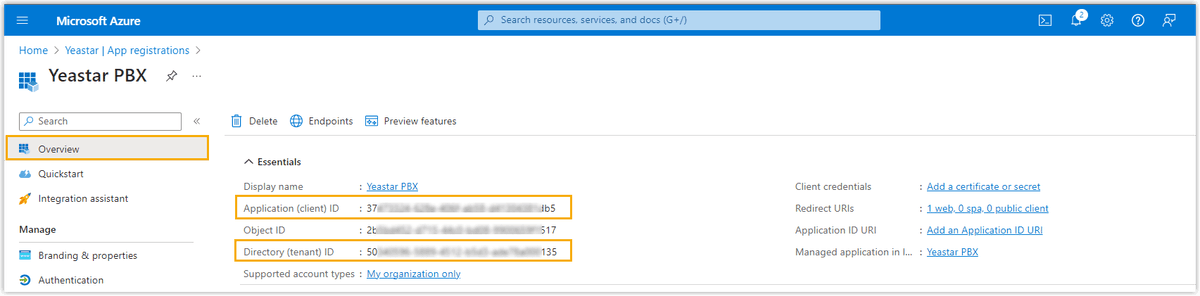
- Click Register, then note down the Application (client) ID and Directory (tenant) ID.
Step 3: Create a Client Secret for the Application
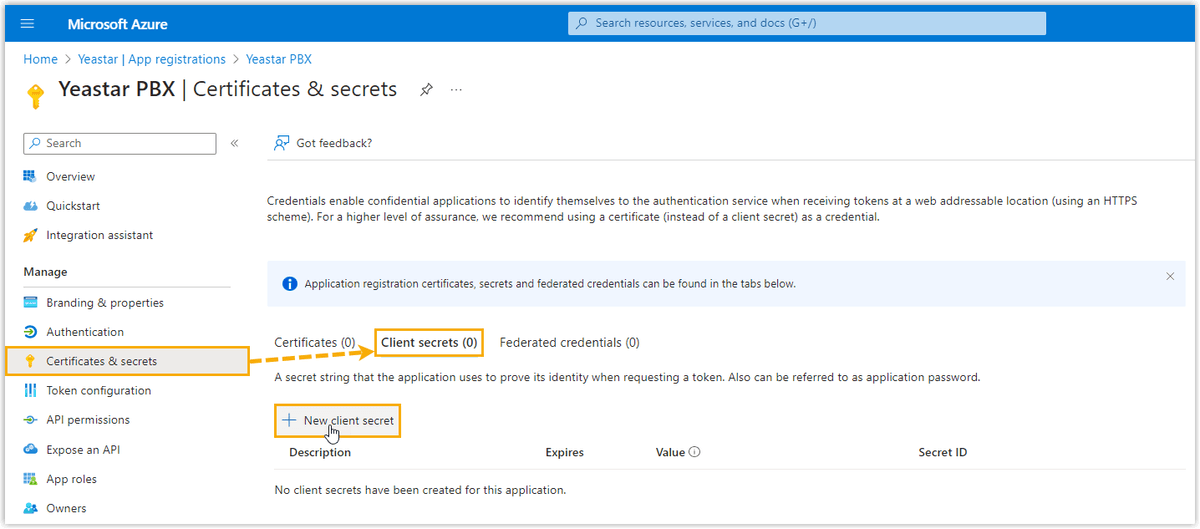
- In the left navigation for the application, go to Certificates & secrets.
- Click New client secret, provide a description, and set an expiration period.

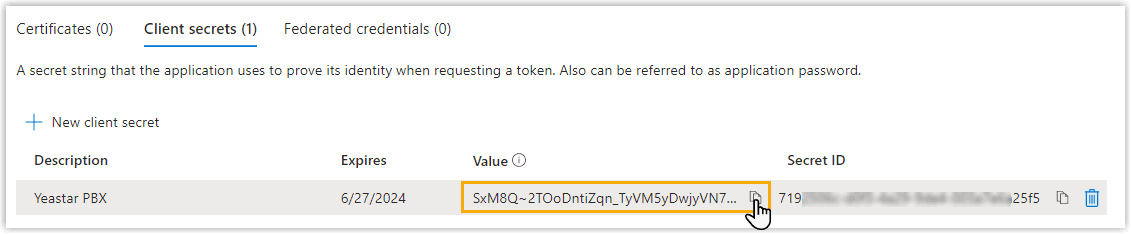
- Click Add and copy the secret value (you may need to click "click to copy").
Step 4: Configure SMTP Settings on PBX
- Go back to the PBX web portal, enter the following information:
- Sender Name: Enter the sender name.
- SMTP Server Address (SMTP): Enter smtp.office365.com.
- Outgoing Mail Server (SMTP) Port: Enter 587.
- Encryption Method: Select STARTTLS.
- Email Address: Enter your Microsoft email address.
- Username: Enter your full Microsoft email address.
- Password: Enter the client secret value from Microsoft Entra ID.
- Paste the Tenant ID and Client ID from Microsoft Entra ID.
- Click Test to ensure the settings are correct. The PBX will request permission to access your Microsoft account.
- Click Save.
Result
- If the test email is sent successfully using the Microsoft account, the page displays "Success" and the recipient's mailbox receives the email.
- If the test email fails to be sent, the page displays "Failed to send" and prompts an error message. You can check the error in Email Sent Logs.