⏰ Set Key Events Based on Time Conditions
IZT Cloud Voice supports IVR key press events based on time conditions, extending the routing of incoming calls based on business hours or other time-based criteria. This topic describes how to apply the same time condition for all key press events or different time conditions for each key press event.
Requirements
IZT Cloud Voice version 8.14.0 or later.
Apply the Same Time Condition for All Key Press Events
- Log in to PBX web portal, go to Call Features > IVR, click Add or edit an existing IVR.
- In the Key Press Events tab, configure the following:
| Key Press Event | Description |
|---|---|
| Event Routing | All key press events route calls based on global business-specific routing using known times. |
- Enable Advanced Settings.

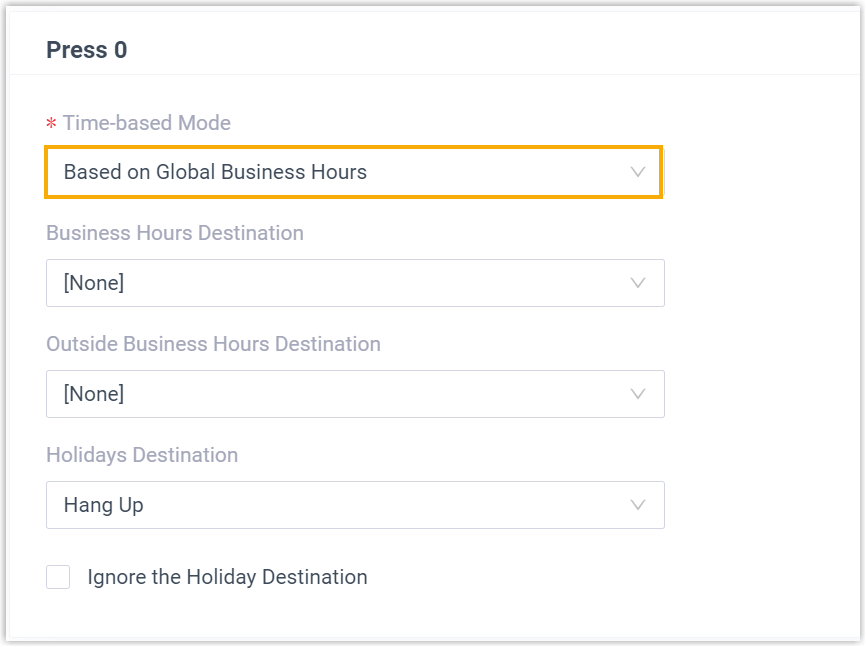
- In the pop-up window, select the checkbox of Time Condition, and select Same time condition for all key presses.
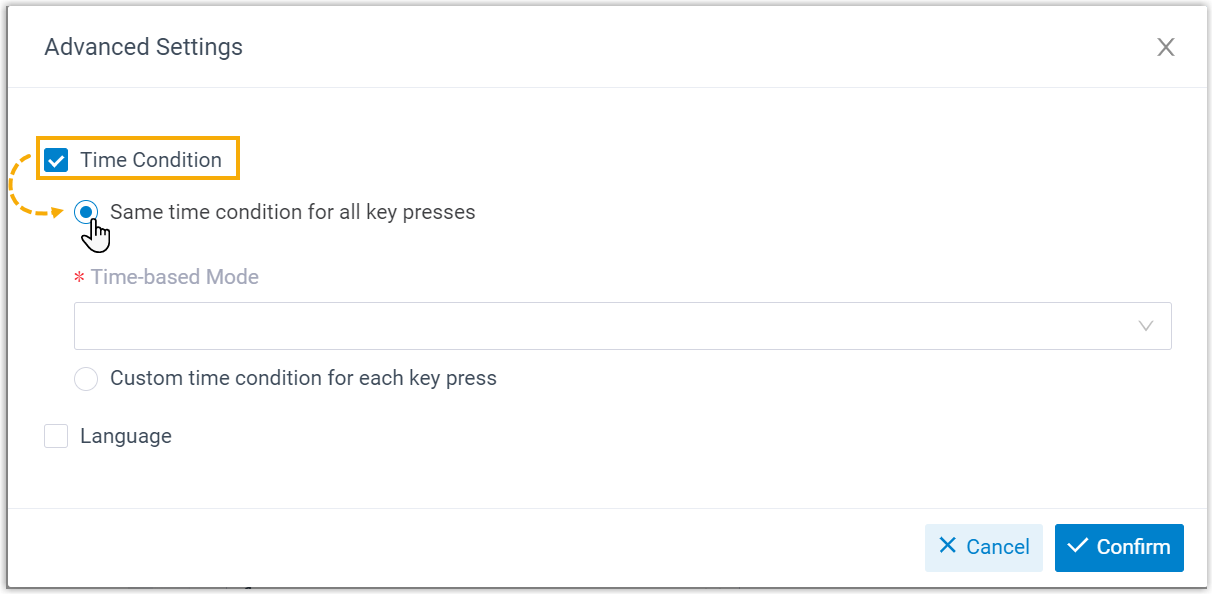
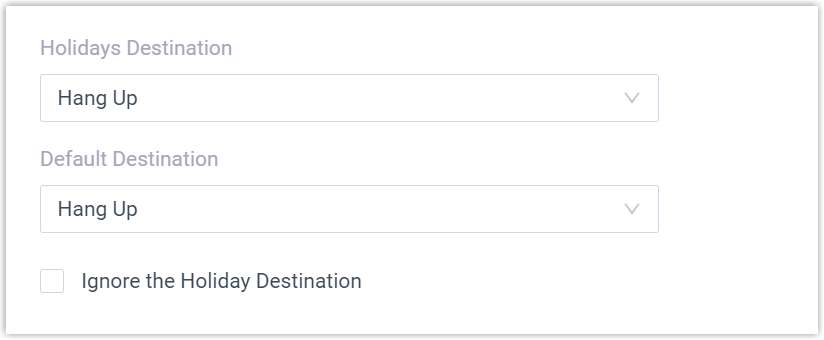
- Specify call routing destinations for a key press event based on the global business hours:
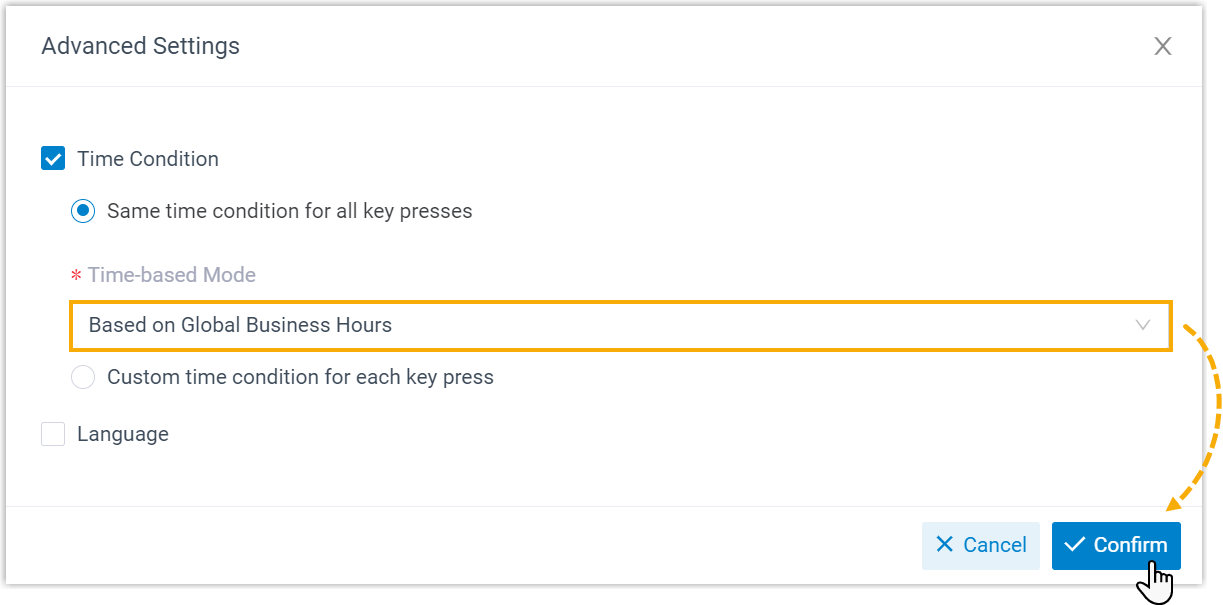
- Business Hours Destination: Route calls during business hours.
- Outside Business Hours Destination: Route calls during non-working hours.
- Holiday Destination: Route calls during holidays.
-
Repeat the steps to define the rest of the key press events accordingly.
-
Click Save and Apply.
Ensure your IVR configurations accurately reflect the business hours and routing needs.
Apply Different Time Conditions for Each Key Press Event
-
Log in to PBX web portal, go to Call Features > IVR, click Add or edit an existing IVR.
-
Enable Advanced Settings on the top-right corner and configure:
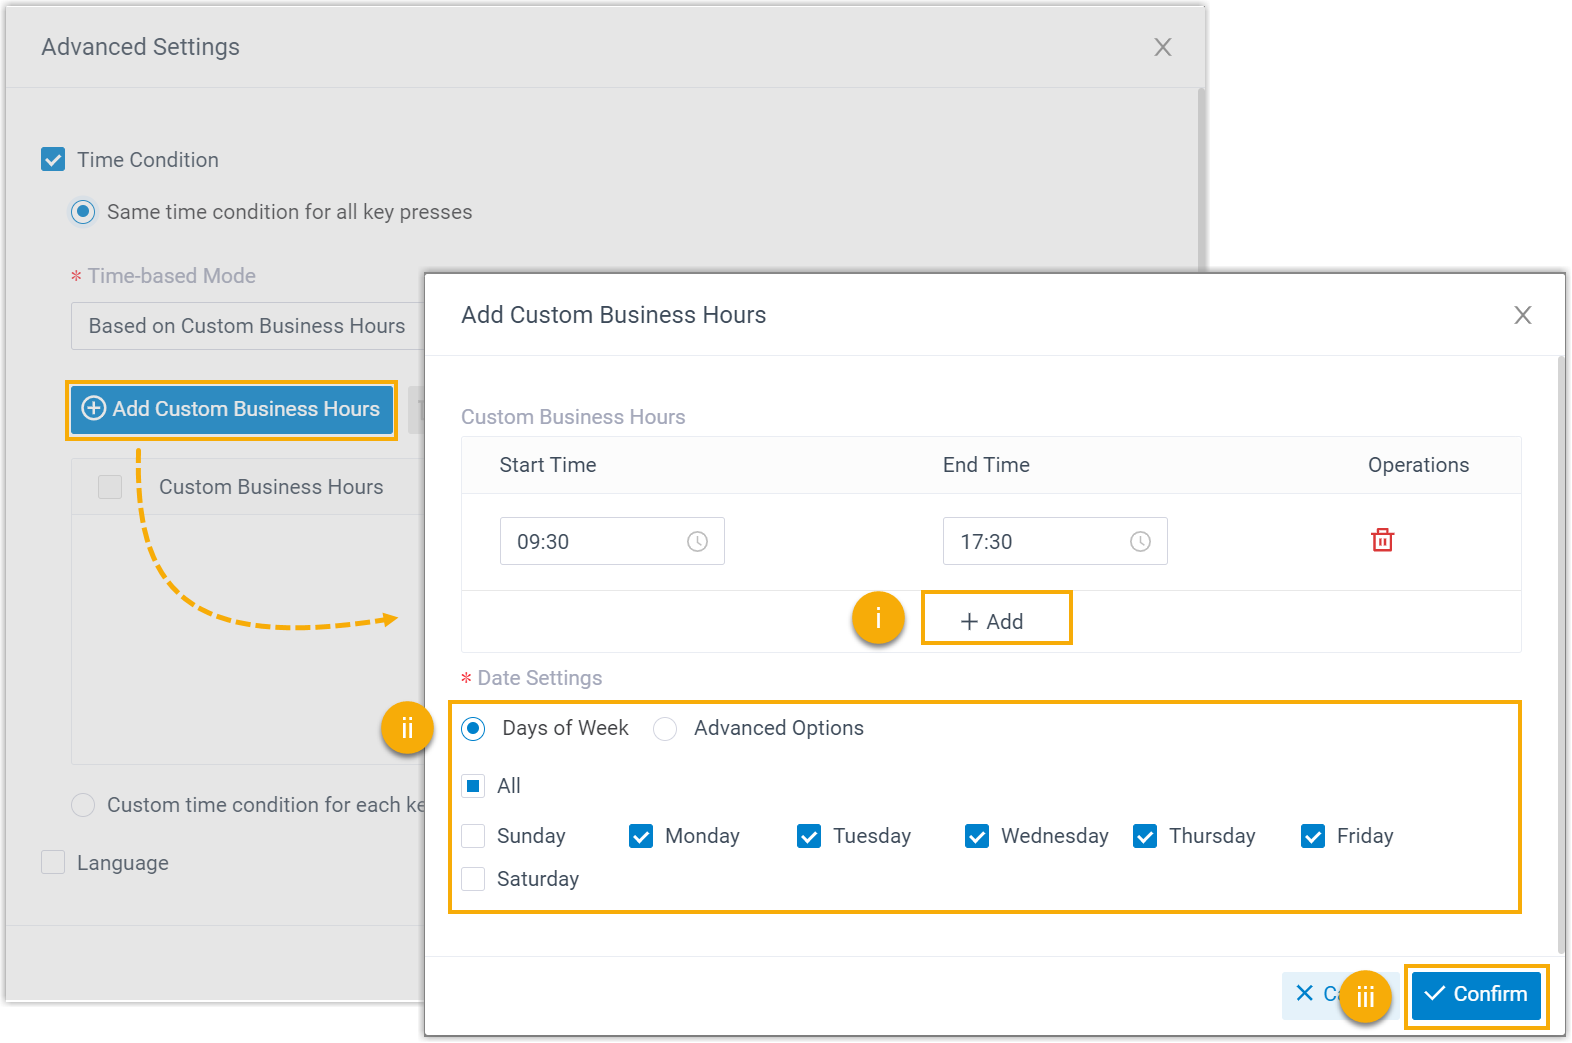
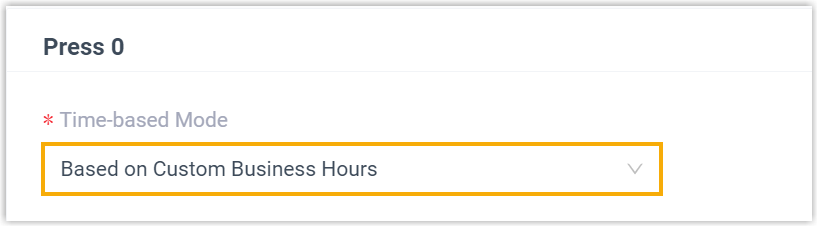
- In the pop-up window, select the checkbox of Time Condition, and select Custom time condition for each key press.
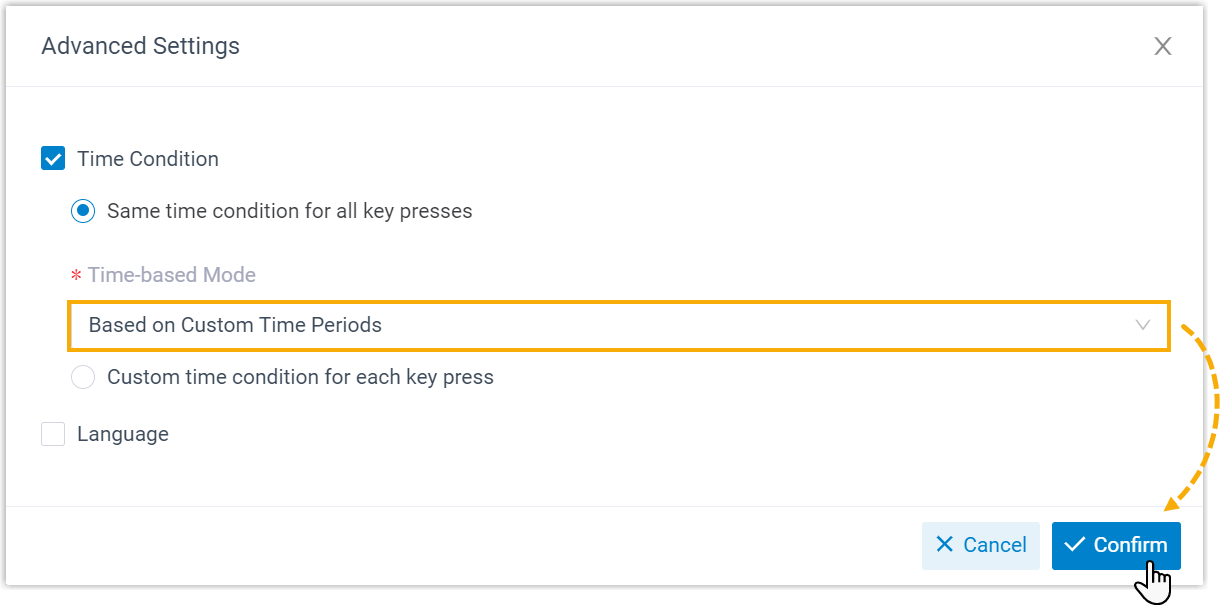
- Specify the call routing destinations based on custom business hours:
- Business Hours Destination: Route calls during custom business hours.
- Outside Business Hours Destination: Route calls during non-working hours.
- Holiday Destination: Route calls during holidays.
- Configure the specific time periods for each key press event:
- Use the Key Press Events tab to set up the IVR key press events according to the defined time conditions:
- Press 1: Route based on global business hours.
- Press 2: Route based on custom business hours.
- Click Save and Apply.
Verify the IVR functionalities by testing various time-based configurations to ensure they work as expected.
Result
When calls route through the IVR system based on configured time conditions, callers are redirected according to the defined settings.
Example
This example helps you understand the workflow of dialing extensions or routing based on time conditions:
- A caller enters the IVR.
- Presses the key according to their needs.
- The IVR routes the caller based on the configured time conditions and key press settings.
Time-based configurations help maintain efficient call handling and improve customer experience.
🌐 Set up a Multi-language IVR
A multi-language IVR allows callers to select their language preferences and provides them with system prompts in their selected language. This topic describes how to set up an IVR route to designated destinations based on different language settings, ensuring better handling of customer calls and improved customer satisfaction.
Requirements
IZT Cloud Voice version 8.14.0 or later.
Step 1. Design a Multi-language IVR
Design a multi-language IVR route that outlines following language settings. Each configured language sets off-call routing keys:
| IVR Language | Key Event | Destination |
|---|---|---|
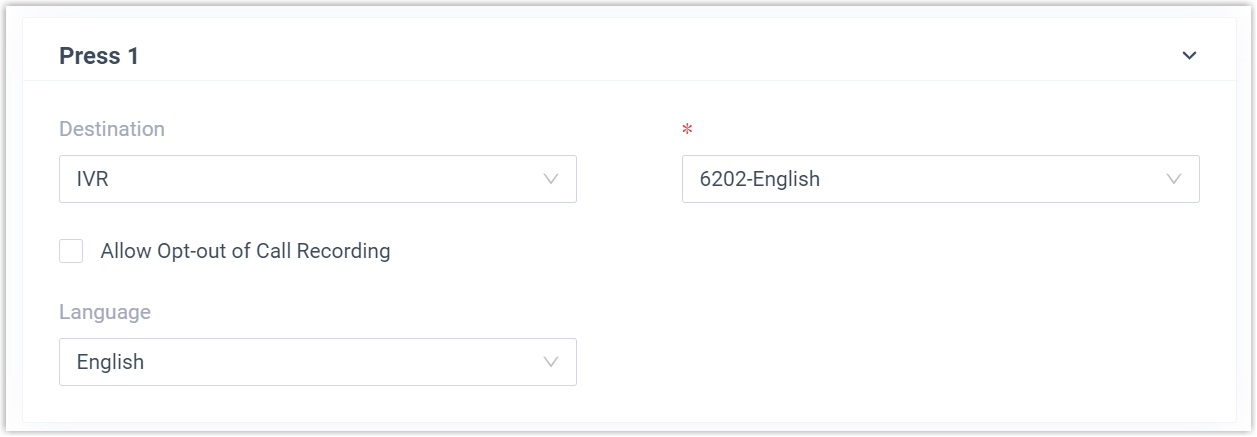
| English | 1 | Sales Queue (620) |
| Spanish | 2 | Engineering (4080) |
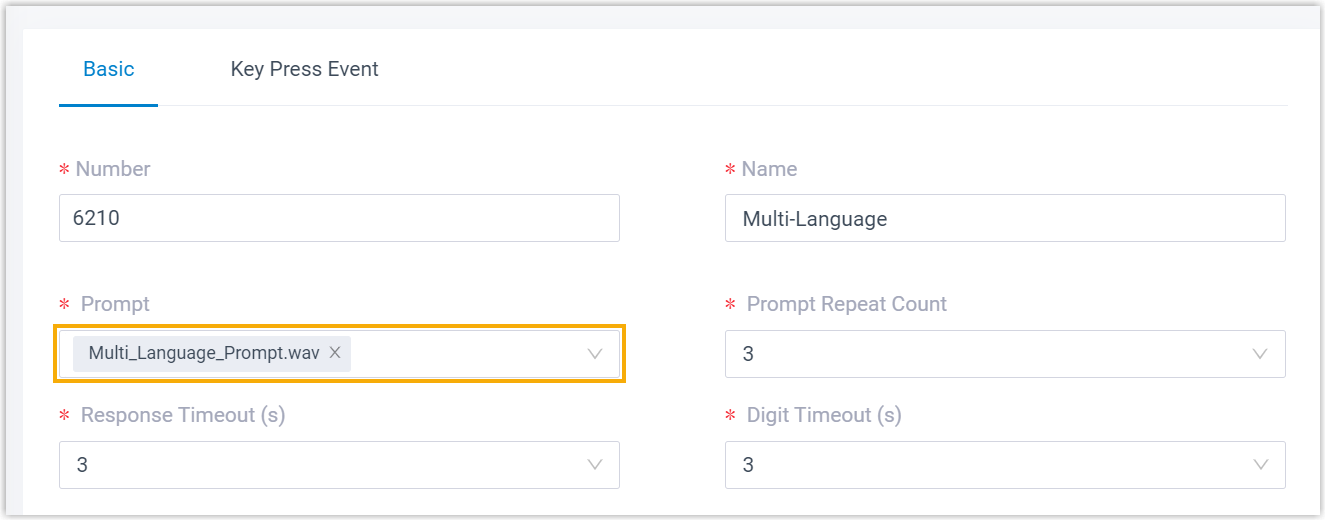
Step 2. Upload the IVR Prompt
- Log in to PBX web portal.
- Navigate to PBX Settings > Voice Prompt > Custom Prompts to upload prompts.
- Choose Upload File to upload audio prompts.
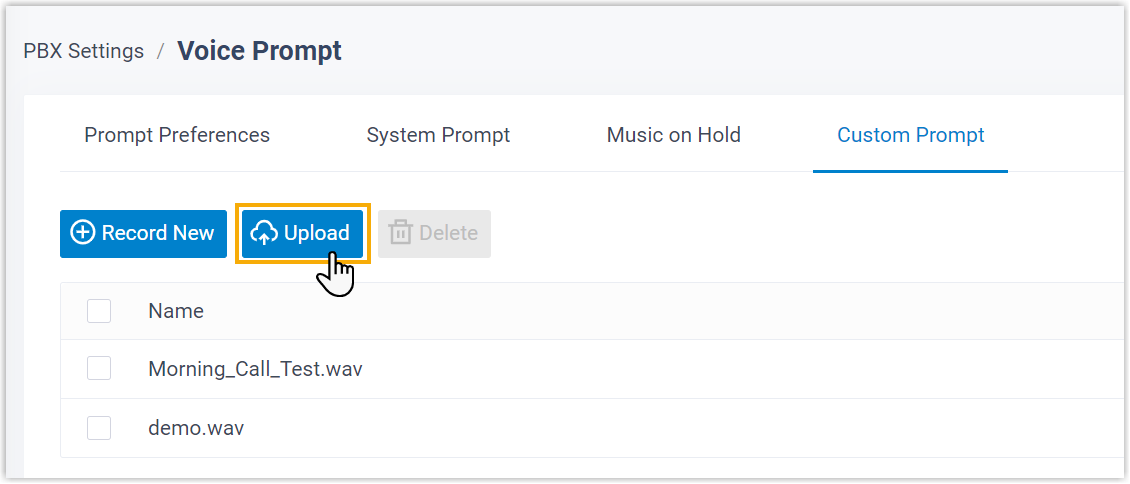
- Select audio files (available formats include
WAVand others), click Save.
Step 3. Set up the Multi-language IVR
- On PBX interface, go to Call Features > IVR, click Add.
- Select the IVR route or related navigate configuration.
- In the Prompt drop-down list, set an uploaded voice prompt.
- Configure general route settings:
- Setup key event settings.
- Ensure the IVR settings are accurate:
Language Configuration
- Enable language settings:
- Set or configure multiple languages for IVR accordingly:
IVR Key Events
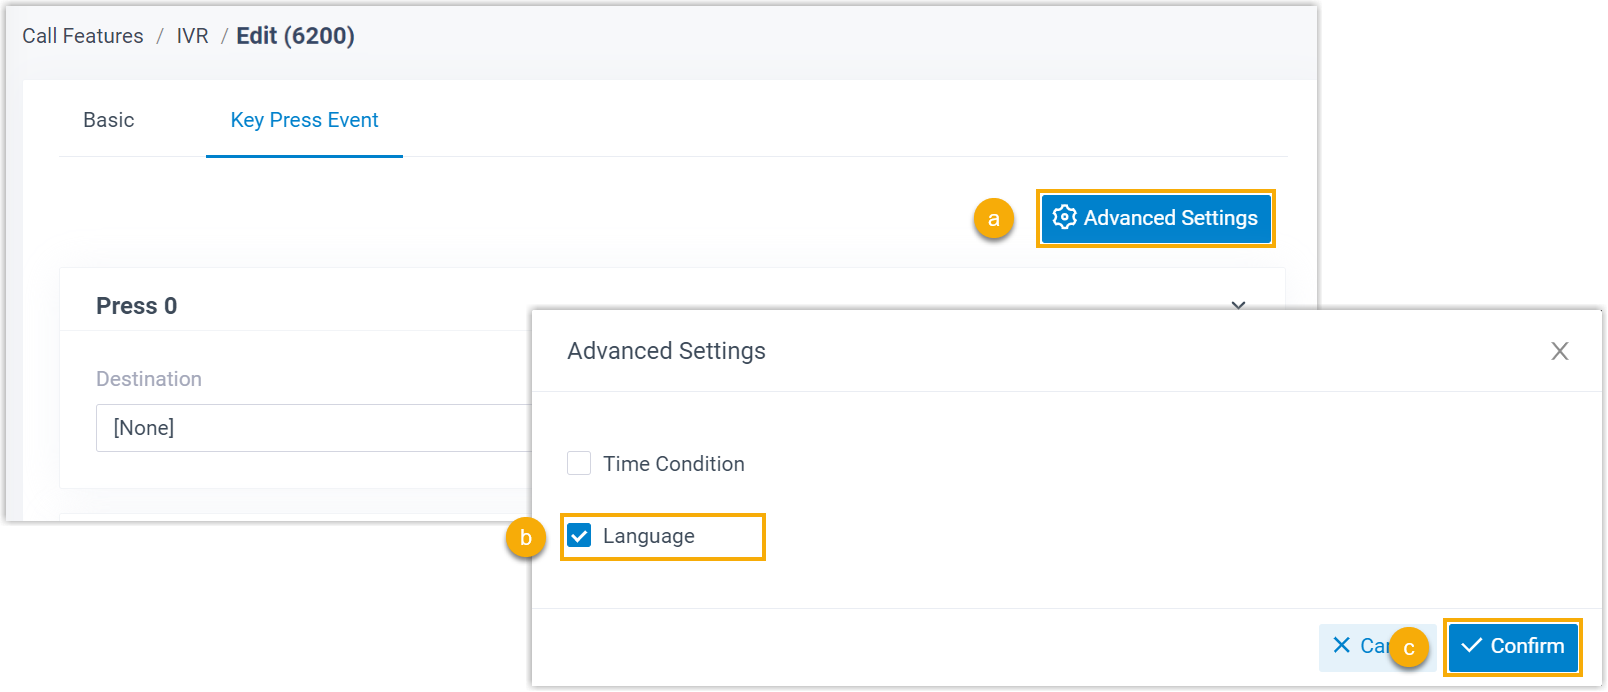
- On the top-right corner of Basic settings, click Advanced Settings.
- Configure key events settings for multi-language navigation:
- Adjust below settings:
-
Select related destination endpoints.
-
Ensure languages settings sync accurately.
-
Click Save and Apply.
Result
When calling via IVR, the users' language set from system preferences. On calling, next prompt language gives the selected direction. After the prompt, the caller proceeds seamlessly expected IVR retention selected key events ensuring accurate implemented use system.
Ensure your IVR configurations wrapped and able to efficiently handle multilingual settings.