📞 Manually Register Fanvil IP Phone with IZT Cloud Voice
This topic takes Fanvil X6U-V2 (firmware: 2.12.1) as an example to introduce how to manually register an extension on a Fanvil IP phone.
Supported devices
The Fanvil IP phones that are compatible with SIP (Session Initiation Protocol).
Procedure
Step 1. Gather registration information on IZT Cloud Voice
Log in to PBX web portal, gather the following information for extension registration.
| Information | Instruction |
|---|---|
| Extension information | Go to Extension and Trunk > Extension > > User > Extension Information, note down the following information: - Extension Number - Registration Name - Registration Password 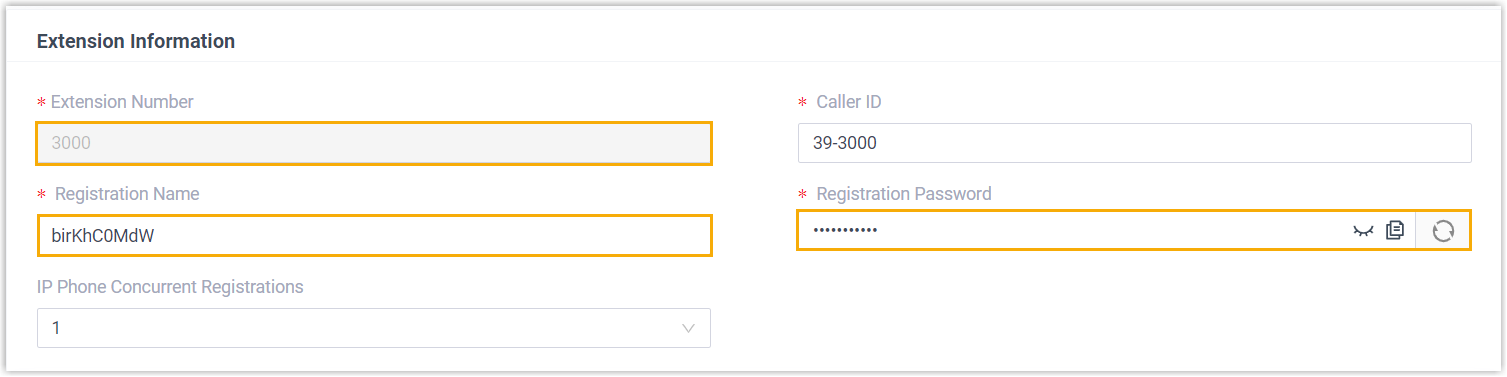 |
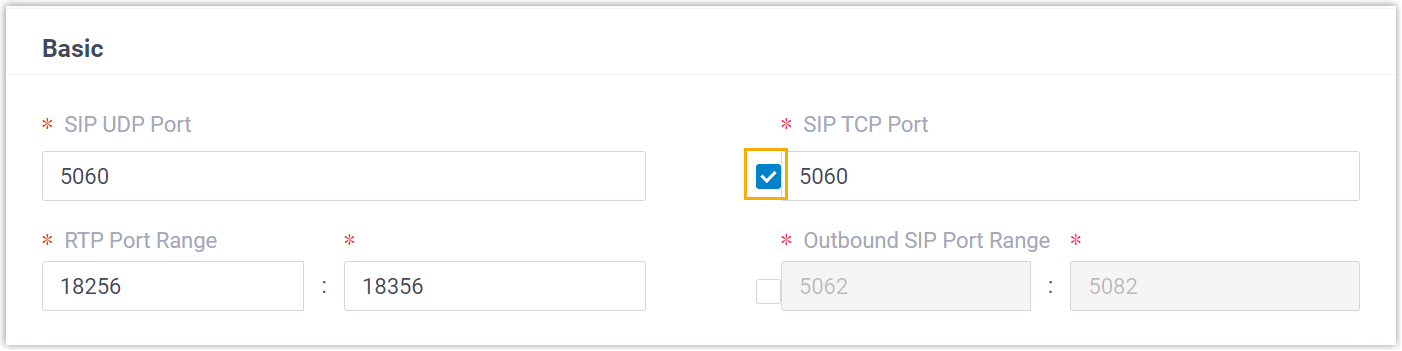
| Transport protocol | Go to Extension and Trunk > Extension > > Advanced > VoIP Settings > Transport, note down the transport protocol of the extension. In this example, the extension uses UDP transport protocol.  Note:
|
| PBX domain name | The domain name of the PBX. In this example, we use the PBX domain name docs.example.izt.cloud for extension registration. |
| SIP registration port | The SIP registration port is 5060. |
Step 2. Register extension on Fanvil IP phone
- Log in to the web interface of the Fanvil IP phone.
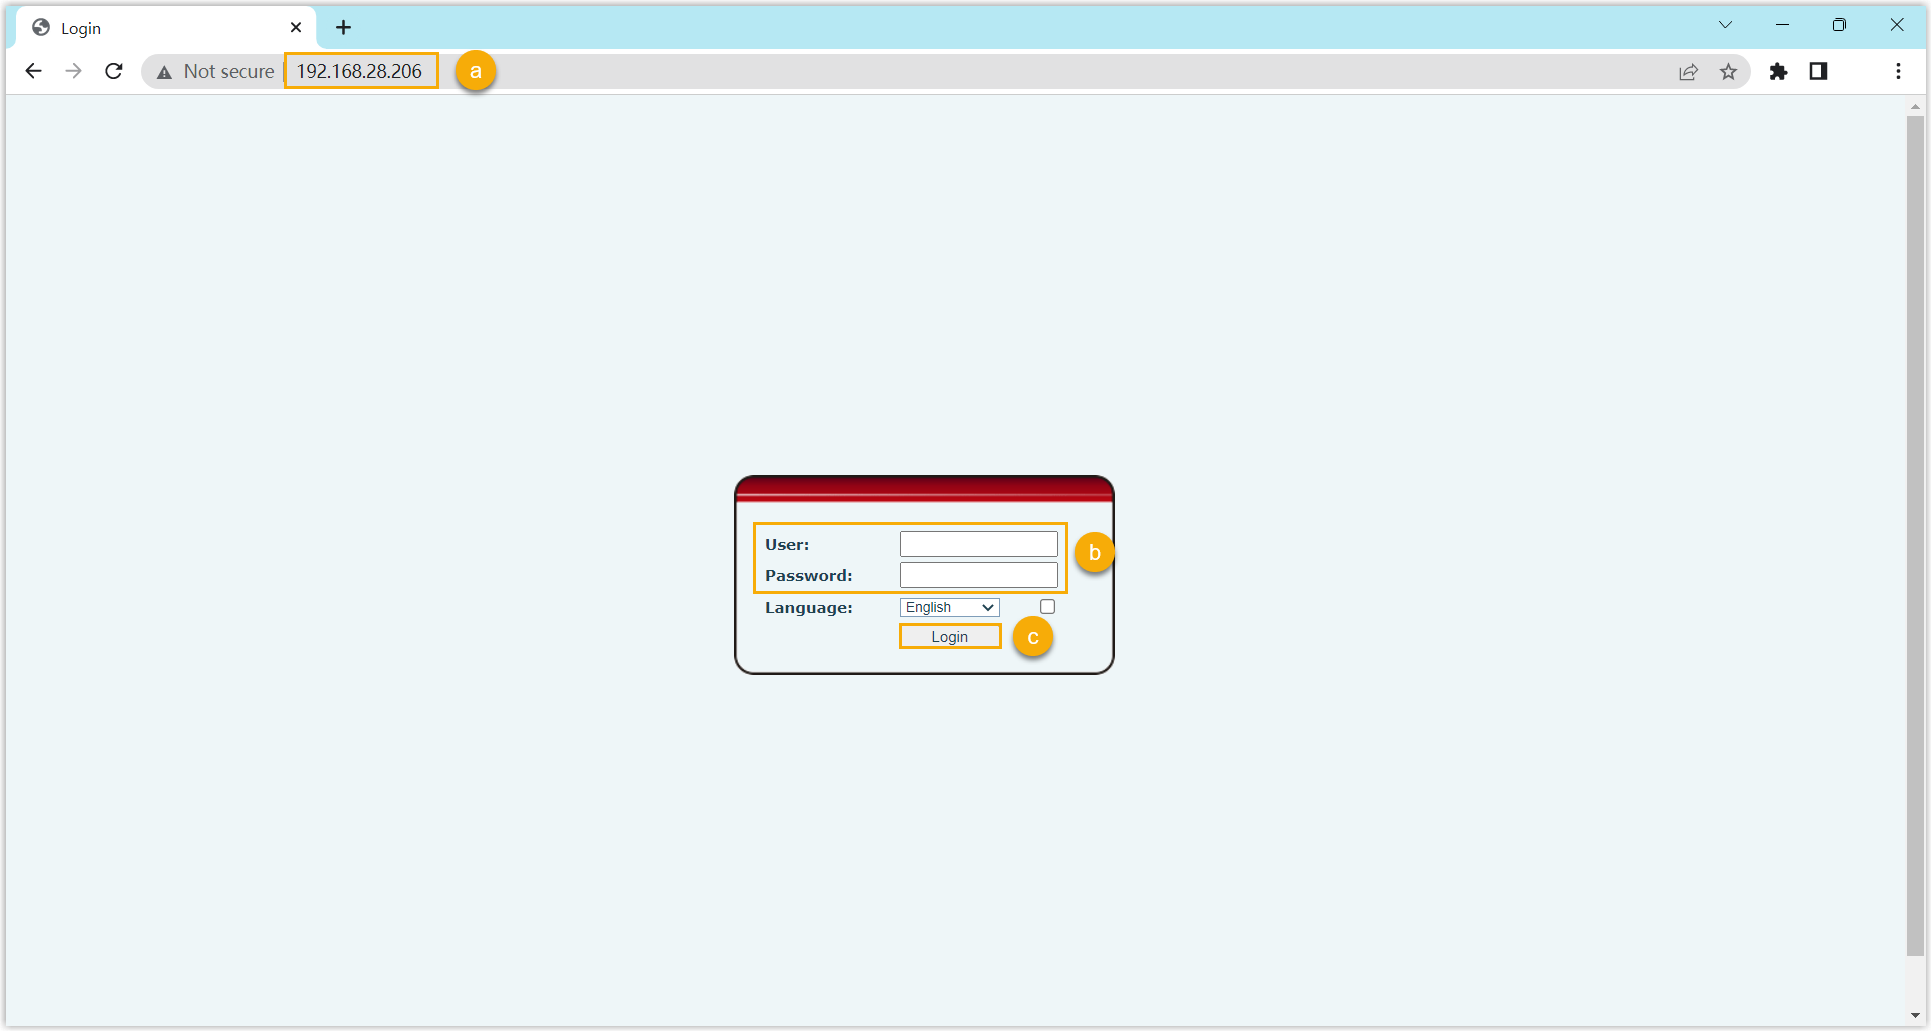
- In the browser's address bar, enter the IP address of the IP phone.
- Enter the username
adminand the associated password. - In this example, enter the default password
admin. - Click Login.
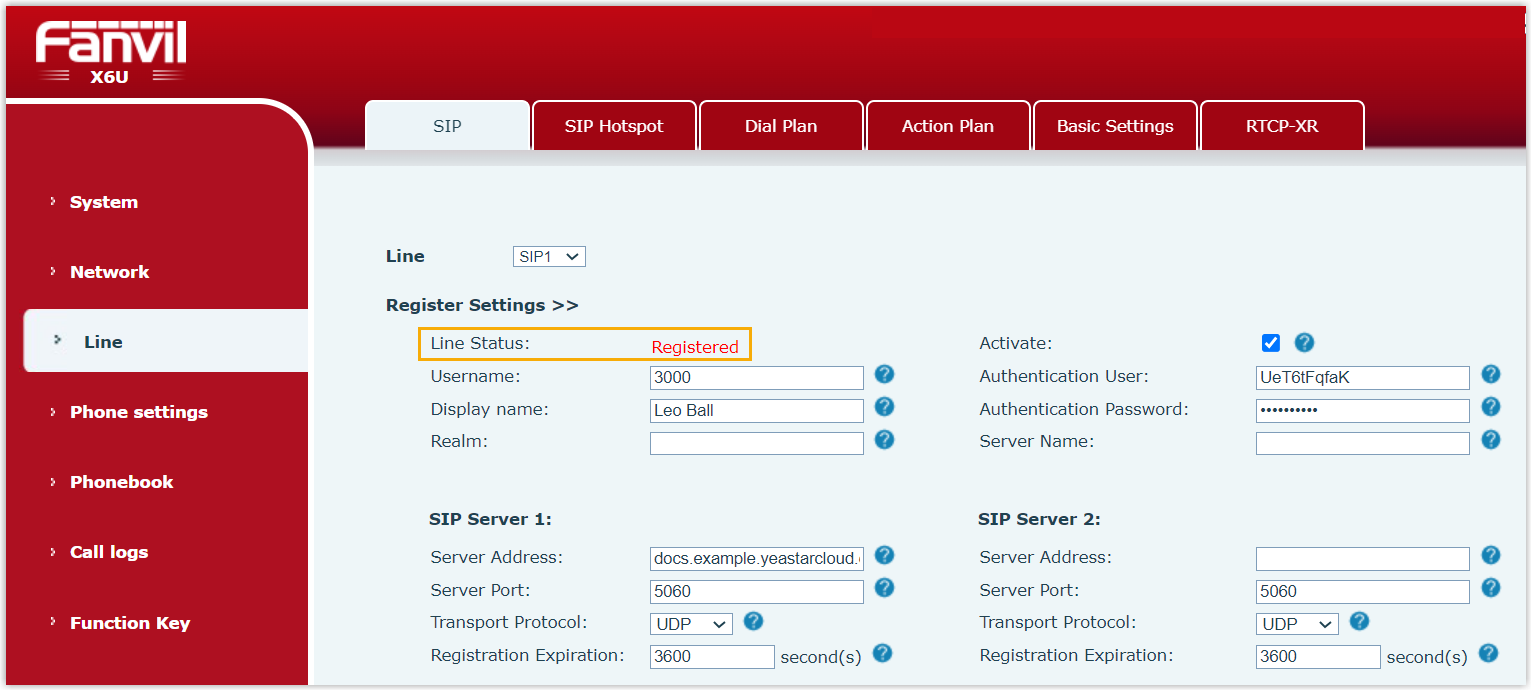
- On the left navigation bar, go to Line > SIP, and select an available account.

- In the Register Settings section, complete the registration configurations.
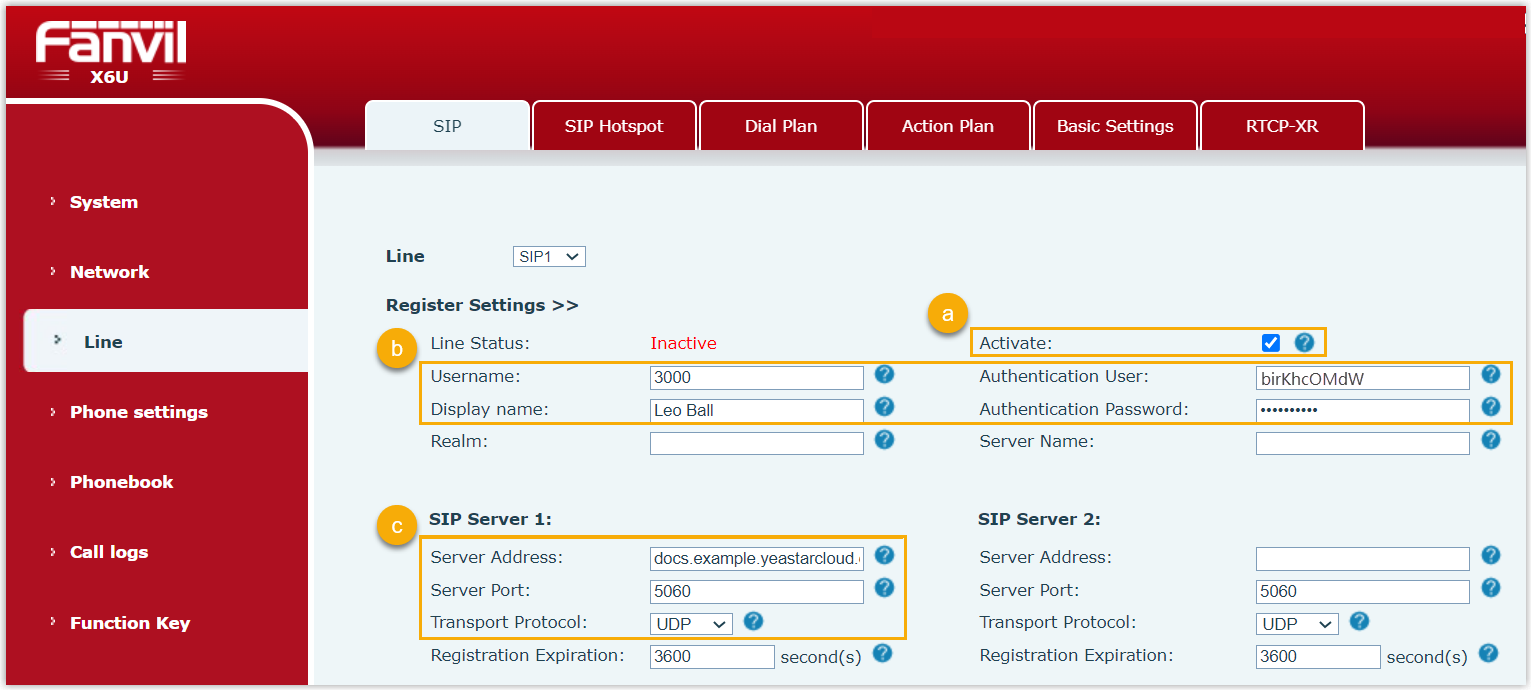
- Select the checkbox of Activate to activate the account.
- Enter the extension information.
- Username: Enter the extension number.
- Display Name: Enter the name associated with the account, which will be displayed on the phone screen.
- Authentication User: Enter the registration name of the extension.
- Authentication Password: Enter the registration password of the extension.
- Enter the PBX server information.
- Server Address: Enter the domain name of the PBX.
- Server Port: Enter the SIP registration port of the PBX.
- Transport Protocol: Select the transport protocol of the extension. In this example, select UDP.
- At the bottom of the page, click Apply.
Result
The extension is registered successfully. You can check the registration status on the Line Status field.