☁️ Archive Files to Google Cloud Storage
IZT Cloud Voice supports archiving the system's call recordings and backup files to Google Cloud Storage, either on a regular interval or any given time you want. This topic describes how to add Google Cloud Storage bucket as an archive server and schedule tasks to archive the desired files.
Requirements and Restrictions
Requirements
- PBX Firmware: Version 84.15.0.2 or later
- PBX Plan: Ultimate Plan
Restrictions
- Archive Server: 10
- Archive Task: 200
Introduction
To enable archiving of call recordings and backup files to a specific bucket in Google Cloud Storage, you need to complete the following steps:
- Prepare an eligible account and create buckets on Google Cloud.
- Use IAM to create users with access permissions.
- Configure the Google Cloud Storage bucket as an archive server on the PBX.
- Create and schedule archive tasks to automatically transfer files from PBX to Google Cloud.
Step 1: Create a Service Account on Google Cloud
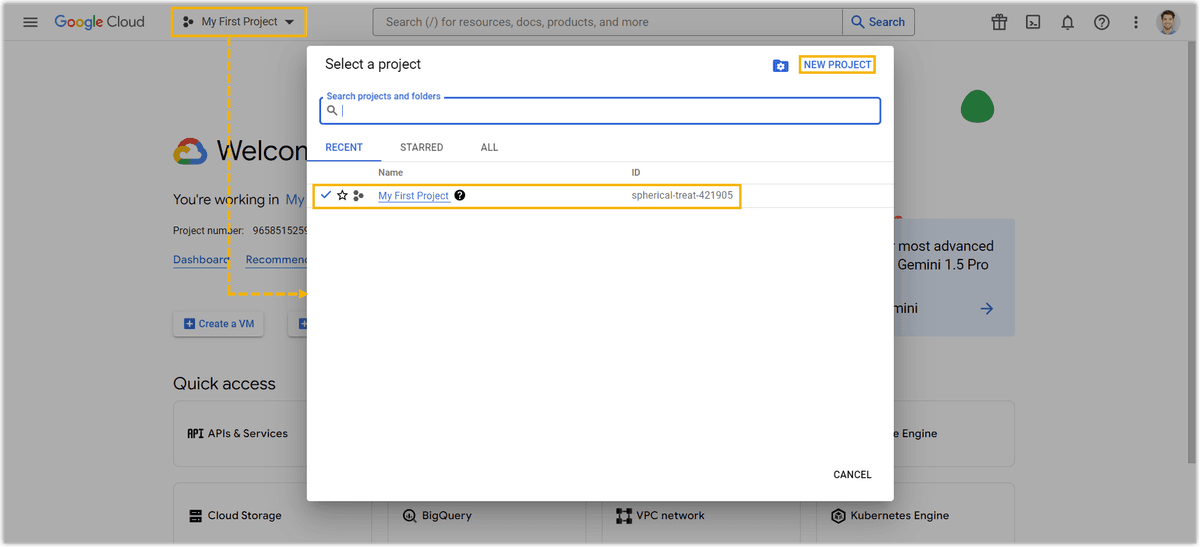
- Log in to Google Cloud Console.
- Create a new project or select an existing one.
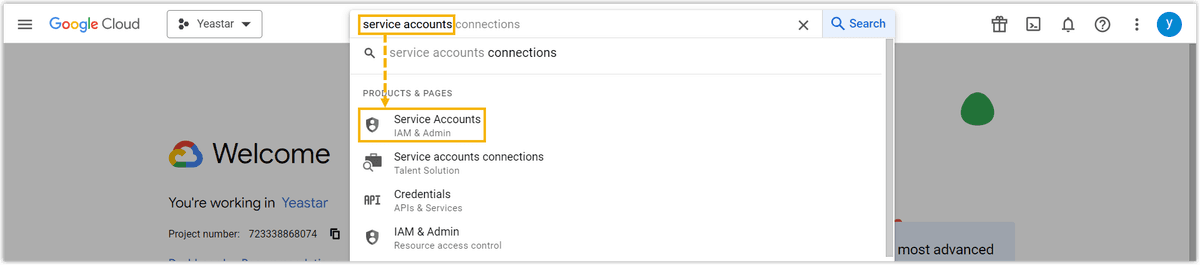
- In the top search bar, search for and select Service Accounts.
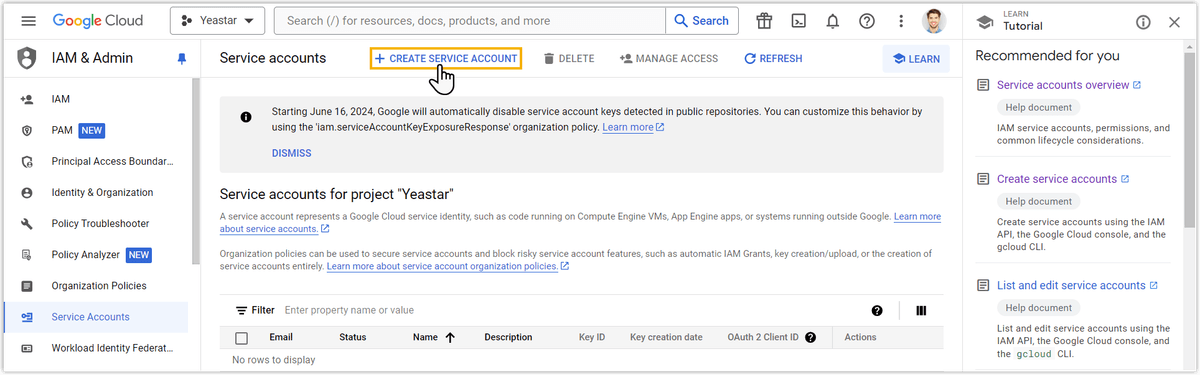
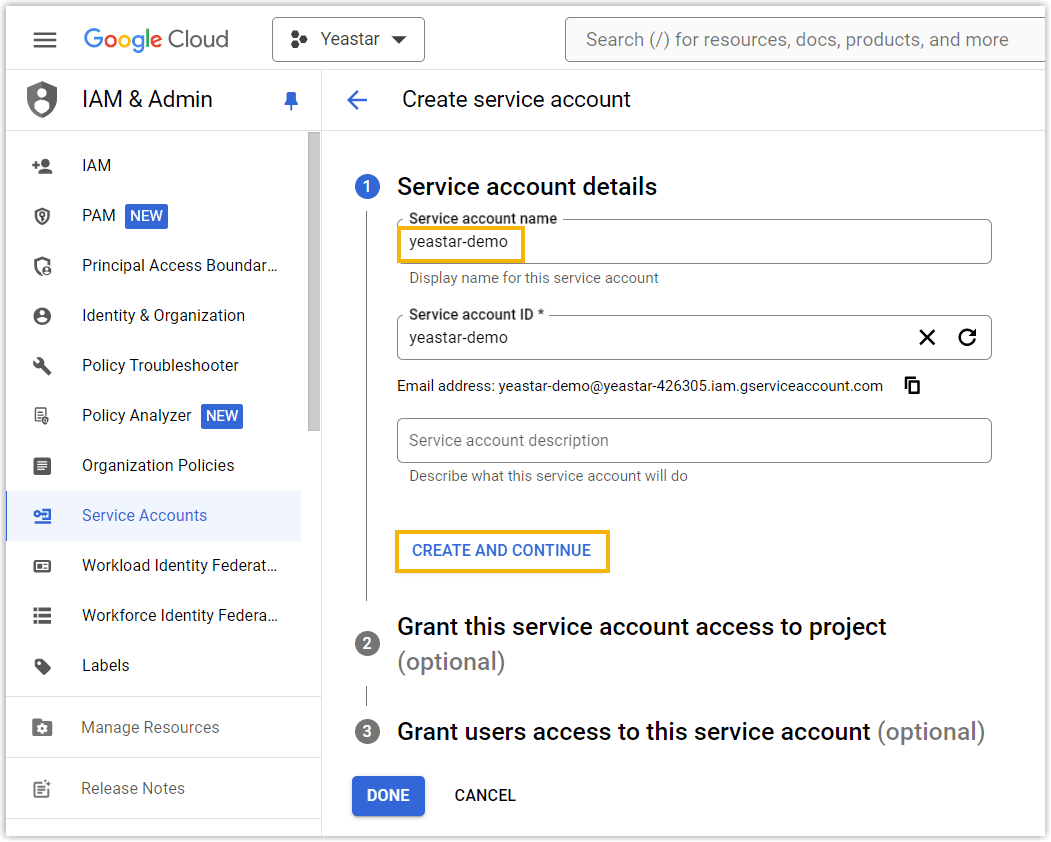
- In the top pane, click CREATE SERVICE ACCOUNT.
- In the Service account details section, enter a name in the Service account name field to help you identify the account, then click CREATE AND CONTINUE.
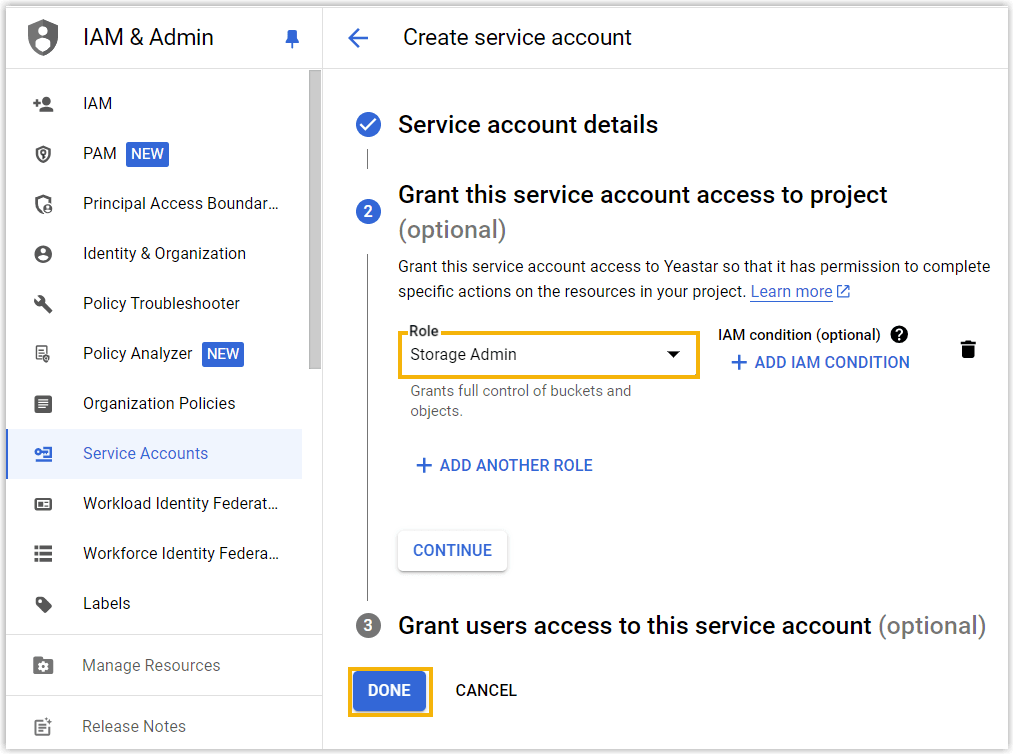
- Grant roles to the service account:
- Select the Storage Admin role from the drop-down.
- Click CREATE KEY and select JSON as the key type, then click CREATE.
- The access key is created and automatically downloaded to your computer as a JSON file. Click CLOSE to close the pop-up window.
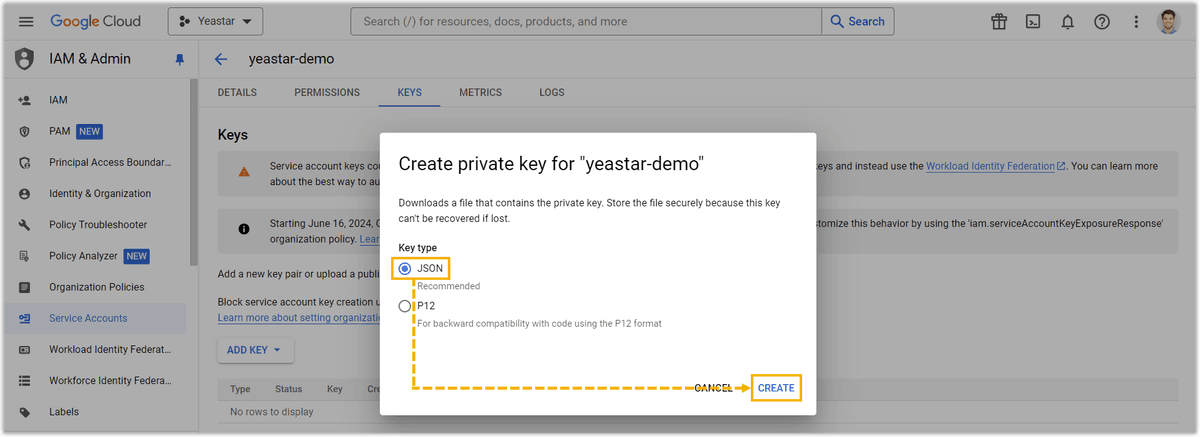
🔔 Note: The key will be needed when setting up Google Cloud Storage bucket as archive server on PBX.
Step 2: Create a Bucket on Google Cloud Storage
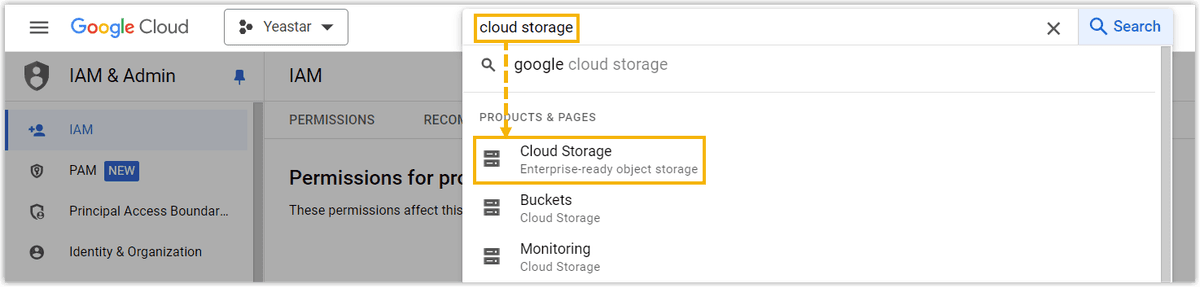
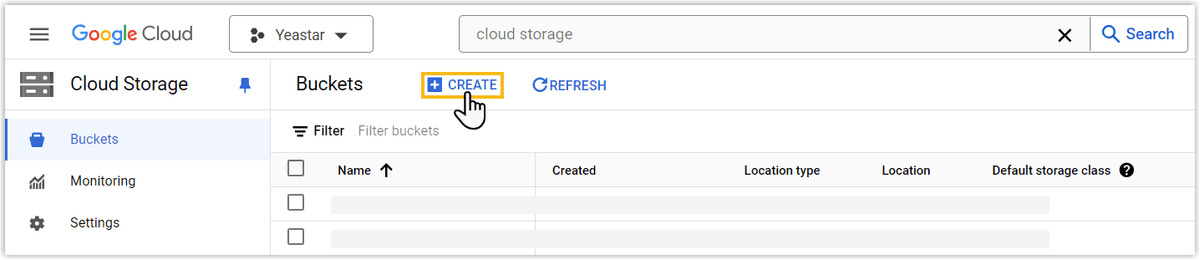
- In the top search bar, search for and select Cloud Storage.
- On the Buckets page, click CREATE.
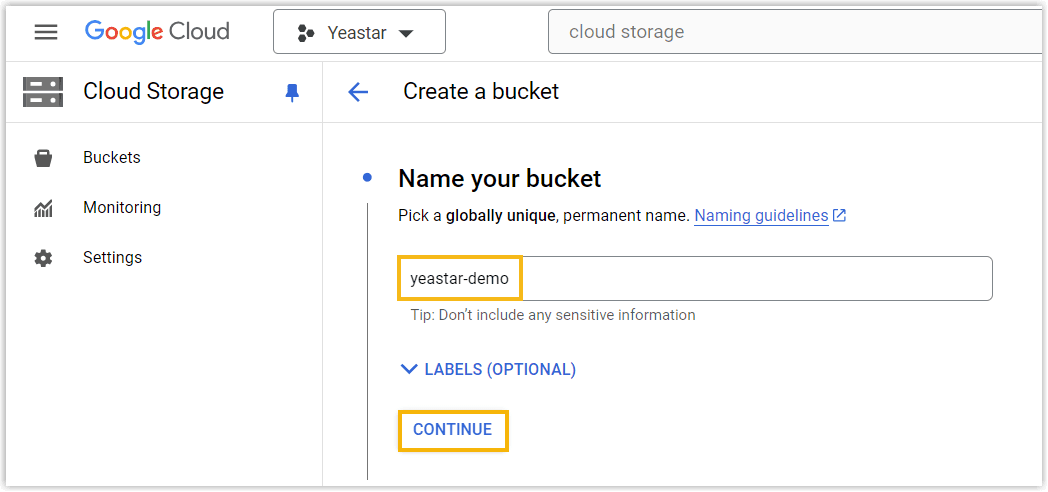
- Enter a name for the bucket to help you identify it, then click CONTINUE.
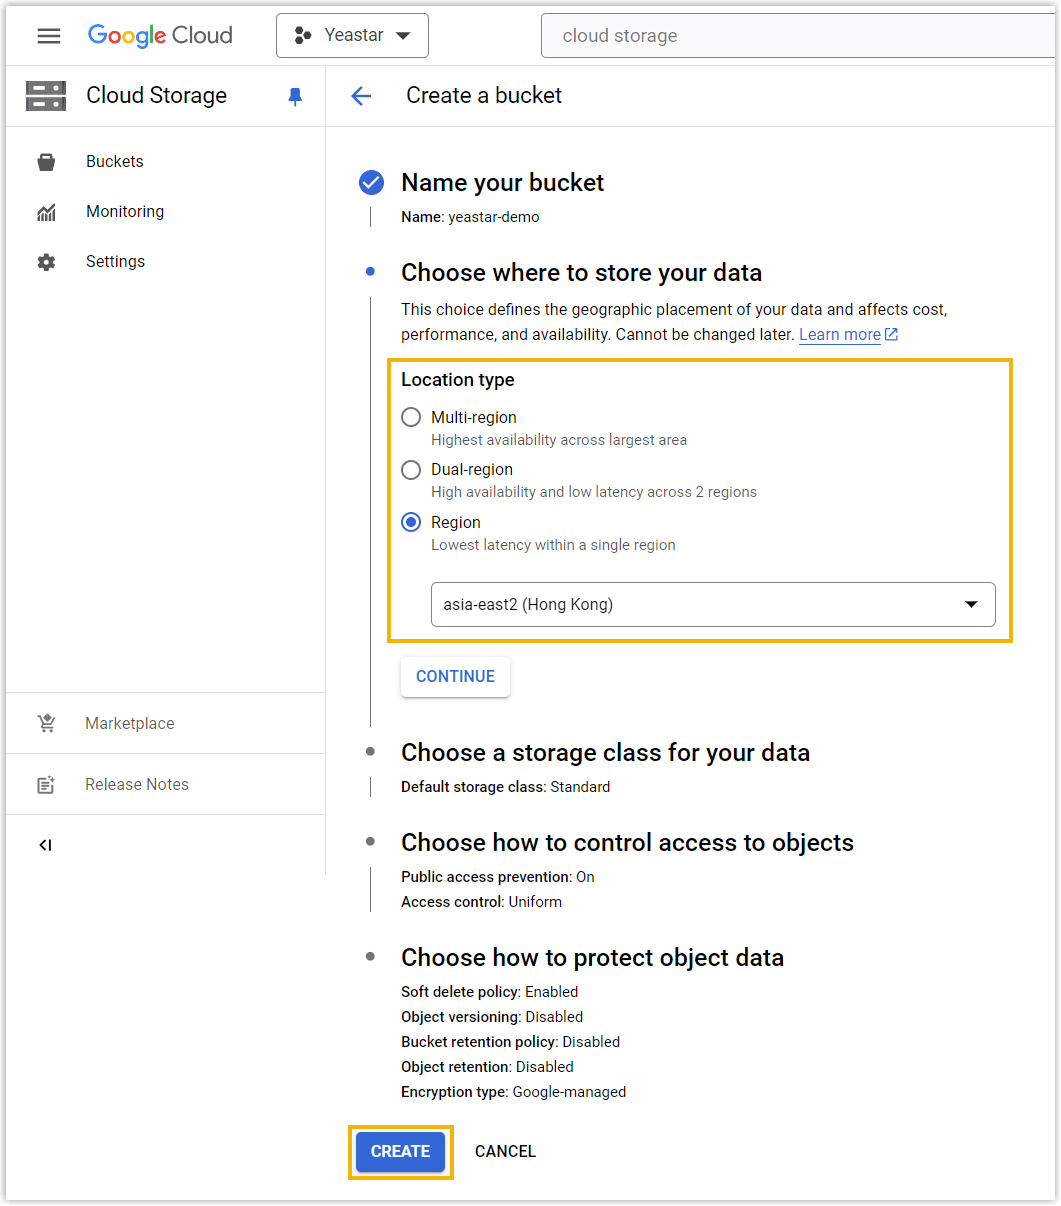
- In the Choose where to store your data section, select the region in which you want to create a bucket, then click CREATE.
🔔 Note: If you want to group the archived PBX files in Google Cloud Storage, you can create folders in the bucket. This way, you can specify PBX files to be archived to the designated folders in the following settings.
Step 3: Add Google Cloud Storage Bucket as Archive Server on PBX
- Log in to the PBX web portal, go to System > Archive.
- Under the Archive Task tab, click Archive Server.
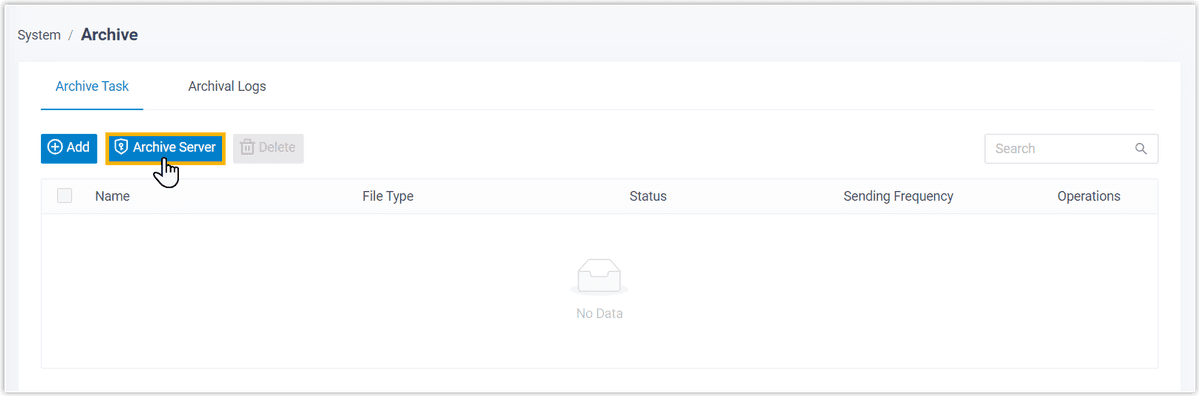
- Click Add.
- In the pop-up window, complete the following settings:
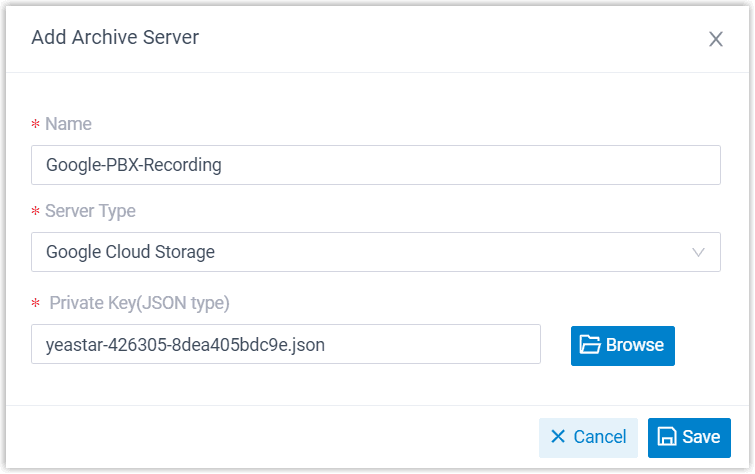
| Setting | Description |
|---|---|
| Name | Enter a name to help you identify the server. |
| Server Type | Select Google Cloud Storage. |
| Private Key/JSON Key | Browse to and upload the JSON file that you have obtained in Google Cloud. |
| Bucket Name | Enter the name of your created bucket. |
- Click Save.
Step 4: Create a Task to Archive Files to Google Cloud Storage on PBX
- Under the Archive Task tab, click Add Task.
- Create a one-time or recurring archive task:
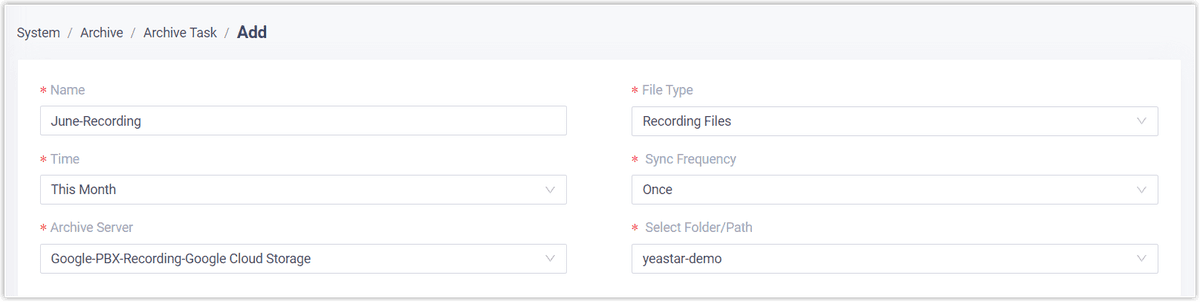
| Setting | Description |
|---|---|
| Name | Enter a name to help you identify the task. |
| File Type | Select Recording Files & Backup Files as needed. |
| Time | Specify a date and time for this task. |
| Sync Frequency | Choose between Once, Daily, or Weekly and set the respective frequency and timescales where appropriate. |
| Archive Server | Select the Google Cloud Storage bucket that you have added. |
| Select Folder/Path | Specify the bucket or folder in which you want to store archived files. The system automatically adds the folder in the bucket based on the task. |
- Click Save.
Result
The specified files will be archived to the designated bucket or folder in your Google Cloud Storage immediately or at the scheduled time.
- Scheduled Execution: The system executes only one task at a time to avoid affecting system performance. If there are multiple tasks, they will be queued up one after another.
- Archive Result: You can check the archive result on PBX or directly on Google Cloud Storage:
🔍 Note: If the task is failed, the Failed to Archive File(s) event will be triggered. You can click Retry to retry the task.
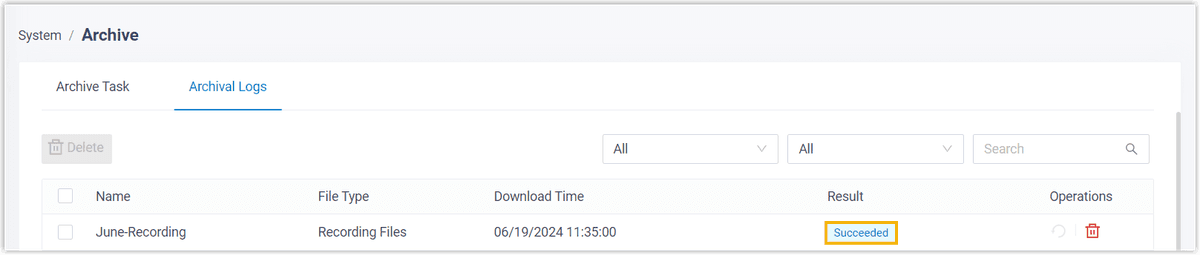
Check the Archive Result on PBX
- Go to PBX web portal > Archive > Archival Logs.
- If the Result column for the task shows Succeeded, it indicates that the archive was successful.
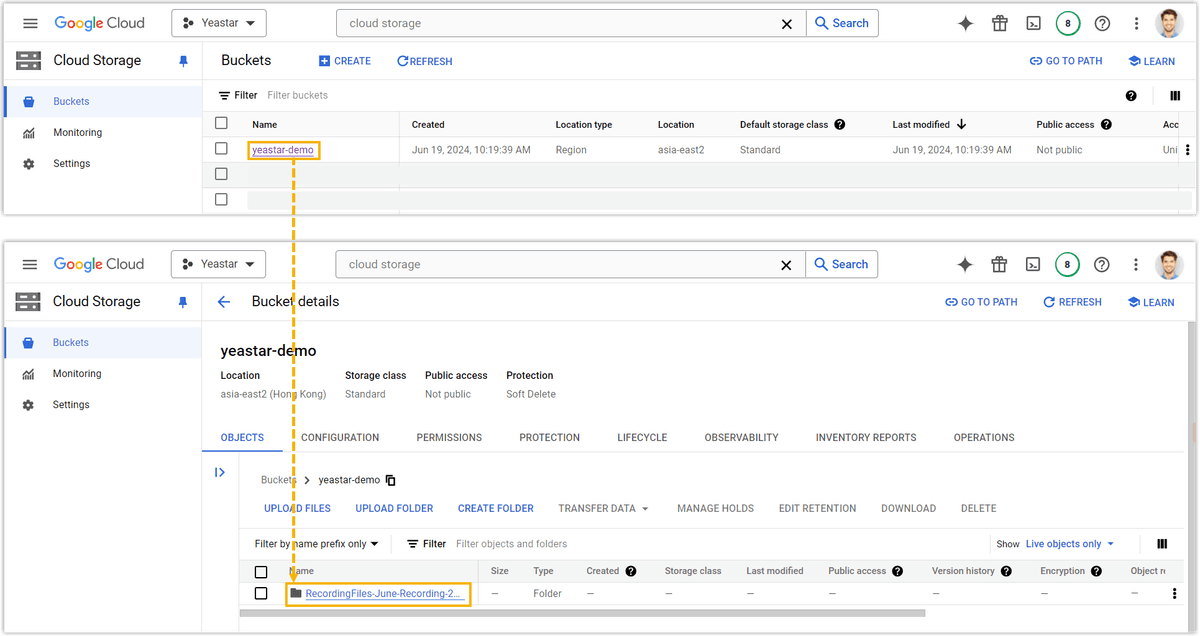
Check the Archive Result on Google Cloud Storage
- On Google Cloud Console, go to the created Storage bucket.
- If the specified files appear in the bucket, it indicates that the archive is successful.